
Opening: The Backcountry Volume Dilemma and Compression Mechanics
Your sleep system is the single bulkiest item inside your backpacking pack.
On most 3-season wilderness trips, a sleeping bag or quilt set occupies between 30% and 45% of total interior pack volume.
A standard 20°F sleeping bag stuffed into a loose factory sack measures roughly 14 to 18 liters.
That single bundle swallows nearly half the carrying capacity of an ultralight 40-liter backpack.
Many backpackers attempt to solve this volume crisis by buying the smallest compression sack available.
They force their insulation into a rigid, rock-hard sphere.
This approach creates two severe backcountry problems: damaged insulation fibers and ruined pack geometry.
Over-compressing delicate insulation can fracture synthetic batting fibers and migrate delicate down clusters away from baffle chambers.
Simultaneously, a rock-hard spherical bundle creates the infamous "bowling ball" effect inside your backpack.
A rigid sphere cannot conform to the natural curves of your pack body, leaving empty, unusable voids in the bottom corners.
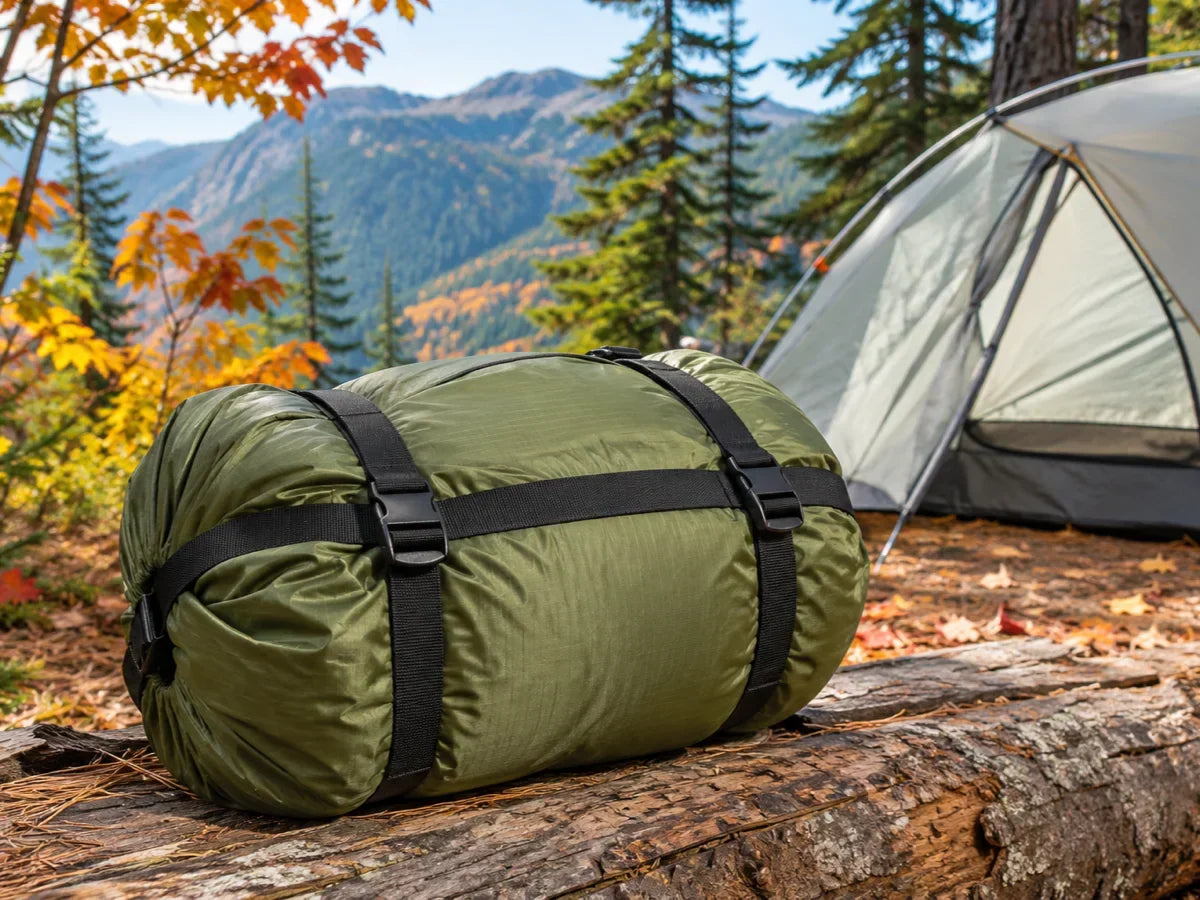
A compression sack should shrink your sleep system to fit your pack without crushing insulation fibers or creating an inflexible bowling ball; sizing by measured liter volume and cinching into an oblong shape preserves down loft and maximizes usable pack space.
Choosing the correct compression sack requires understanding the mathematical volume of your uncompressed gear, the mechanical limits of your insulation, and the geometry of your pack.
What You'll Learn in This Guide
Mastering sleep system volume reduction requires an empirical approach to gear sizing.
Here is what this guide covers:
Quick Answer: The Compression Sack Sizing Decision Shortcut
If you need an immediate sizing recommendation for your sleep system, consult this field decision shortcut.
WHEN choosing a compression sack for backpacking, choose a Medium (13.8L uncompressed, φ21x40cm) for 3-season down sleeping bags (20°F to 40°F) or combined ultralight hammock quilt setups, OR choose a Large (21.2L uncompressed, φ24x47cm) for synthetic sleeping bags, 0°F winter down bags, or full 4-piece cold-weather hammock systems.
START by measuring your uncompressed sleep system volume using the Cardboard Box Test (Length x Width x Height in inches divided by 61 equals liters).
IF packing synthetic insulation, limit compression to 30% to prevent fiber creasing and permanent loft loss.
IF packing in freezing winter conditions, size up one volume tier so cold-numbed fingers can easily stuff insulation at sunrise.
FOR MOST backpackers, a dual-cap 1.1oz Silnylon Compression Sack cinched into a flat oblong cylinder provides the ideal balance of volume reduction, weather protection, and pack-friendly shape.
The Compression Sack Decision Framework
Selecting the right compression sack requires balancing three technical variables: insulation type, temperature rating, and pack carrying capacity.
A sack that is too small forces you to fight tight fabric collars every morning and risks blowing out seam stitching.
Conversely, a sack that is too large leaves excess webbing straps tangling inside your pack and fails to provide adequate volume reduction.
Here is the operational framework for matching gear to sack dimensions:
Part 1: How Compression Sacks Work (Volume Reduction vs. Fiber Stress)
A compression sack functions through mechanical advantage.
Standard stuff sacks rely solely on hand pressure to force gear through a circular opening.
Once you tie off the drawcord collar, the expanding insulation pushes back against the fabric walls.
A compression sack adds two reinforced end-caps connected by three or four adjustable webbing straps.
By pulling down on the strap ladders, you apply linear mechanical force along the longitudinal axis of the cylinder.
This external force expels trapped air molecules from between the insulation filaments.
According to data from Sea to Summit testing, high-quality compression sacks reduce packed volume by 30% to 50%.
However, mechanical compression is not without physiological consequences for insulation.
Air trapped inside sleeping bags provides the thermal barrier that keeps you warm at night.
When you compress insulation for transit, you are removing that dead air space temporarily.
The critical engineering challenge is ensuring the insulation expands fully when unpacked at camp.
Part 1b: The Volume Reduction Sweet Spot (30% to 40%)
Independent research from outdoor gear laboratories found that the sweet spot for sleeping bag compression sits between 30% and 40% volume reduction.
Below 30% compression, bulky sleeping bags continue to consume excessive interior space inside mid-sized packs.
Above 40% compression, the curve of diminishing returns flattens rapidly.
You expend immense energy cranking down straps while risking seam blowout.
More importantly, a study of down compressibility showed that exceeding 50% volume reduction forces down plumes into dense micro-clumps.
These clumps require extensive manual fluffing to restore full loft before sleep.
Part 2: The Cardboard Box Test: How to Measure Sleeping Bag Volume in Liters
Sleeping bag manufacturers frequently list bag weight and temperature ratings, but omit exact uncompressed liter volumes.
Because sleeping bags have irregular, tapered mummy geometries, measuring them with a standard tape measure on a floor produces inaccurate numbers.
The outdoor industry standard method for measuring irregular sleep systems is the Cardboard Box Test.
This test converts complex 3-dimensional curves into a precise mathematical volume.
Follow this step-by-step protocol to measure your sleeping bag or quilt set at home:
- Locate a square or rectangular cardboard box that is slightly larger than your sleeping bag.
- Cut a flat piece of stiff cardboard that matches the interior length and width of the box to act as a leveling lid.
- Place your uncompressed sleeping bag into the box in loose folds.
- Place the cardboard leveling lid gently on top of the sleeping bag.
- Press down lightly until the bag fills the bottom corners of the box without compressing the insulation fibers.
- Measure the interior Length and Width of the box in inches.
- Measure the Height from the bottom of the box to the underside of the leveling lid in inches.
- Calculate volume using this mathematical formula:
$$\text{Volume (Liters)} = \frac{\text{Length (in)} \times \text{Width (in)} \times \text{Height (in)}}{61}$$

Part 2b: Metric vs. Imperial Calculations for Sleep System Volume
Converting between imperial inches and metric centimeters requires different mathematical divisors.
When calculating in inches, divide total cubic inches by 61 to determine liters.
When calculating in centimeters, multiply length by width by height and divide by 1,000.
Both formulas yield identical volume capacities for any given sleeping bag.
Part 3: Compression Sack Sizing Matrix: Medium 14L vs. Large 21L Across Temperature Ratings
Once you know your sleep system's uncompressed volume in liters, select a compression sack that accommodates that volume without bursting.
A high-performance silnylon compression sack features a cylindrical body with an open drawcord collar.
The uncompressed volume of the sack must always exceed the uncompressed volume of the sleeping bag by at least 5% to 10% to ensure smooth stuffing.
Here is the detailed sizing matrix across common insulation types and temperature ratings:

Part 3b: Fill Power Scaling: 650 FP vs. 850 FP Compression Profiles
Down fill power directly determines how much air a down cluster can trap per ounce of weight.
Higher fill power down collapses into smaller microscopic discs when compressed.
A 20°F down sleeping bag insulated with 850 fill power down packs roughly 30% smaller than a 650 fill power bag of identical warmth.
High-loft down clusters contain higher ratios of micro-air pockets per ounce of material.
When compressed, those clusters collapse into flat discs, allowing the entire bag to slide into a Medium 14-liter sack.
Synthetic batting of identical warmth requires thicker fiber strands, demanding a Large 21-liter sack.
Part 4: Down Compressibility Physics: Why Plumules Tolerate 50% Reduction
Down feathers and synthetic fibers respond to mechanical pressure in fundamentally different ways.
Understanding this physical difference prevents costly damage to your backcountry sleep gear. For a detailed breakdown of thermal ratings and drying efficiency, read our Down vs. Synthetic Insulation Guide.
Down is an organic 3-dimensional protein structure consisting of thousands of microscopic plumules radiating from a central quill point.
Because down contains no rigid chemical binders, it possesses extraordinary natural elasticity.
When subjected to linear strap tension, down clusters fold flat without structural fracture.
Controlled research from outdoor gear laboratories found that high-fill-power goose or duck down safely tolerates up to 50% volume reduction during trail transit.
Once unpacked, ambient humidity and natural elasticity cause the down clusters to blossom back to 100% loft within 15 minutes.

Part 4b: Synthetic Batting Mechanics: Why Polyester Batting Resists Past 35%
Synthetic insulation operates on an entirely different mechanical model.
Synthetic batting consists of polyester polymers manufactured either as continuous extruded filaments or chopped short-staple fibers.
These fibers are treated with silicone and thermally bonded or resin-sprayed to form a continuous sheet of batting.
When you compress synthetic batting past 30% to 35% of its resting volume, the mechanical pressure exceeds the yield strength of the polymer bonds.
Individual polyester fibers develop permanent micro-creases.
Repeated heavy compression shears the thermal bonds between fiber sheets.
This structural breakdown results in permanent loft loss and creates thin spots along baffle stitch lines.
Part 5: The "Bowling Ball" Trap: Why Spherical Compression Destroys Backpack Geometry
The most common mistake backpackers make with compression sacks is over-tightening the webbing straps until the sack becomes a rock-hard sphere.
This condition is widely known in the trail community as the "bowling ball" trap.
When you cinch all four compression straps with maximum, equal force, the cylindrical sack naturally deforms into a sphere.
A sphere possesses the lowest surface-area-to-volume ratio of any geometric shape.
While a rigid sphere looks impressively compact on your gear table, it performs terribly inside a backpack.
Backpacks are constructed with flat backpanels and curved lateral perimeters.
When you drop a hard, spherical compression sack into the bottom of your pack, it touches the pack fabric at only small contact points.
This creates massive empty voids around the perimeter of the sphere, particularly in the lower lumbar corners.
Equipment packed on top of the sphere tilts awkwardly to the left or right.
The sleeping bag turns into an unyielding pivot point that presses directly into your lower spine.

Part 5b: How Spherical Loads Create Spine Pressure and Void Corners
Field testing on Reddit r/Ultralight showed that packing a spherical compression sack at the base of a frameless or internal-frame pack displaces the pack's center of gravity backward by up to two inches.
This backward shift pulls the shoulder straps tight across the trapezius muscles.
It also levers the bottom edge of the pack directly into the sacrum.
In addition, void spaces in the bottom corners trap cold air and waste up to 5 liters of pack capacity.
The solution to the bowling ball trap is intentional shape control.
Instead of cinching straps equally to force a sphere, you must cinch your compression sack into an oblong, flattened oval cylinder.
An oblong oval cylinder rests horizontally across the base of your pack, filling the bottom corners completely and creating a flat foundation for the rest of your gear.
Part 6: Step-by-Step Packing Protocol: How to Cinch into a Pack-Friendly Oblong Oval
Achieving a pack-friendly oblong oval requires a specific cinching sequence.
Follow this 6-step field protocol every time you pack your sleeping bag or quilt set:
- Loosen All Straps Fully: Release the ladder-lock buckles on all four webbing straps so the compression caps sit completely loose.
- Stuff Toe-First in Small Folds: Feed the footbox of your sleeping bag into the bottom of the sack first. Use your fists to push insulation into the circular bottom seams. Continue stuffing handful by handful.
- Cinch the Inner Collar: Pull the internal silnylon drawcord tight and secure the cordlock. Tuck the drawcord tail inside the collar so it does not tangle in the webbing.
- Position the Top Cap Evenly: Seat the top compression cap squarely over the gathered collar. Ensure the webbing straps run straight down the sides without twisting.
- Cinch in Alternating Pairs: Do not tighten one strap all the way down. Tighten Strap 1 two inches, then tighten opposite Strap 3 two inches. Next, tighten Strap 2 two inches, followed by opposite Strap 4.
- Flatten into an Oblong Oval: Tighten Straps 1 and 3 slightly more than Straps 2 and 4. Use both hands to press down firmly on the sack, flattening it into an oval cross-section that matches your backpack's interior width.

Part 6b: Testing the Horizontal Pack Fit in 40L to 65L Packs
Once you have shaped your compression sack into an oblong oval, test its fit inside your empty backpack.
The oval cylinder should slide horizontally across the lower seams of the pack.
It should fill the bottom space without stretching side water bottle pockets or deforming the lumbar pad.
A well-fitted base bundle creates a level horizontal platform for food bags, cook kits, and tents.
Part 7: Sizing for Hammock Campers: Topquilt and Underquilt Packing Configurations
Hammock campers face a unique packing puzzle that ground campers do not experience.
A complete hammock sleep system requires two independent pieces of insulation: a topquilt for upper body warmth and an underquilt suspended beneath the hammock body to block convective heat loss.
Hammock hangers frequently ask whether they should pack both quilts into a single large compression sack or separate them into two smaller sacks.
The answer depends on pack volume and trail conditions.
Here are the primary hammock packing configurations:
Configuration A: The Single Large Sack (All-in-One Sleep Bundle)
Sea to Summit Compression Sack Sizing and Use
In this configuration, you pack both your 30°F down topquilt and your 30°F down underquilt into a single Large 21-liter silnylon compression sack.
A standard 30°F topquilt measures roughly 7 to 8 liters uncompressed.
A matching 30°F underquilt measures roughly 8 to 9 liters uncompressed.
Together, they total 15 to 17 liters uncompressed, which fits inside a 21-liter sack.
When cinched down 35%, the entire combined sleep system compresses into an oblong 10-to-11-liter bundle.
This bundle creates a solid, stable base at the bottom of a 45-to-55-liter pack.
Configuration B: Dual Medium Sacks (Modular Weight Distribution)
If you carry a narrow, low-volume ultralight pack (35L to 42L), a single 11-liter compressed bundle can be too wide to slide horizontally into the base of your pack.
In this scenario, pack each quilt into its own Medium 14-liter sack.
Each quilt compresses down to a small 4.5-to-5.5-liter cylinder.
You can then pack the two cylinders vertically side-by-side or stack them sequentially along the pack backpanel.
Configuration C: The Hammock-and-Quilt Quick Camp Setup
For fast trail deployment in wet weather, some hangers pack their hammock body directly inside the Medium sack alongside their topquilt.
The underquilt is left attached to the hammock in a continuous gear sleeve.

Part 7b: Comparing Single Sack vs. Dual Modular Sacks for Hammock Quilts
Hammock campers must choose between packing topquilts and underquilts together or separately.
Packing both quilts into one Large 21-liter sack simplifies camp setup and pack organization.
Packing quilts into two Medium 14-liter sacks allows more flexible weight distribution in narrow ultralight packs.
Consider your pack shape and trail routine when selecting between single and dual sacks.
Part 8: Weatherproof Boundaries: Silnylon Sacks vs. Submersible Dry Bags
Evac Compression Dry Bags | Smarter Dry Storage for Any Mission
Water protection is a vital consideration when packing backcountry sleep insulation.
Wet down loses 100% of its insulating loft, and wet synthetic batting becomes heavy and clammy.
A critical misunderstanding exists in the outdoor community regarding the difference between water-resistant silnylon compression sacks and waterproof submersible dry bags.
Silnylon compression sacks are constructed from ultralight 1.1oz ripstop nylon impregnated with liquid silicone and coated with polyurethane.
This fabric is naturally hydrophobic and repels driving rain, pack condensation, and wet ground contact.
However, a standard silnylon compression sack features stitched seams and dual open-ended compression caps.
While the fabric sheds moisture effectively, the stitched needle holes and drawcord collar are air-permeable.
If you drop a silnylon compression sack into a deep river or leave it sitting in standing puddle water at the bottom of a canoe, water will slowly penetrate through the seams under hydraulic pressure.
A submersible dry bag, by contrast, is built from heavy 70D polyurethane or vinyl-laminated fabric.
Dry bags employ radio-frequency (RF) welded seams and a roll-top mechanical gasket that forms an airtight and watertight seal.
In addition, because dry bags are airtight, compressing air out of them requires specialized purge valves or air-permeable membrane bases (such as eVent).
Standard dry bags are also significantly heavier (typically 200 to 350 grams compared to 88 grams for silnylon).

Part 8b: The Dual-Layer Defense: Pairing Silnylon Sacks with a Pack Liner
For standard 3-season backpacking, pairing an ultralight silnylon compression sack with a lightweight waterproof pack liner provides total storm security without adding unnecessary dry bag weight.
A simple pack liner made from an unscented trash compactor bag weighs only 45 grams.
When placed inside your backpack, it creates an impervious primary barrier against driving rain and water crossings.
Your silnylon compression sack provides the secondary barrier while maintaining optimal pack volume reduction.
This dual-defense setup delivers complete peace of mind at half the weight of heavy vinyl dry bags.
Part 9: Stuffing vs. Rolling: Preserving Baffle Stitching and Shell Fabric
Backcountry beginners frequently ask whether they should fold and roll their sleeping bag neatly before placing it inside a compression sack.
Experienced backpackers follow a direct rule: never roll your sleeping bag for trail packing.
Always stuff it randomly in small handfuls.
Rolling a sleeping bag forces the shell fabric, interior taffeta lining, and insulation to fold along identical crease lines every single day of your trip.
Repeated folding along identical lines causes localized mechanical fatigue in the nylon threads and tears internal baffle mesh.
In addition, rolling creates tight, cylindrical air pockets that make sliding the bag into a compression sack extremely difficult.
Random stuffing distributes mechanical stress randomly across the millions of ripstop threads and down clusters.
No single fold line receives repeated stress.
Follow these rules when stuffing your sleep system:
- Open All Zippers Partially: Leave the main sleeping bag zipper one-quarter unzipped to allow trapped air to vent freely without catching zipper teeth on delicate baffle fabrics.
- Feed Footbox First: Start with the dense toe box and push it firmly into the bottom seam corners of the sack to eliminate empty dead space.
- Tuck Hood and Drawcords Last: The hood, collar toggles, and drawcords should be the final components pushed through the collar opening, resting protected beneath the top compression cap.
- Avoid Dragging Hardware: Keep metal zipper sliders and plastic cord toggles centered inside the fabric bundle so they do not rub directly against the compression sack's outer shell.

Part 10: Off-Season Storage Rules: Preserving Down Fill Power and Synthetic Loft
A compression sack is an active transit tool designed exclusively for moving gear along the trail.
It should never be used as a home storage container.
Storing down or synthetic insulation compressed inside a small sack between backpacking trips is the number one cause of permanent gear failure.
When down clusters remain tightly packed in a dark, confined sack for months at a time, natural residual oils can oxidize.
The delicate plumule filaments lose their electrostatic springiness.
Testing demonstrates that sleeping bags stored compressed over an off-season lose between 15% and 30% of their thermal loft permanently.
Synthetic insulation fares even worse: continuous filaments develop permanent memory bends, reducing the thickness of the batting by up to 40%.
Follow these four mandatory off-season storage rules:
- Unpack Immediately Upon Returning Home: As soon as you return from a trip, remove your sleeping bag or quilt set from its compression sack.
- Air Dry Thoroughly: Hang your sleep system in a warm, dry room for 24 to 48 hours to evaporate all body moisture, sweat, and condensation before storage.
- Store in a Large Breathable Bag: Place your sleep system into a large, breathable cotton storage sack or oversized mesh laundry bag (typically 60 to 90 liters capacity).
- Hang or Shelf Store in Climate Control: Store your uncompressed bag on a closet shelf or hang it from a wide clothes hanger in a temperature-controlled room. Never store sleep insulation in unheated attics, damp basements, or car trunks where temperature extremes accelerate fiber degradation.

Part 10b: Step-by-Step Cleaning and Loose Storage Protocol
Never store a sleeping bag that contains trail dirt, skin oils, or residual humidity.
Before off-season storage, spot-clean fabric shells with mild soap and lukewarm water.
Ensure the bag is 100% dry before placing it into its loose storage sack.
Storing clean, dry insulation protects fabric coatings from mold and preserves loft for decades.
Scenario 1: Sizing a 3-Season 20°F Down Quilt Set into a Medium 14L Compression Sack for an Ultralight 40L Pack
Consider an ultralight backpacker preparing for a 4-day trek along the Appalachian Trail with a 40-liter frameless backpack.
The hiker carries a premium 20°F down topquilt (850 fill power, 19 ounces) and a matching 20°F down underquilt (850 fill power, 21 ounces).
Together, the two uncompressed quilts measure approximately 13.5 liters in the Cardboard Box Test.
The hiker must decide whether to pack them in a Medium 14-liter sack or a Large 21-liter sack.
In a 40-liter backpack, interior volume is at a premium.
A Large 21-liter sack leaves too much loose fabric and cannot be cinched down tightly without deforming into a spherical ball that pushes against the hiker's food bag.
The hiker chooses a Medium 14-liter silnylon compression sack.
The two down quilts are stuffed sequentially into the sack: topquilt on the bottom, underquilt on top.
Because both quilts use high-loft 850 fill power down, they compress effortlessly into the 13.8-liter sack body.
The hiker cinches the opposite strap pairs progressively by 35%, reducing the total volume to 8.2 liters.
The resulting bundle forms an oblong cylinder measuring 21 cm in diameter and 24 cm in compressed height.
This cylinder drops horizontally into the base of the 40-liter pack, resting flat against the bottom seams and creating a stable, low center of gravity.
Verdict: Choose a Medium 14-liter silnylon compression sack when packing high-fill-power (800+ FP) 3-season down quilt sets into mid-sized ultralight packs (38L to 45L); cinch opposite straps to a moderate 35% to 40% reduction to preserve down plumules and form a flat horizontal base platform.
Scenario 2: Packing a Bulky 3-Season Synthetic Sleeping Bag into a Large 21L Sack to Prevent Seam Blowout
Consider a weekend camper hiking in the Pacific Northwest with a 3-season 20°F synthetic mummy sleeping bag.
The sleeping bag uses continuous-filament polyester insulation and weighs 3.6 pounds.
The camper measures the bag using the Cardboard Box Test: 14 inches long by 11 inches wide by 8.5 inches deep, yielding 1,309 cubic inches, or 21.4 liters uncompressed.
The camper originally attempted to stuff this bag into a standard 14-liter sack.
The collar seams strained severely, and closing the drawcord required two people pulling simultaneously.
When the camper cinched the straps, the extreme pressure caused one of the strap ladder seams to begin tearing away from the silnylon cap.
The camper upgrades to a Large 21-liter silnylon compression sack (φ24x47cm, 21.2 liters uncompressed).
The synthetic sleeping bag slides smoothly through the wider 24 cm collar opening without excessive friction.
The camper tightens the four webbing straps gradually, applying only 25% compression.
This reduces the bag volume from 21.4 liters to 16.0 liters.
The strap tension remains well within safe operational limits (under 25 pounds of force per strap).
The polyester continuous filaments are compressed gently without sharp micro-creasing, protecting the bag's thermal rating for future seasons.
Verdict: Choose a Large 21-liter compression sack for bulky synthetic sleeping bags rated 20°F to 35°F; never force synthetic batting into a 14-liter Medium sack, and strictly limit compression to 25% to 30% to prevent fiber shearing and seam failure.
Scenario 3: Eliminating the "Bowling Ball" Dead-Space Trap by Compressing into an Oblong Oval
Consider a backpacker packing a 50-liter internal frame backpack for a 5-day mountain traverse.
The backpacker uses a 15°F down sleeping bag (800 fill power, 14.5 liters uncompressed).
On previous trips, the backpacker cranked down all four compression straps on their Medium sack with maximum force, turning the sack into a hard, round ball measuring 20 cm in every direction.
Inside the backpack, this hard ball created major problems.
The curved sphere pushed outwards against the pack fabric, deforming the internal frame sheet and creating painful pressure spots on the backpacker's lower back.
In addition, roughly 5 liters of empty dead space existed around the sides of the ball in the lower pack corners.
Small items slid into these gaps and became impossible to retrieve without emptying the entire pack.
The backpacker switches to the oblong oval packing protocol.
After stuffing the bag into the Medium 14-liter sack, the backpacker tightens Straps 1 and 3 by four inches, but tightens Straps 2 and 4 by only two inches.
The backpacker uses their body weight to press the sack flat against the floor.
The sack compresses into an oblong oval cross-section measuring 24 cm wide, 17 cm deep, and 23 cm tall.
When slid into the backpack, the flat 24 cm side rests flush against the internal frame sheet.
The oval edges fill the lower corners completely, eliminating dead space voids and creating a flat upper platform that supports a bear canister.
Verdict: Choose differential strap tensioning (cinching opposite strap pairs unevenly) to shape your compression sack into an oblong oval; this eliminates the bowling ball dead-space trap, aligns with internal pack frame sheets, and provides a level base for heavy equipment.
Scenario 4: Winter 0°F Alpine Expedition Packing: Sizing Up One Volume Tier to Allow Easy Stuffing with Freezing Hands
Consider an alpine mountaineer setting out on a sub-zero winter expedition in the White Mountains.
The mountaineer carries a thick -10°F expedition down sleeping bag containing 36 ounces of 850 fill power down.
In laboratory conditions at 70°F, the sleeping bag compresses into a Medium 14-liter sack if two hands pack with maximum force.
However, backcountry realities change dramatically at 5°F (-15°C) at 6:00 AM.
Inside a frozen tent, fingers are stiff, dexterity is severely reduced, and pack-up must happen rapidly before body heat dissipates.
Attempting to stuff a massive, highly-lofted winter bag into a narrow 21 cm collar with freezing hands is frustrating and dangerous.
The mountaineer deliberately sizes up to a Large 21-liter silnylon compression sack.
The wide 24 cm collar opening and extra 7 liters of uncompressed volume allow the mountaineer to stuff the bulky down bag inside in less than 45 seconds, even while wearing liner gloves.
Once the collar is secured, the mountaineer pulls the four webbing straps with moderate force, reducing the bag to an easy 13-liter compressed bundle.
The extra volume tier converts a morning struggle into a fast, repeatable winter packing routine.
Verdict: Choose to size up one volume tier (stepping from Medium 14L to Large 21L) for winter and alpine expeditions below 20°F; the wider collar opening and generous uncompressed volume ensure fast, frustration-free packing with cold hands while wearing gloves.

Common Mistakes with Compression Sacks
Most gear failures and packing frustrations stem from treating a compression sack as a brute-force clamp rather than a precision volume tool.
Here are the five most common decision mistakes backpackers make in the field.
Mistake 1: Cinching Straps into a Rigid Sphere Instead of an Oblong Oval
Many campers pull all four compression straps until the webbing cannot budge, creating a hard, round ball.
As analyzed in Part 5, a sphere leaves massive voids in the lower corners of your backpack.
A rigid sphere also creates a painful pressure point against your lower back.
To prevent this mistake, check the shape of your compression sack as you tighten the straps.
Pull one opposite strap pair slightly more than the other, and use your body weight to press the sack flat against the ground.
Your goal is a flat, oblong oval cylinder that spans the width of your pack frame.
Mistake 2: Forcing Synthetic Batting Beyond 35% Volume Reduction
Backpackers transitioning from down to synthetic insulation often expect synthetic bags to pack down to micro dimensions.
They lean on compression caps with their knees, pulling straps until the seams creak.
Forcing synthetic insulation beyond a 35% volume reduction fractures the bonded polymer fibers.
This causes immediate, permanent loft loss and creates cold spots along the compression strap lines.
If your synthetic sleeping bag will not fit inside your pack without extreme compression, upgrade to a larger pack or choose a Large 21-liter sack that permits gentle 25% compression.
Mistake 3: Treating Silnylon Compression Sacks as Submersible Dry Bags
Ultralight silnylon is highly water-resistant, but it is not submersible.
Some backpackers mistake a silnylon compression sack for a whitewater dry bag.
They strap it to the outside of their pack or trust it unprotected during dangerous river fords.
If submerged, water will seep through the stitched seams and drawcord collar.
Always keep your sleep system inside your backpack.
For wet-weather trips, line the inside of your pack with an ultralight waterproof pack liner, then place your silnylon compression sack inside the liner.
This dual-layer system guarantees dry sleep gear under all conditions.
Mistake 4: Long-Term Off-Season Storage in a Compressed Sack
Leaving a sleeping bag compressed inside a gear closet between trips causes severe, irreversible damage.
Both down plumules and synthetic batting lose their natural elasticity when compressed for weeks at a time.
A sleeping bag stored compressed over a single winter can lose two to four inches of loft.
This permanently degrades a 20°F sleeping bag into a 35°F bag.
Always unpack your sleep gear as soon as you return from the trail.
Hang the bag to air out for 24 hours, then store it loosely in a 70-liter breathable mesh or cotton storage sack.
Mistake 5: Rolling Instead of Stuffing Down Sleep Systems
Beginners often fold their sleeping bag into quarters and roll it tightly like a yoga mat before sliding it into the sack.
This practice concentrates bending stress on the exact same fold lines every morning.
Over time, this mechanical fatigue weakens the ripstop shell fabric and shears internal baffle stitching.
Rolling also traps air inside the center core, making the roll too fat to fit through the collar.
Always stuff your sleeping bag randomly in small handfuls, starting with the footbox.
Random stuffing distributes pressure evenly and is three times faster than folding.
The Quick Decision Checklist
Use this field checklist to make your final compression sack sizing and packing decision before heading into the backcountry, and explore our full Camping Accessories Collection for modular trail organization.
- ✓ Measure First: Conduct the Cardboard Box Test at home to determine your sleeping bag or quilt set's uncompressed volume in liters.
- ✓ Match Insulation Type: Choose a Medium (14L) sack for 800+ fill power down sleep systems; choose a Large (21L) sack for synthetic bags or winter quilts.
- ✓ Observe Compression Limits: Cinch down up to 40% to 50% for high-loft down; restrict synthetic insulation compression to 25% to 30% maximum.
- ✓ Prevent the Bowling Ball: Tighten opposite strap pairs progressively to flatten the sack into an oblong oval rather than a rigid sphere.
- ✓ Fit the Pack Base: Ensure the compressed oval cylinder rests horizontally across your backpack's bottom seams to fill the lower lumbar corners.
- ✓ Dual Weather Defense: Pair your silnylon compression sack with an interior pack liner for guaranteed storm protection.
- ✓ Unpack at Camp: Shake out your sleeping bag immediately upon pitching shelter to allow 15 minutes of full loft recovery before bedtime.
- ✓ Store Loose at Home: Transfer insulation to a large breathable cotton or mesh storage sack immediately upon returning from your trip.

Shop Ultralight Silnylon Compression Sacks
Shop Now →