Most tarp setup guides answer the wrong question first.
I compared 13 sources for this brief, including REI setup guidance, an A-frame setup source, current tarp camping pages, and three Reddit threads from hammock and car-camping users.
The pattern was clear: beginners do not fail because they chose the fifth-best tarp pitch.
They fail because they choose a shape before they read the site.
For most campers, the low A-frame is the default camping tarp setup because it teaches the ridgeline, corner tension, runoff angle, and wind exposure in one repeatable pitch.
Switch shapes only when the weather or job changes.
Use a closed-end A-frame for wind-driven rain, a lean-to or high kitchen tarp for fair-weather access, a low plow-point style for strong wind, and poles when the tree spacing is wrong.
That is the framework this guide uses.
What You'll Learn

This guide gives you one default setup, five field scenarios, and a short checklist you can use before the first stake goes in.
I am not going to rank every tarp shape as if they are equal.
A beginner needs a reliable order of operations.
A campground cook station, a hammock rain fly, and a ground shelter can use the same tarp fabric, but they should not use the same geometry.
If you are still choosing the tarp itself, start broad with tarps and shelters, then narrow the pick only after you know whether the job is sleeping coverage, hammock coverage, or a kitchen roof.
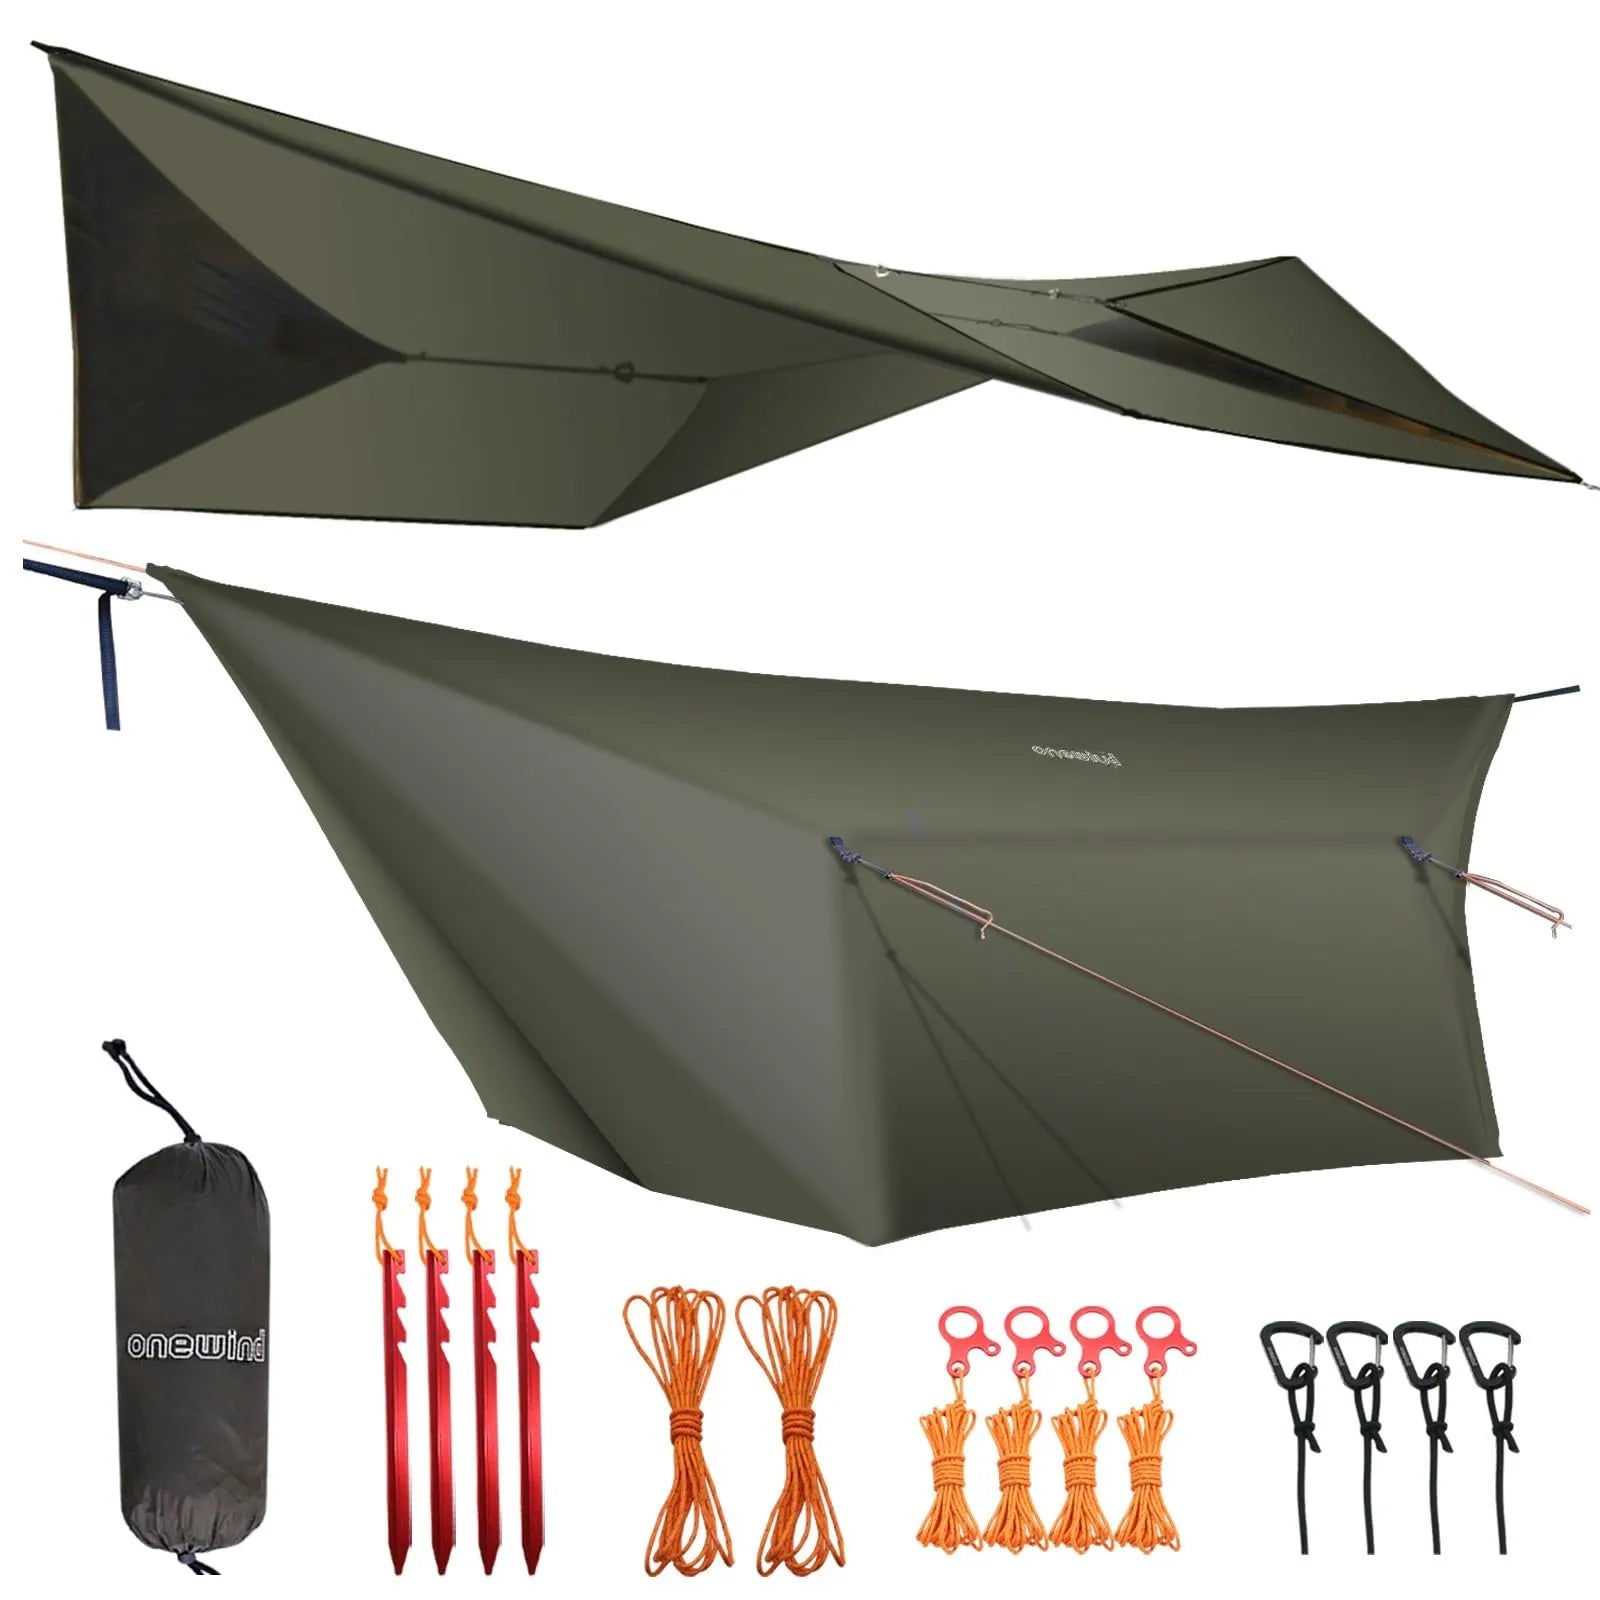
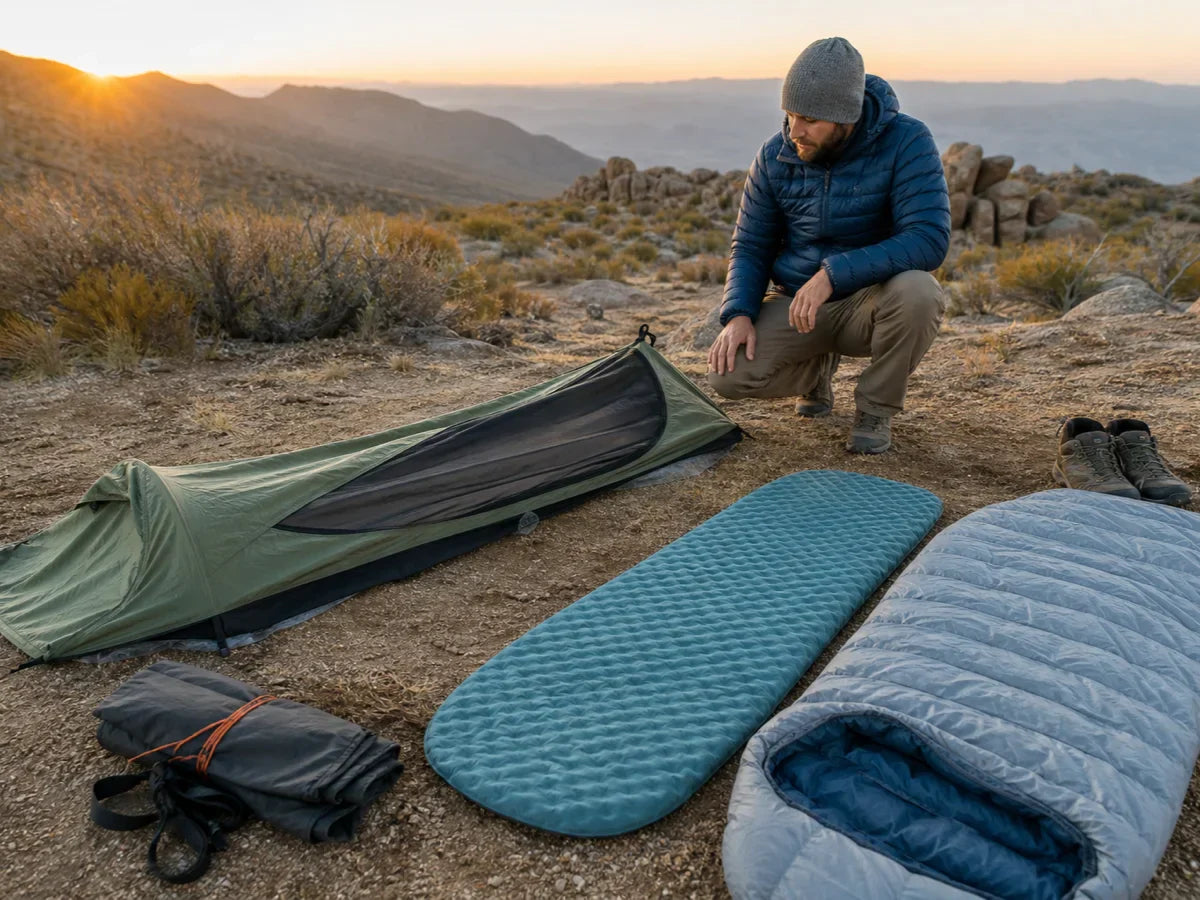
The only gear assumption is basic: a tarp, 30 to 50 feet of cord for the ridgeline, 4 to 8 guylines, 6 to 8 stakes, and either trees, trekking poles, or tarp poles.
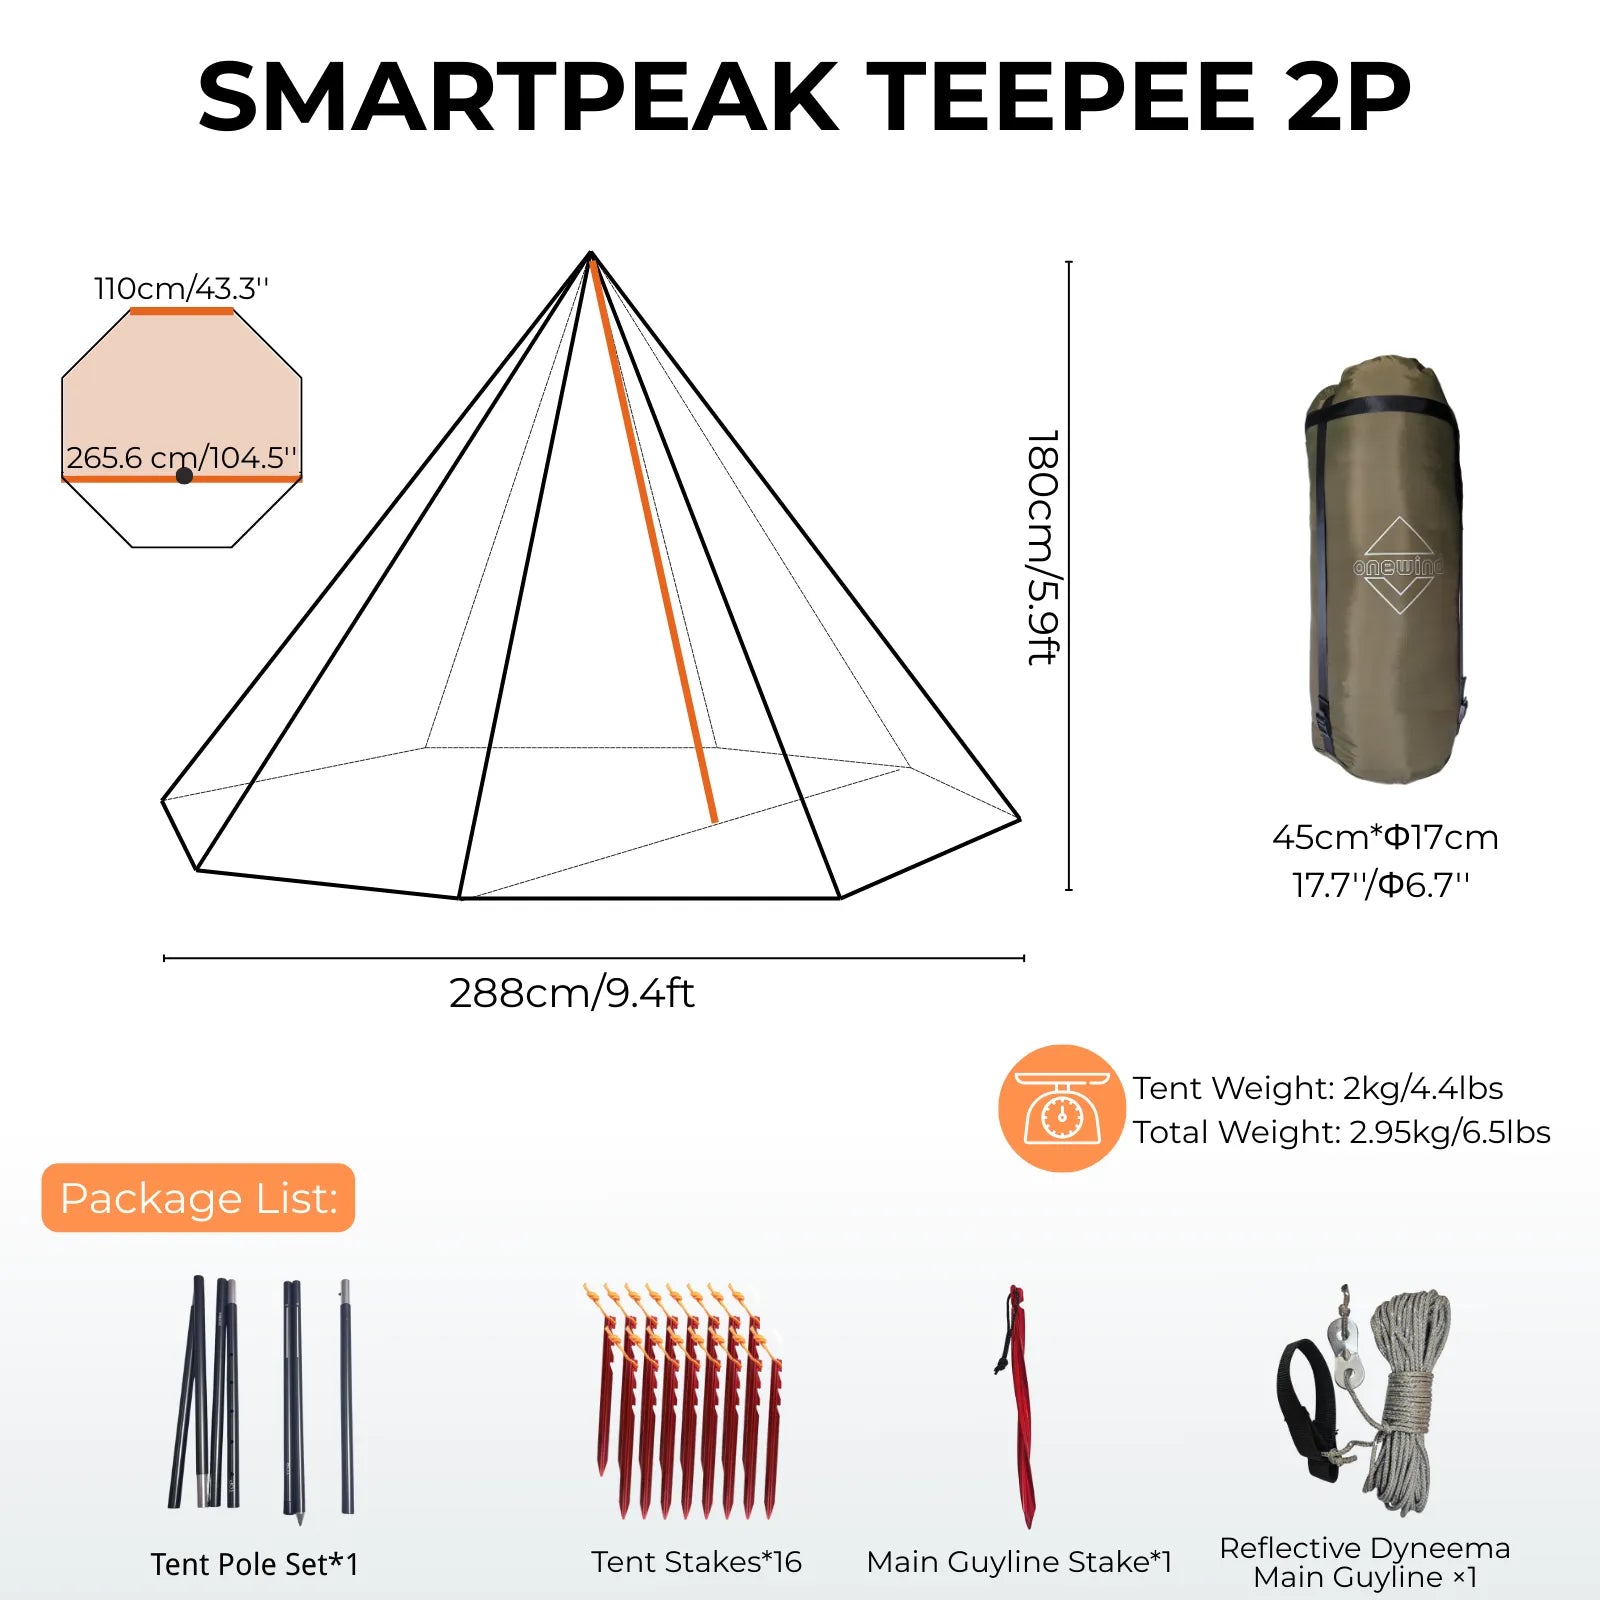
According to the A-frame setup guidance reviewed for this article, an 8 by 10 foot tarp is a usable minimum for one person, while 10 by 12 feet gives beginners more margin.
That margin matters because a beginner rarely pitches the tarp perfectly on the first try.
Quick Answer
If you only learn one camping tarp setup, learn the low A-frame first.
It works because the ridgeline carries the structure, the corners create the roof angle, and the two sides shed water away from the sleeping or sitting zone.
REI's tarp shelter guidance uses the same foundation: secure the ridgeline or poles first, then tension corners and side loops after the tarp is centered.
For a first trip, set the ridgeline around chest height in calm weather and lower it toward 18 to 24 inches in bad weather if you are sleeping under it.
For a kitchen tarp, keep the ridgeline high enough to stand, but make the downhill side obvious before rain starts.
For a hammock, ignore headroom until the edges cover the hammock body and the expected splash zone.
For wind, lower the windward side first.
Do not fix a flapping tarp by only pulling harder on the same bad geometry.
The Decision Framework
For most campers, the first question is not "Which tarp pitch looks clever?"
The first question is "What is the tarp protecting?"
A sleeping body needs low side coverage.
A hammock needs centered rain coverage and a splash buffer.
A picnic table needs headroom, drainage, and anchor points that people will not trip over.
A windy campsite needs less exposed fabric.
That is why the A-frame is the default, not the final answer.
It gives you a repeatable baseline.
Run the ridgeline first.
Center the tarp.
Stake the four corners so each panel sheds water.
Add side pullouts only after the basic roof is stable.
When the rain is vertical and mild, keep the setup balanced.
When the rain is coming sideways, lower the weather side until the tarp starts acting like a wall.
When the wind direction is steady, close the end facing the wind or shift to a lower storm shape.
When you need cooking space, raise the working side but keep a steep drain line behind it.
The mistake is treating every pitch as a personality choice.
The smarter move is to match shape to job.
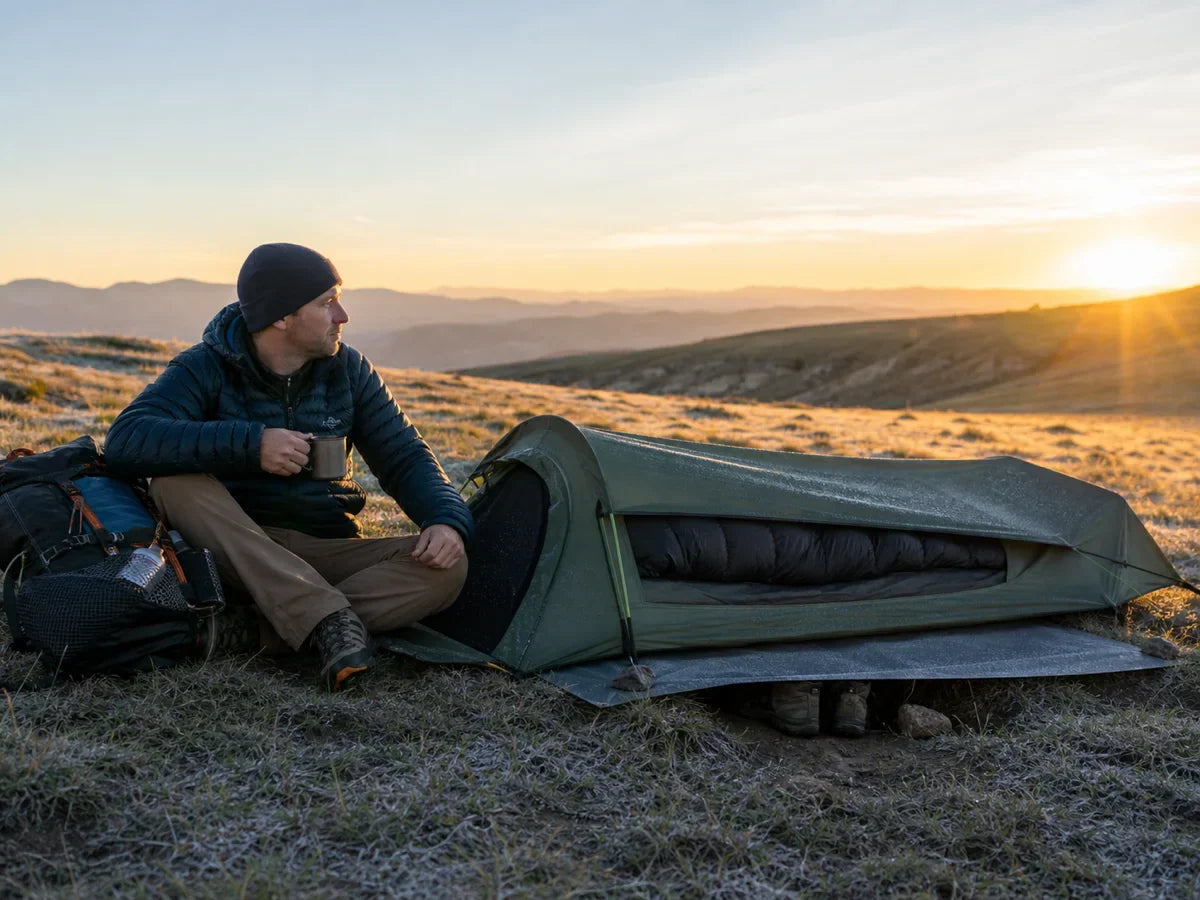
Scenario 1: Beginner A-frame setup between two trees before rain starts
This is the scenario most beginners should practice at home.
You have two trees, a rectangular tarp, enough cord, and rain in the forecast.
The right call is a low A-frame because it gives the fewest moving parts and the fastest feedback.
Tie one end of the ridgeline to the first tree.
Tension the second end at the second tree.
Drape or clip the tarp so the centerline follows the ridgeline.
Stake the first two corners on one side, then pull the opposite side until both roof panels look even.
REI lists the bowline, trucker's hitch, and prusik as useful knots for tarp setup, and that trio maps well to the beginner job.
Use the bowline for a fixed loop, the trucker's hitch for tension, and a prusik when the tarp needs sliding adjustment on the line.
The A-frame setup source gives a practical kit range: 30 to 50 feet of cord and 6 to 8 stakes.
That range is not decoration.
It lets you move the anchor points instead of forcing the tarp into a cramped or slack pitch.
Do not start high because it feels roomy.
High pitches feel better for five minutes, then leak from the sides when wind changes.
For a first rain setup, put weather resistance ahead of sitting height.
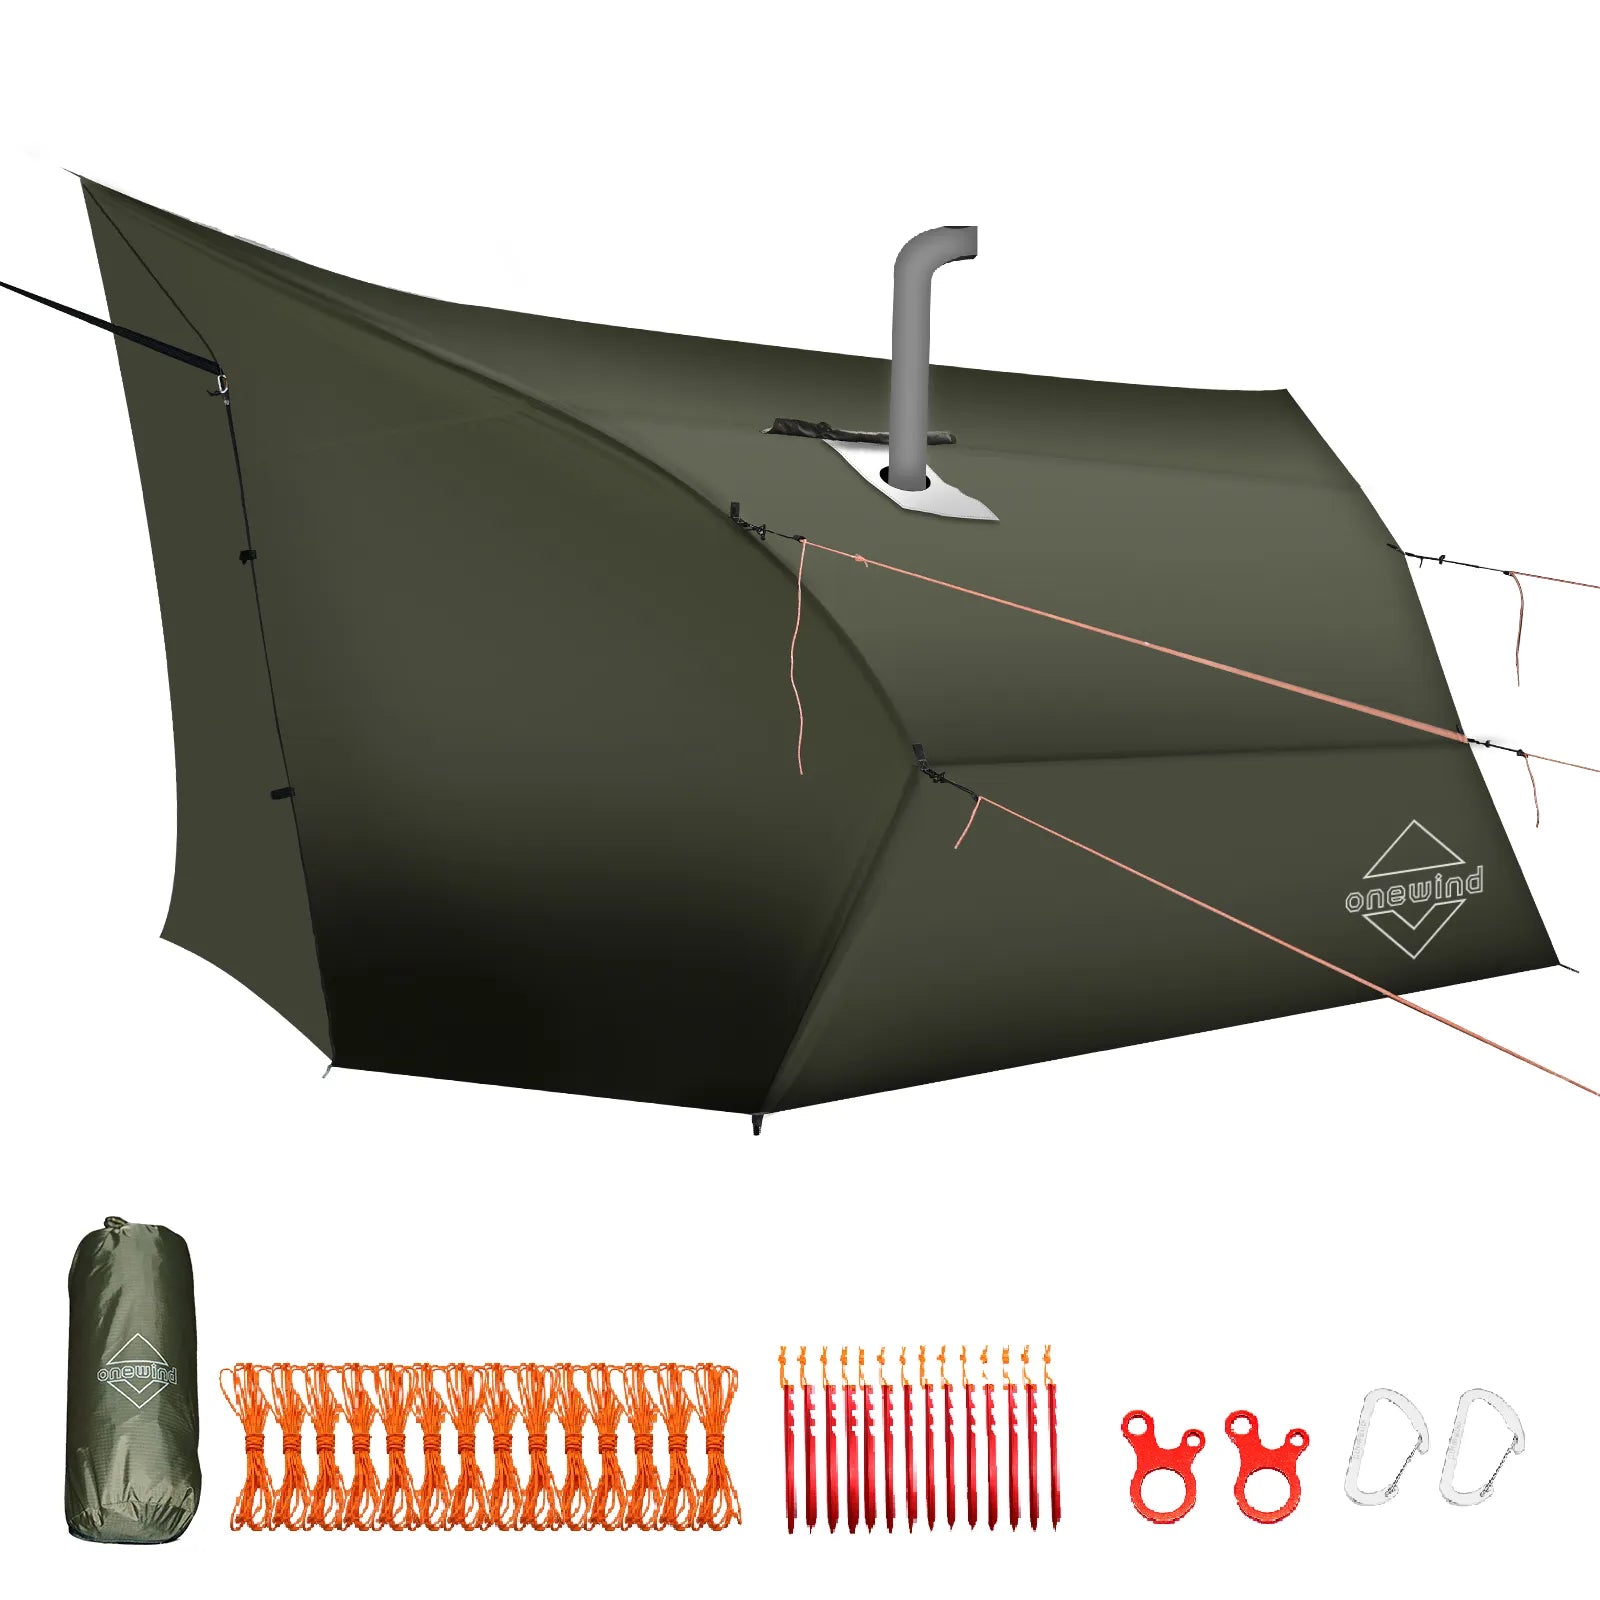
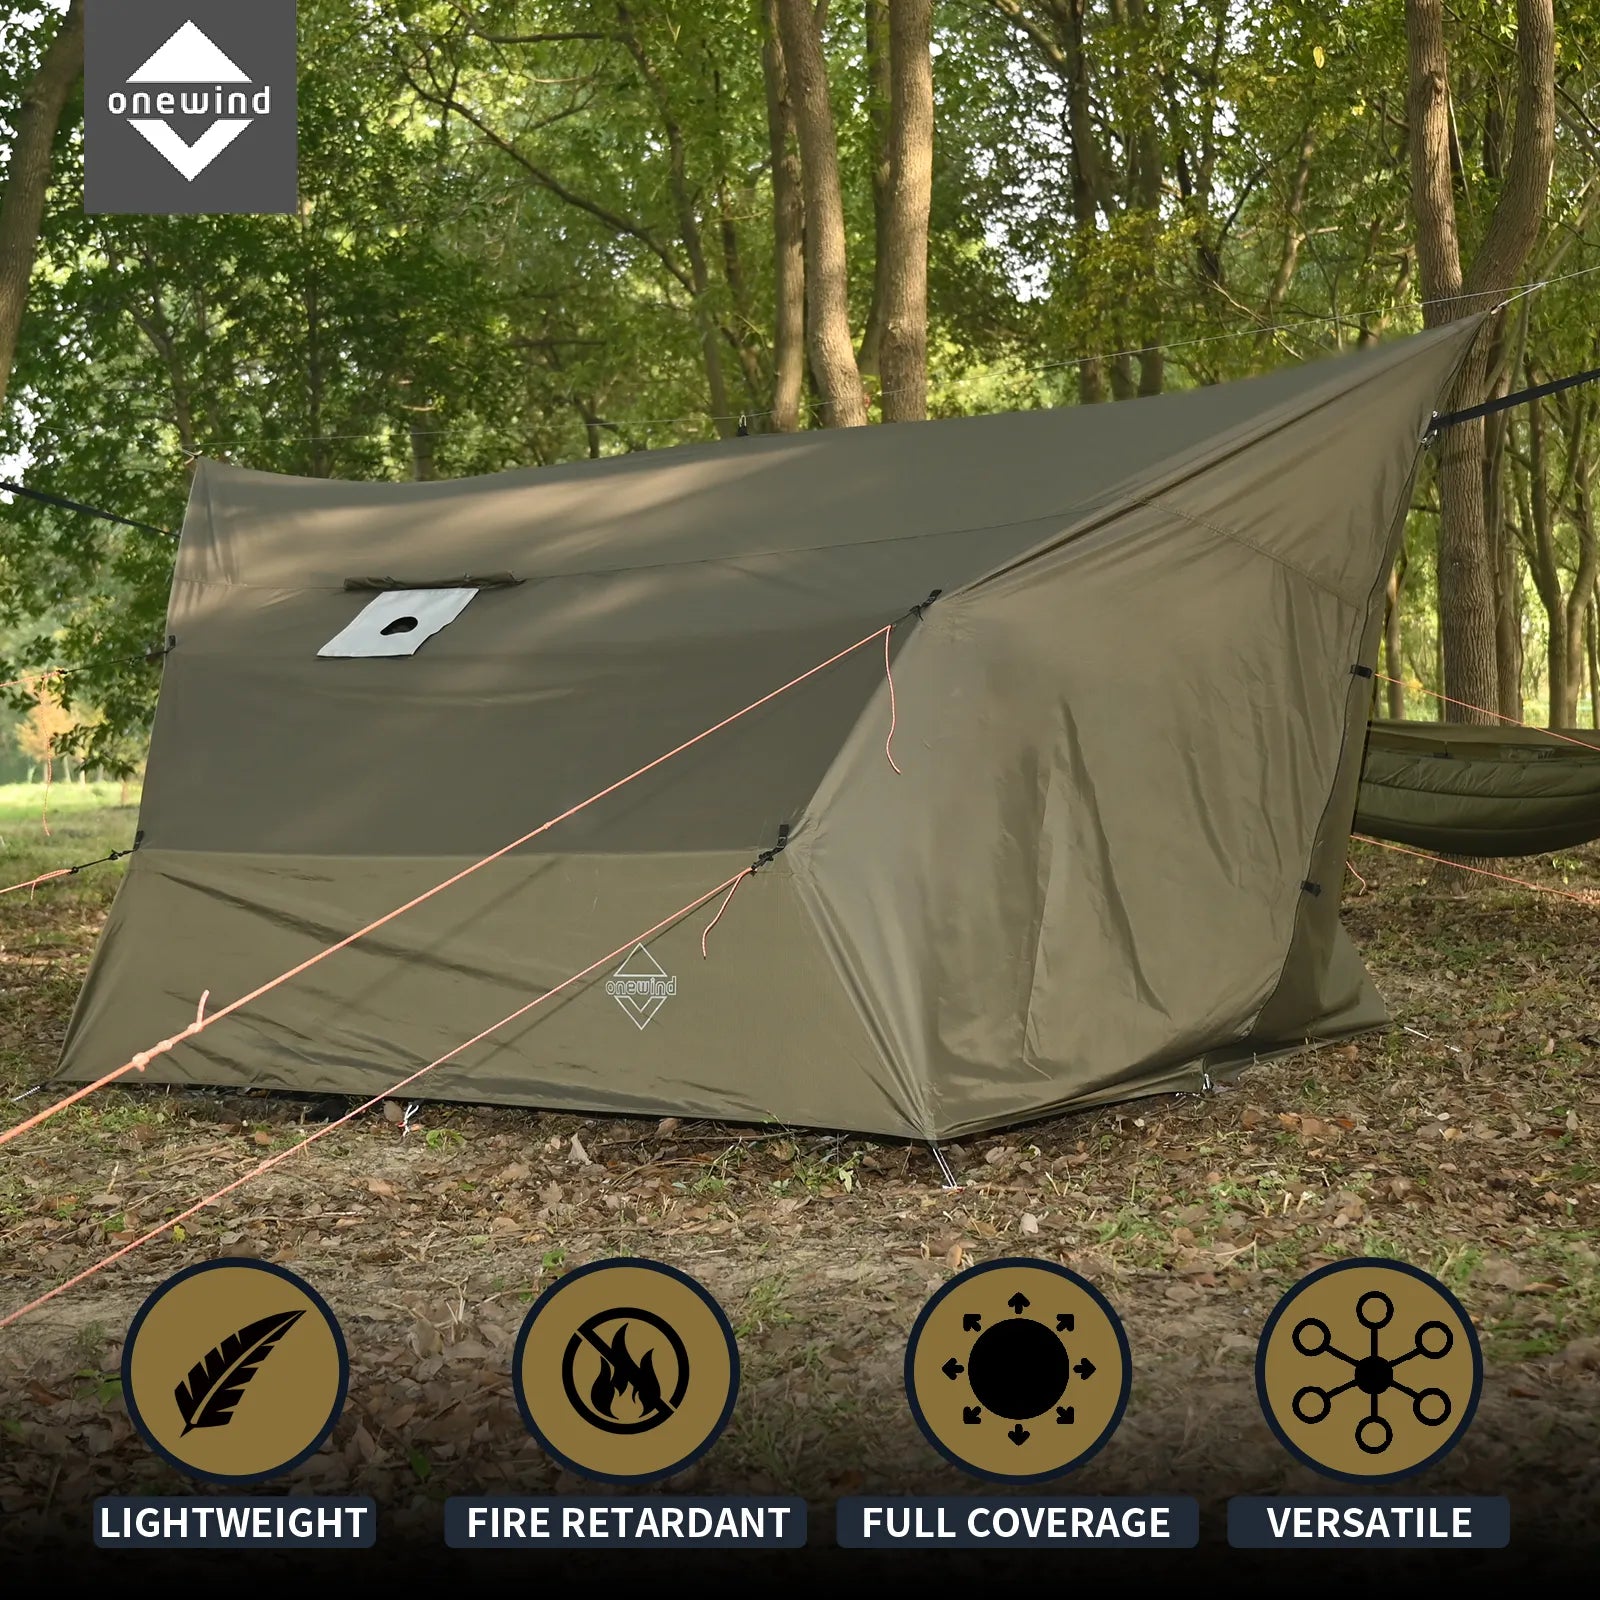
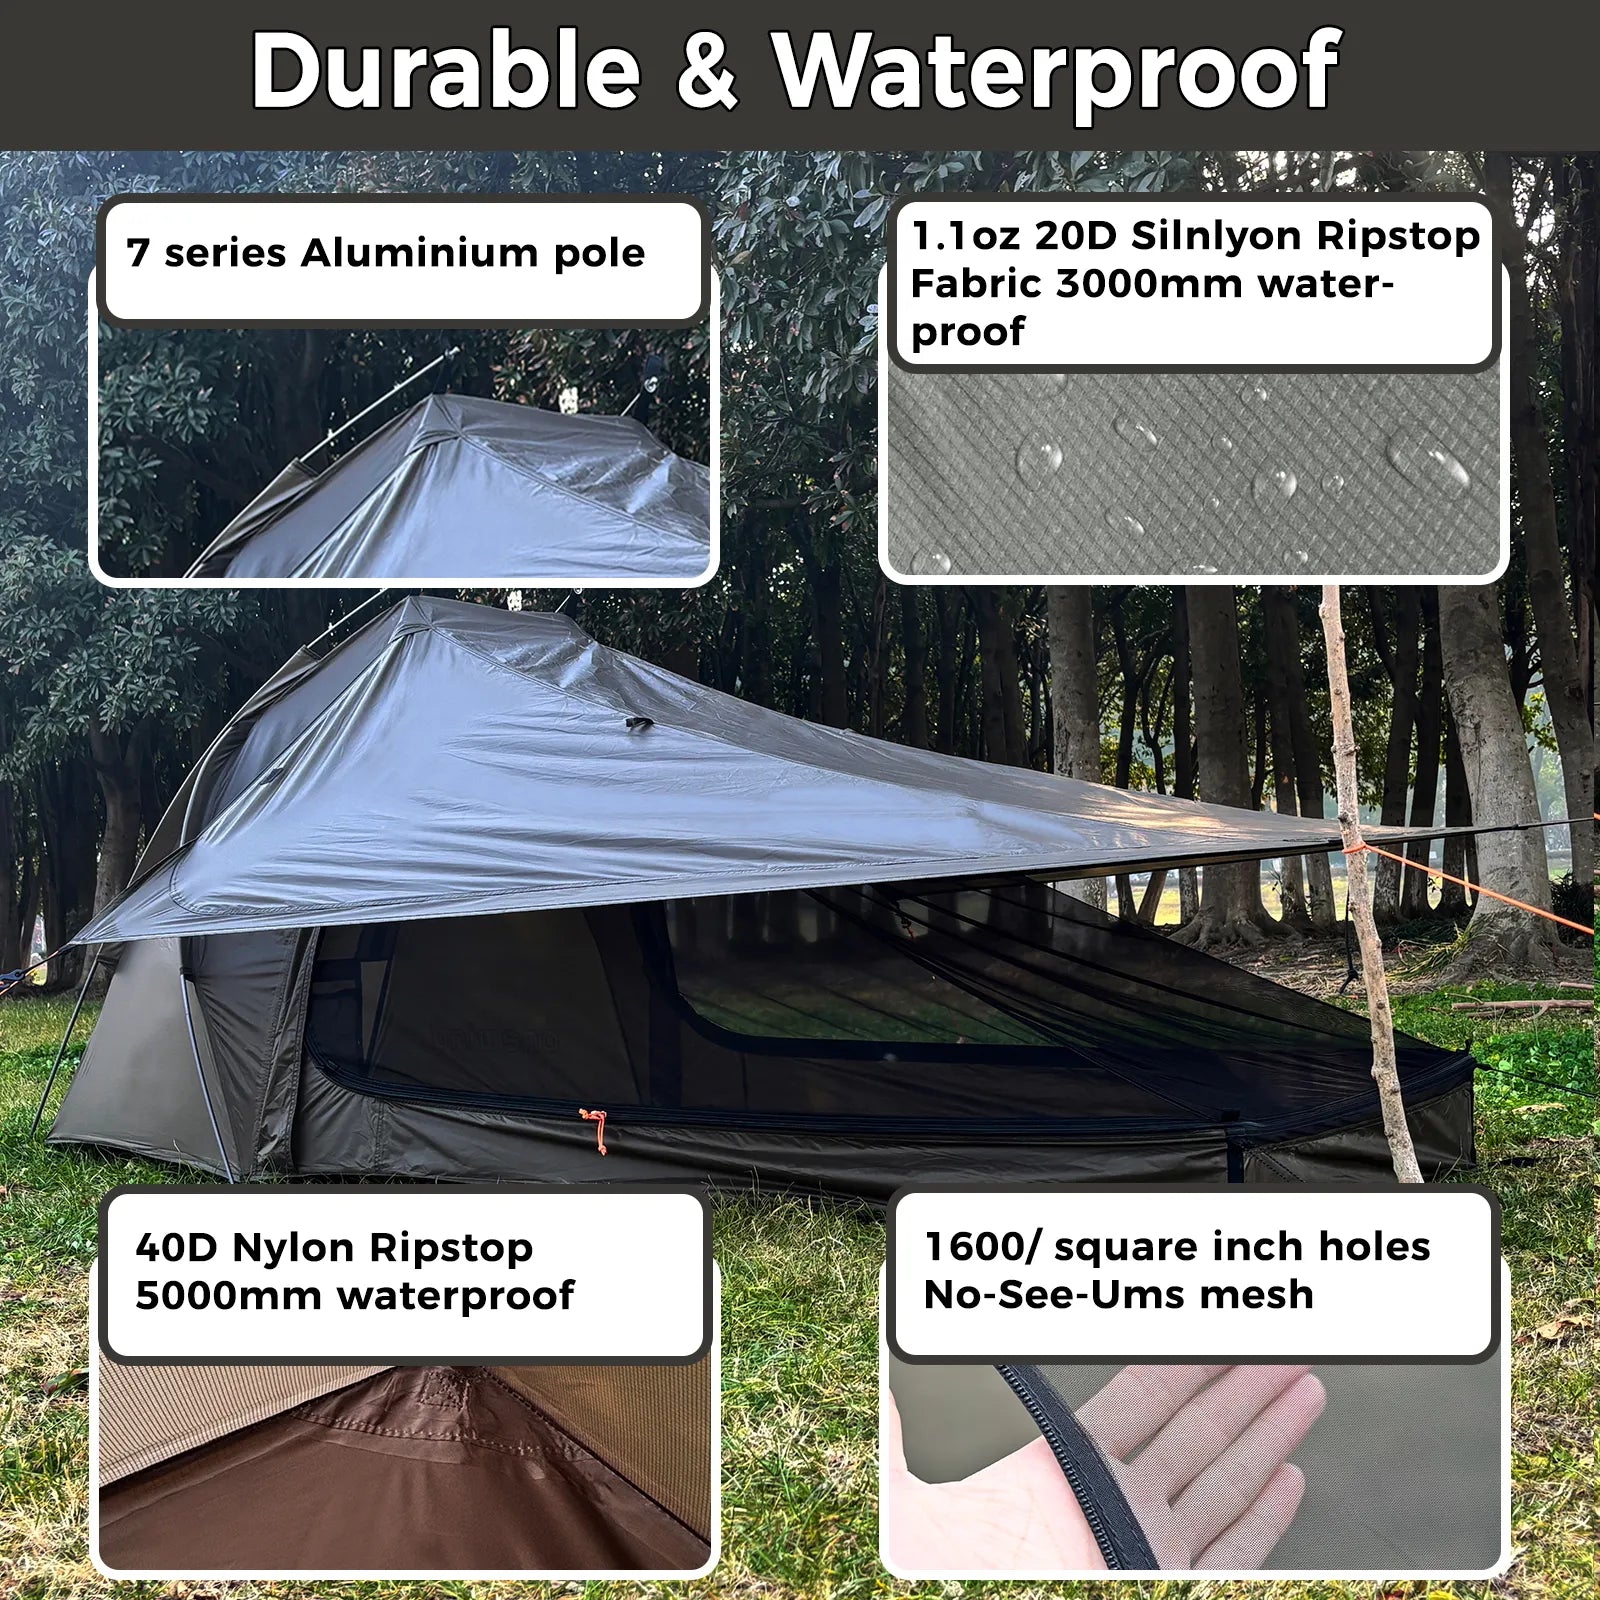
With Onewind gear, a tarp sleeve or organized guyline setup helps because the tarp comes out ready to center instead of dragging lines through wet ground.
For this specific A-frame use case, a full-size option like the 12ft silnylon tarp gives more end coverage than a tiny minimalist sheet, which matters when the ridgeline is not perfect.
Verdict: Choose a low A-frame first, then raise it only after the roof drains cleanly and the weather side stays covered.
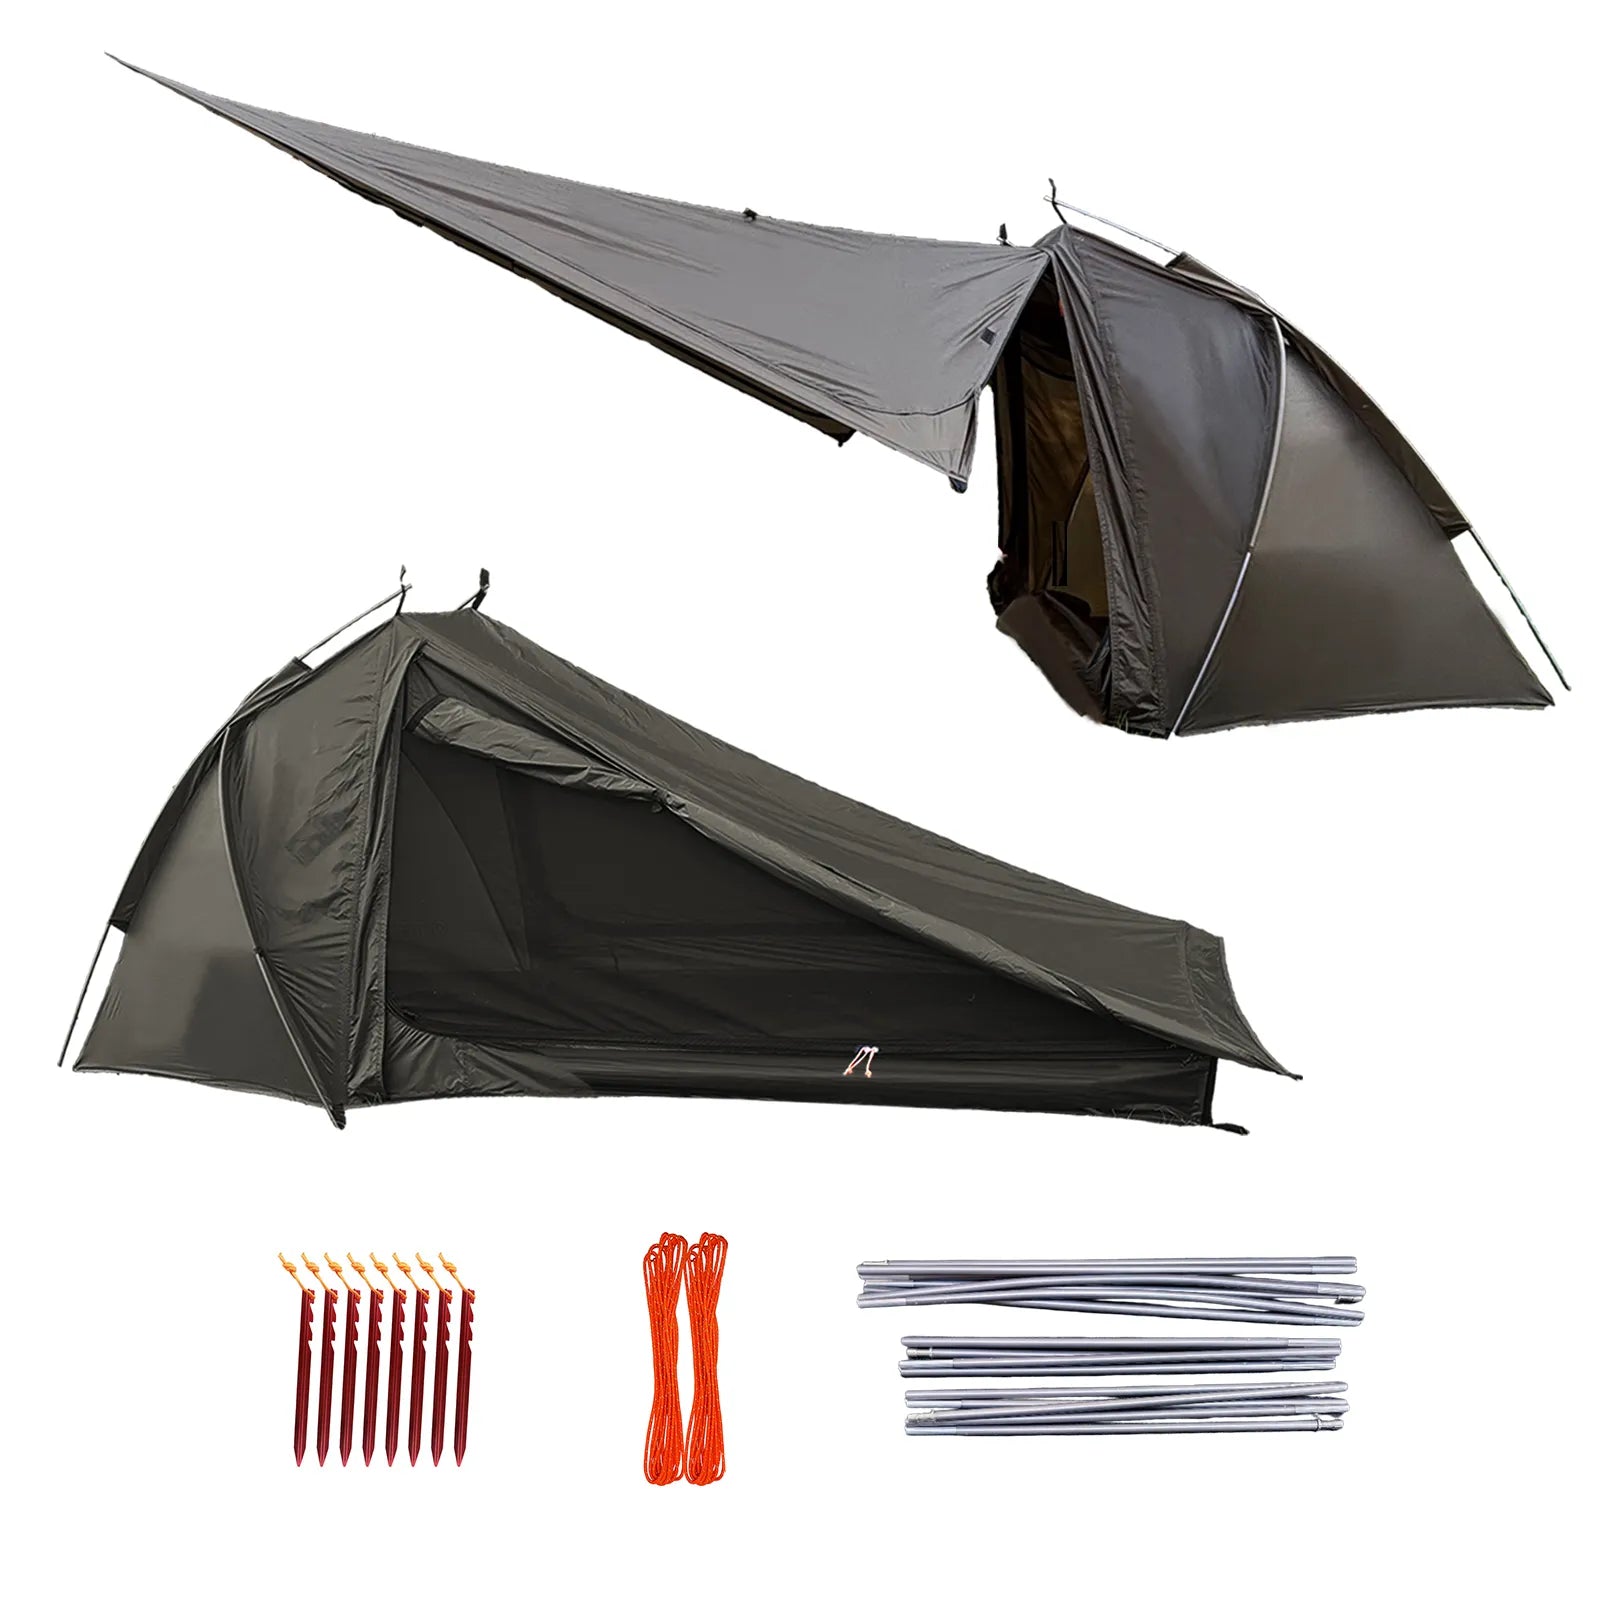
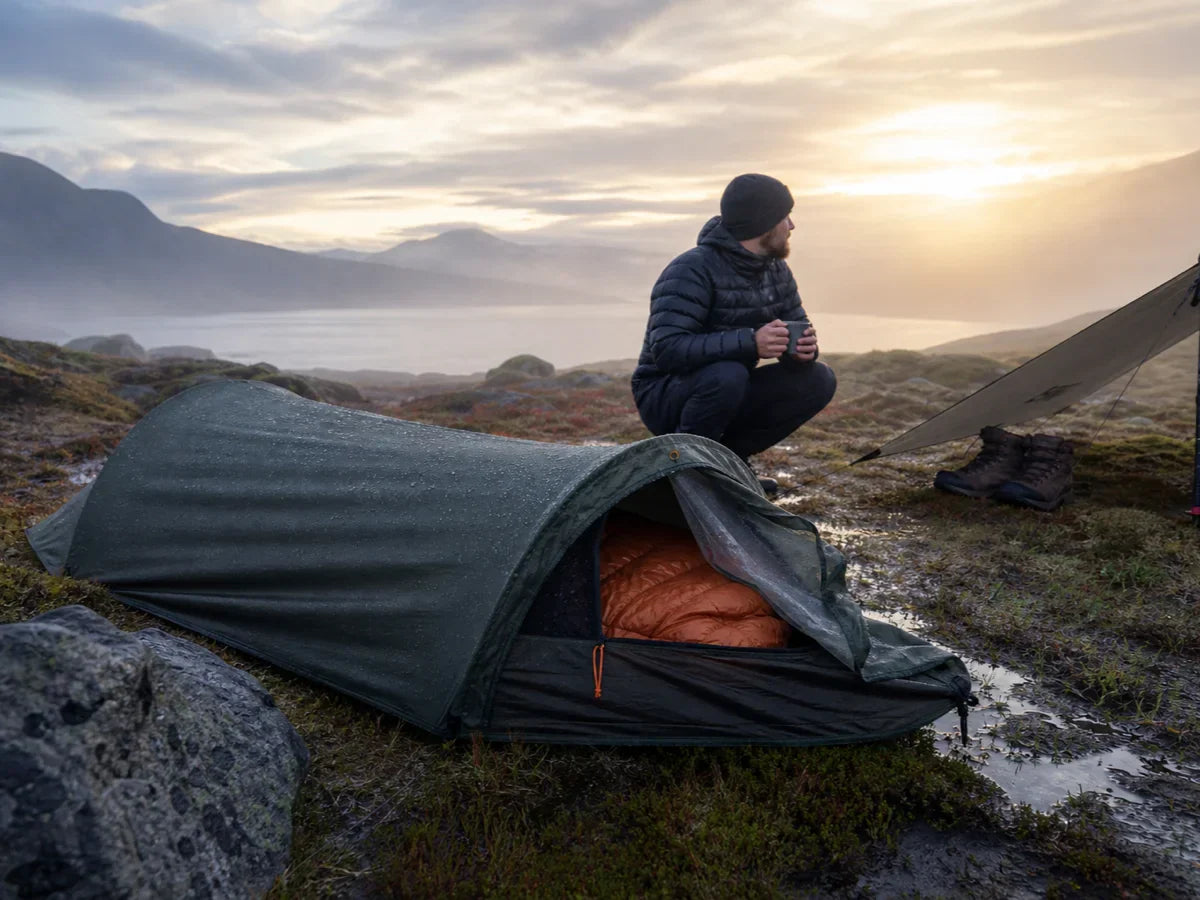
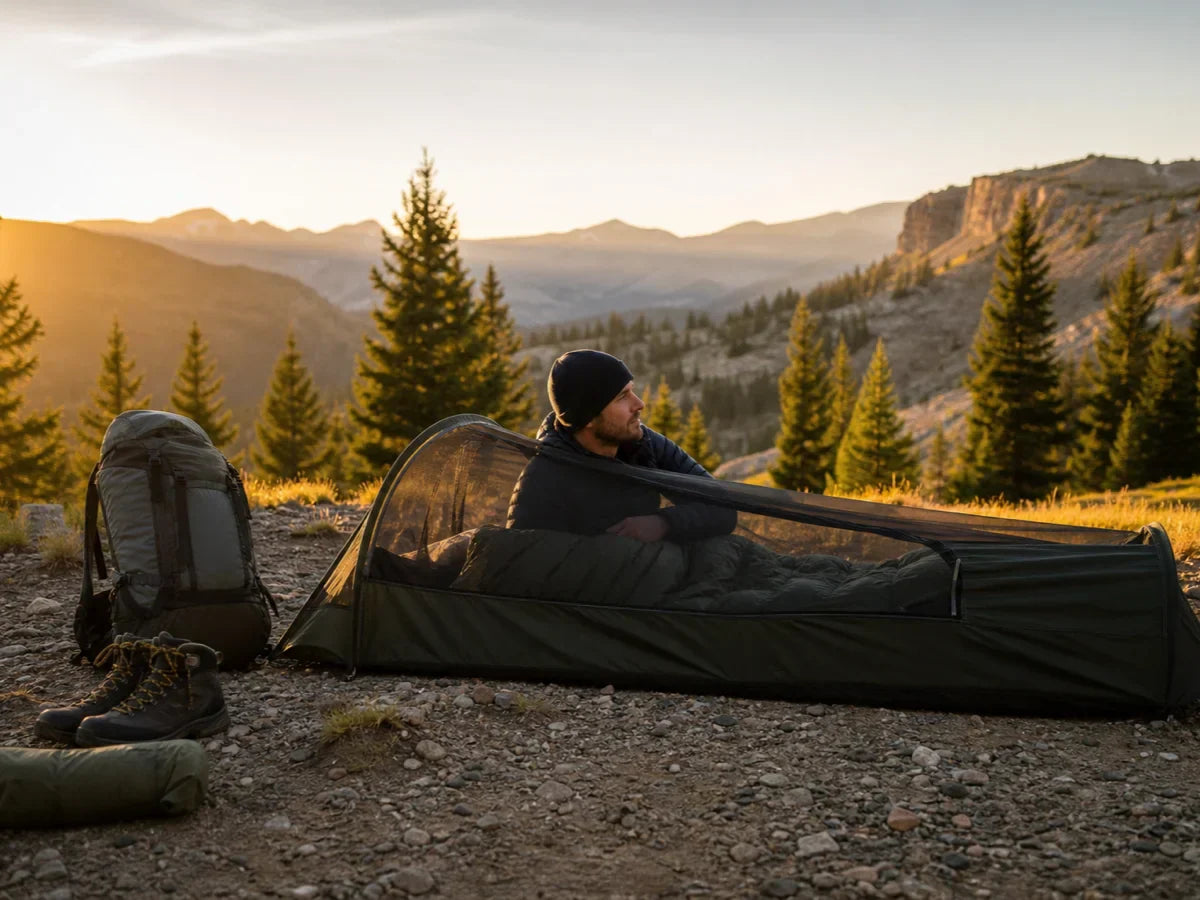
Scenario 2: Hammock tarp setup that avoids splash and side exposure

A hammock tarp is not just a roof.
It is side protection.
The common beginner error is pitching the tarp high enough to admire the campsite, then discovering that rain does not fall straight down.
Reddit hammock campers keep circling the same practical advice: use pre-attached lines, learn prusik adjustment, and pitch lower in bad weather.
Continuous ridgelines came up because they make centering easier when the tarp has to sit over the hammock, not merely between two trees.
A split ridgeline can work, especially when you care about less cord and less tangle.
For a beginner in rain, easier centering usually wins.
Start by hanging the hammock where the suspension angle and tree spacing are right.
Then center the tarp over the hammock body, not just over the suspension.
Bring the tarp edges down until they cover the side of the hammock where splash will hit.
If wind is coming from one direction, lower that side first and accept less porch space.
If the forecast is ugly, skip the porch mode.
Porch mode is a fair-weather comfort setup, not the default storm setup.
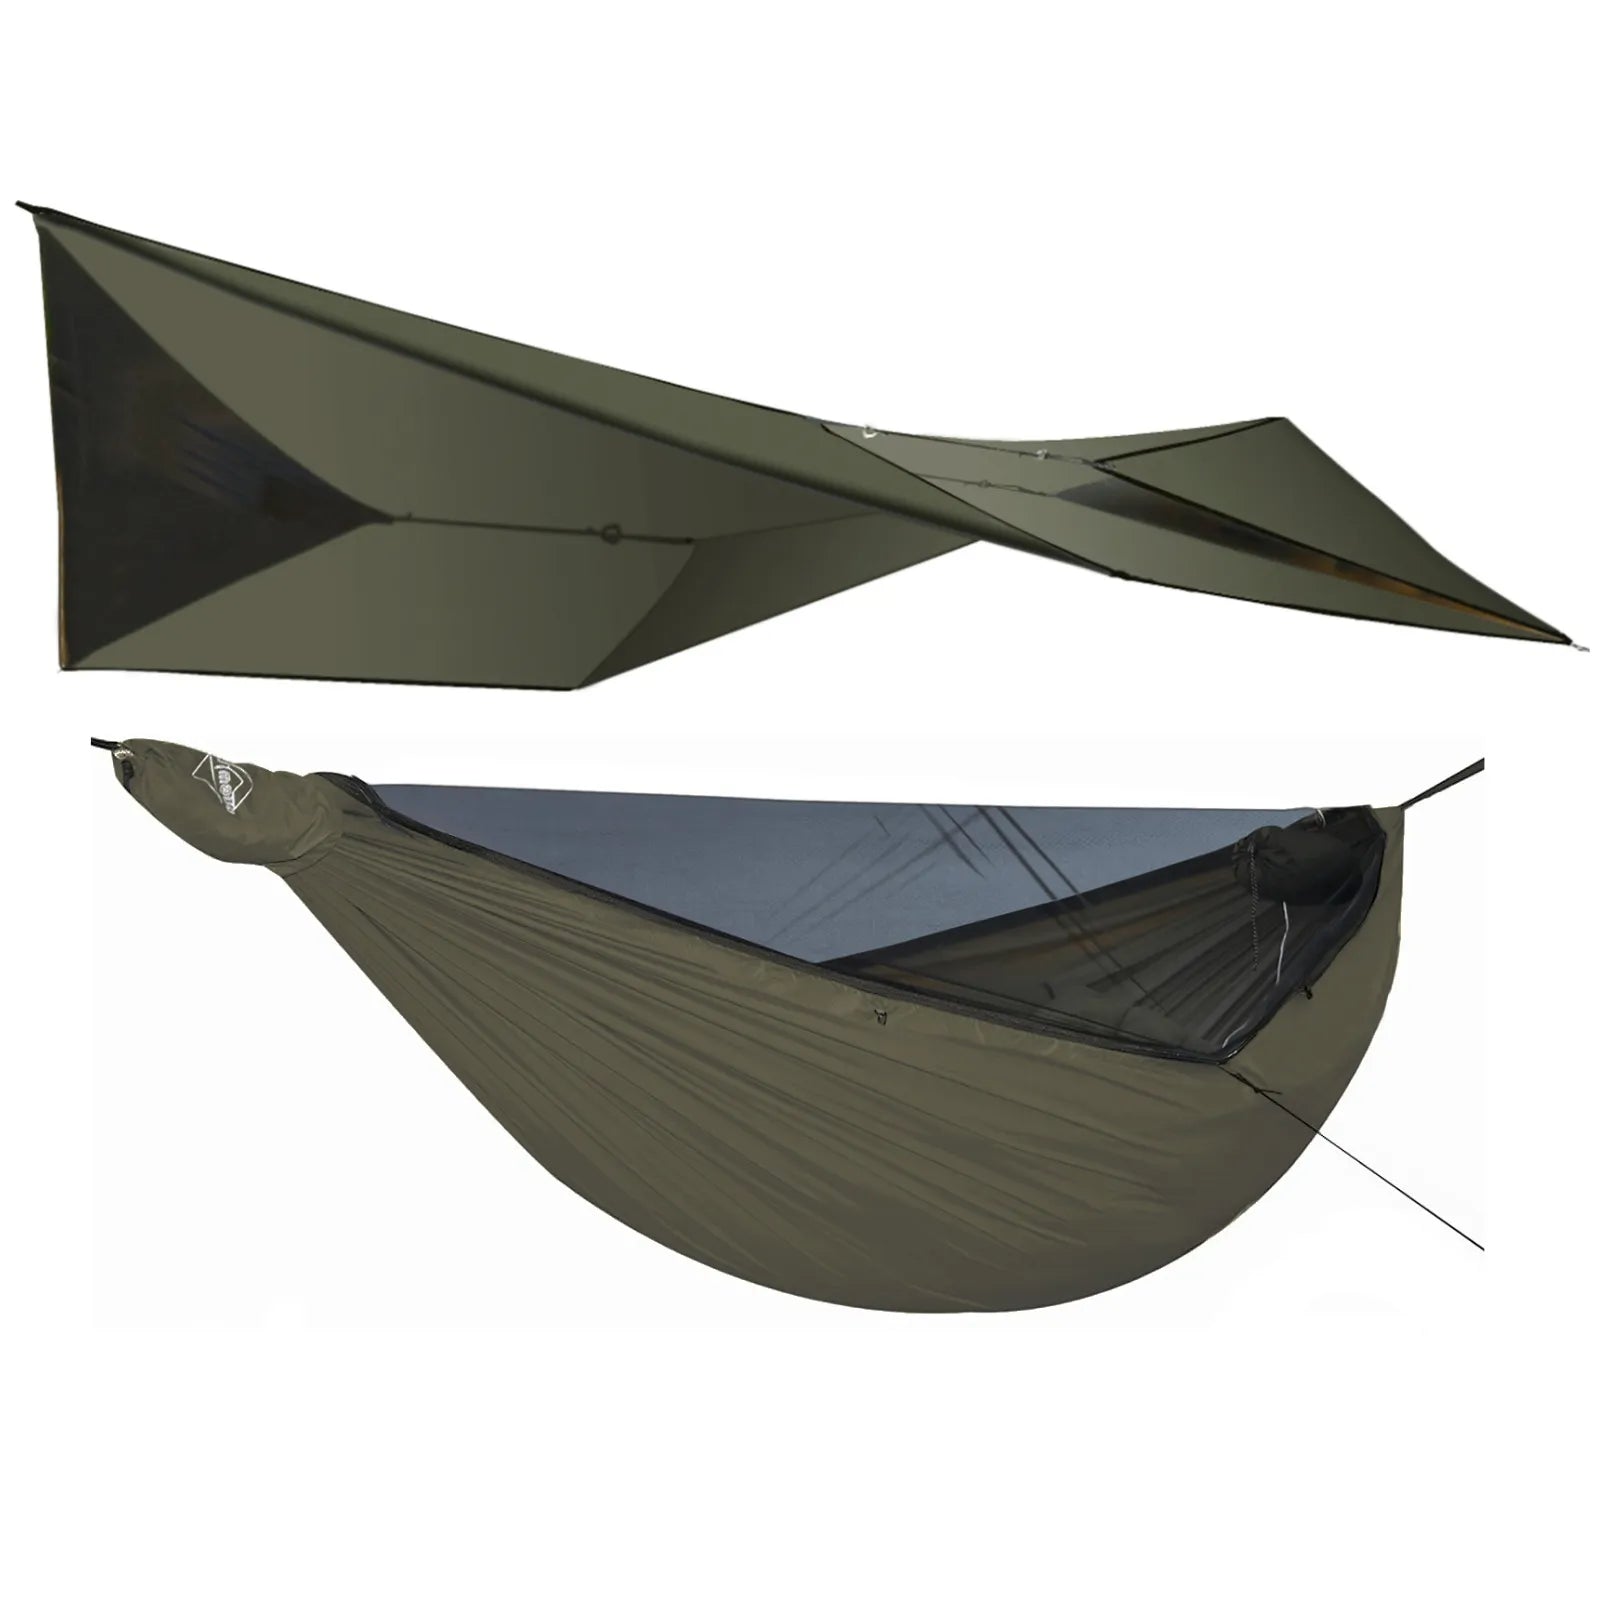
For Onewind hammock users, a dedicated Hammock Rain Fly earns its keep here because the shape and tie-outs match the coverage job better than a random flat sheet.
A mesh tarp sleeve also helps when the first task is getting rain cover deployed before the hammock or quilt gets wet.
Verdict: Choose a low, centered hammock tarp pitch with fast ridgeline adjustment before you choose porch height or views.
Scenario 3: Car-camping kitchen or picnic-table tarp for an all-day rain
A kitchen tarp has a different job from a sleeping tarp.
You need standing room, a dry table, and runoff that does not pour into the cooking lane.
Car-camping discussions mention anchors that backpacking guides often ignore: vehicle racks, trees, heavy rocks, extendable canopy poles, and old tent poles.
That matters because a campground is rarely a perfect forest grid.
The right pitch is often a high A-frame or lean-to, not a low storm shelter.
Start with the table or kitchen zone.
Pick the side where water should drain.
Then place the ridgeline so the tarp slopes away from chairs, bins, and the stove.
If you tie to a vehicle rack, protect the cord from sharp metal and check that doors or hatchbacks will not saw into the line.
If you use poles, guy them out in two directions before adding full tarp tension.
If the tarp flaps, do not keep raising it.
Lower the windward edge or move the corner anchors outward until the fabric stops snapping.
The campground version can use heavier hardware because you are not counting ounces.
For a family or group setup, setup accessories such as tarp poles and extra guylines make more sense here than chasing an ultralight-only pitch.
Verdict: Choose a higher kitchen tarp only when you can control runoff and traffic paths, then lower the windward side if rain starts moving sideways.
Scenario 4: Trekking-pole tarp setup when there are no usable trees
Open ground does not cancel the A-frame logic.
It changes the supports.
REI's ultralight tarp setup guidance includes trekking-pole A-frame setups, which is the right bridge between backpacking and basic tarp geometry.
The sequence stays familiar.
Place the tarp.
Set the pole positions.
Lightly tension the pole guylines.
Stake the corners.
Then retension the poles and side points.
The pole angle matters because a straight vertical pole can kick out under changing tension.
Angle each pole slightly away from the tarp body so the guyline and tarp tension work against each other.
Keep the ridgeline lower when wind is present.
A chest-high pole setup may feel livable in calm weather, but the same height can become a sail on exposed ground.
If you only have four stakes, skip optional side pullouts until the four corners and pole guylines hold.
If you have six to eight stakes, add mid-edge guylines to reduce panel slap.
This is also where a rectangular tarp with multiple tie-outs beats a minimal sheet with only corner loops.
The extra tie-outs let you tune the roof instead of moving the whole shelter.
Verdict: Choose a trekking-pole A-frame when trees are missing, but keep the pitch low and spend your strongest anchors on poles and corners first.
Scenario 5: Windy campsite troubleshooting when the tarp flaps or stakes pull out

Wind exposes bad geometry faster than rain.
A tarp can look clean in still air and fail ten minutes after the gusts arrive.
Wind-focused tarp guidance points toward lower ridgelines, close anchors, stronger stake choices, and controlled panel tension.
The A-frame source gives the same practical direction: in bad weather, drive stakes deeper, add side guylines, and bring windward corners closer to the ground.
Research from REI adds the setup detail beginners usually miss: the bowline, trucker's hitch, and prusik each solve a different tension or adjustment problem.
Start diagnosis at the ridgeline.
If the ridge is loose, every corner fix is temporary.
Next, check the windward side.
If wind can get under the tarp, the tarp will lift, pop, and pull stakes.
Lower that side until the fabric stops acting like a scoop.
Then check the anchors.
Soft soil needs more surface area, not more hope.
Use longer stakes, place rocks over guylines, or bury a stick as a deadman anchor in sand or loose ground.
Finally, check runoff.
Wind can push rain under a tarp that would be fine in vertical rain.
If one end takes the weather, close that end or rotate the shelter before dark.
The wrong response is buying a bigger tarp before learning this sequence.
A bigger tarp with poor angles becomes a bigger wind target.
Verdict: Choose a lower, tighter, wind-facing setup before you blame fabric, and reinforce anchors only after the windward edge is no longer scooping air.
Common Mistakes That Break Beginner Trips
The five mistakes below share one cause.
The tarp decision happens too late.
A tarp is not difficult because the fabric is mysterious.
It is difficult because the site, weather, anchors, and trip job all arrive at once.
Across setup guides and camper discussions, the same warning keeps repeating in different forms.
People want a pitch library, but they need a setup sequence.
Mistake 1: Arriving after dark
Darkness turns small tarp mistakes into wet gear.
You miss the ground slope.
You miss the branch above the ridgeline.
You miss the shallow dip that becomes a water path.
A beginner should pitch the tarp before cooking, before organizing bins, and before inflating a sleeping pad.
That order feels strict until the first storm.
The A-frame should be standing while you still have enough light to see whether both panels shed water.
If the tarp is for a hammock, the rain fly should be centered before quilts or blankets come out.
If the tarp is for a kitchen, the runoff line should be obvious before the table is full.
Arriving after dark also pushes people toward high, loose pitches because they want fast headroom.
That is backwards for rain.
For the first setup, daylight is a piece of gear.
Mistake 2: Assuming every campsite is equivalent
No tarp setup works the same on every campsite.
Two trees that are 8 to 12 feet apart can make a compact A-frame easy.
Two trees that are far apart can turn the same tarp into a sagging roof unless the ridgeline is very tight.
Soft soil changes the stake plan.
Rocky soil changes it again.
A picnic-table tarp may need poles because the best cooking location does not line up with trees.
A hammock tarp must follow the hammock hang first, then solve rain coverage second.
The better routine is a 60-second site walk.
Look above for dead limbs.
Look below for depressions and runoff lines.
Look sideways for wind direction and likely foot traffic.
Then pick the shape.
The tarp pitch should answer the site, not the other way around.
Mistake 3: Underestimating insulation or weather-protection requirements
A tarp protects against rain and some wind.
It does not replace insulation.
This matters because beginners often talk about tarp setup as if staying dry and staying warm are the same problem.
They overlap, but they are not identical.
For ground shelter, a tarp keeps rain off the top while the ground pad and sleep system manage cold and moisture underneath.
For hammock camping, the tarp handles rain while the insulation under the hammock handles convective heat loss.
For a kitchen tarp, the tarp keeps the work area usable while clothing layers handle the cold.
Weather protection also changes with pitch height.
A high tarp gives airflow and access.
A low tarp gives storm protection.
Choose the tradeoff before you are tired.
If rain and wind are likely, protect dryness first and comfort second.
If the night is calm and warm, you can open the pitch after the shelter has already proven it drains.
Mistake 4: Buying premium gear before the first trip
Premium fabric does not fix a poor pitch.
A lighter tarp with a slack ridgeline still pools water.
A larger tarp with a high windward edge still catches wind.
A full accessory kit still fails if the stakes are placed where people walk.
Start with the parts that teach the system.
You need a tarp large enough to cover the job, cord long enough to place the ridgeline where it belongs, stakes that match the soil, and simple tension adjustment.
After that, upgrade around the problems you actually meet.
If the tarp is slow to deploy in rain, a tarp sleeve is a real upgrade.
If hammock centering is slow, a continuous ridgeline or ready rain fly setup can help.
If the kitchen tarp lacks anchors, poles and extra guylines matter more than a different fabric color.
For Onewind buyers, the product decision should come after the setup job: hammock rain coverage, tarp sleeve storage, tarp pole support, or mosquito-net overlap.
That keeps the product path clean: tarps and shelters for the roof, setup accessories for poles and tension, and a dedicated Hammock Rain Fly when the tarp's main job is hammock coverage.
That keeps gear from becoming a substitute for practice.
Mistake 5: Ignoring weather shifts on arrival day
A tarp setup is not finished when the last stake goes in.
It is finished when the site conditions stop changing.
That rarely happens on arrival day.
Rain can soften the ground and loosen stakes.
Wind can shift 45 degrees and start pushing spray under the side that looked protected at dinner.
People can create new traffic paths once coolers, chairs, and lanterns move around.
The fix is a short recheck before dark.
Walk the tarp edge that faces the weather.
Pluck or press the ridgeline to see whether it lost tension.
Look for the first water path off the fabric.
Check whether any stake is leaning or lifting.
For a hammock, stand where the wind is coming from and look across the tarp edge to the hammock body.
If you can see too much of the hammock side, lower the tarp before sleeping.
For a kitchen tarp, check where runoff lands after the first shower, not where you hoped it would land.
Onewind tarp poles, stakes, and extra guylines can support these adjustments, but the adjustment decision still comes from the site.
The Quick Decision Checklist
Use this order the first time you set up a camping tarp.
First, name the job.
Second, find the weather side.
Third, set the ridgeline or pole supports.
Fourth, stake the four corners.
Fifth, add extra side tension only after the roof sheds water.
Sixth, recheck the setup after the first wind shift or rain shower.
If you are unsure, choose the low A-frame.
It is not always the most comfortable tarp setup.
It is the most useful starting point because every later adjustment is easier to understand.
Raise it for kitchen access.
Close it for wind-driven rain.
Center it carefully for a hammock.
Replace trees with poles when the site forces you to.
For most campers, that one sequence is enough to stop guessing.
The tarp is just fabric until the geometry is right.
Once the geometry is right, even a simple tarp becomes a reliable rain plan.