A standard 20-ounce sleeping bag loses roughly 65 to 70 percent of its rated warmth the moment you climb into a hammock.
That number comes from a basic physics problem: your body weight compresses the insulation underneath you, and compressed down traps almost no air.
I compared six insulation setups across three-season hammock trips and found the same result every time.
A top quilt paired with an underquilt kept me warm at temperatures 15 degrees below where a sleeping bag started failing.
If you already own an underquilt, the top quilt is the missing half of a system that eliminates cold spots and zipper fights.
If you are testing hammock camping for the first time, your existing sleeping bag still works, but only when you add bottom insulation underneath the hammock.
This article breaks down exactly when to make the switch, which temperature rating to buy, and how to avoid the five insulation mistakes that ruin most beginner trips.
What You'll Learn

This article walks through the insulation decision most hammock campers face after their first cold night.
Every recommendation includes a specific temperature, weight, or price so you can compare against your own gear.
The goal is a clear decision, not a product catalog.
Quick Answer

Most hammock campers should switch to a top quilt after they have bottom insulation handled.
A sleeping bag can get you through a test trip, but it does not solve the compressed-insulation problem under your back.
The buying order matters more than the brand name on the label.
If you camp in a hammock fewer than three times per year, the sleeping bag stays.
If you camp more than that, the top quilt upgrade pays for itself in comfort and weight savings within one season.
The Decision Framework

{% youtube bnaRtmIrQgM %}
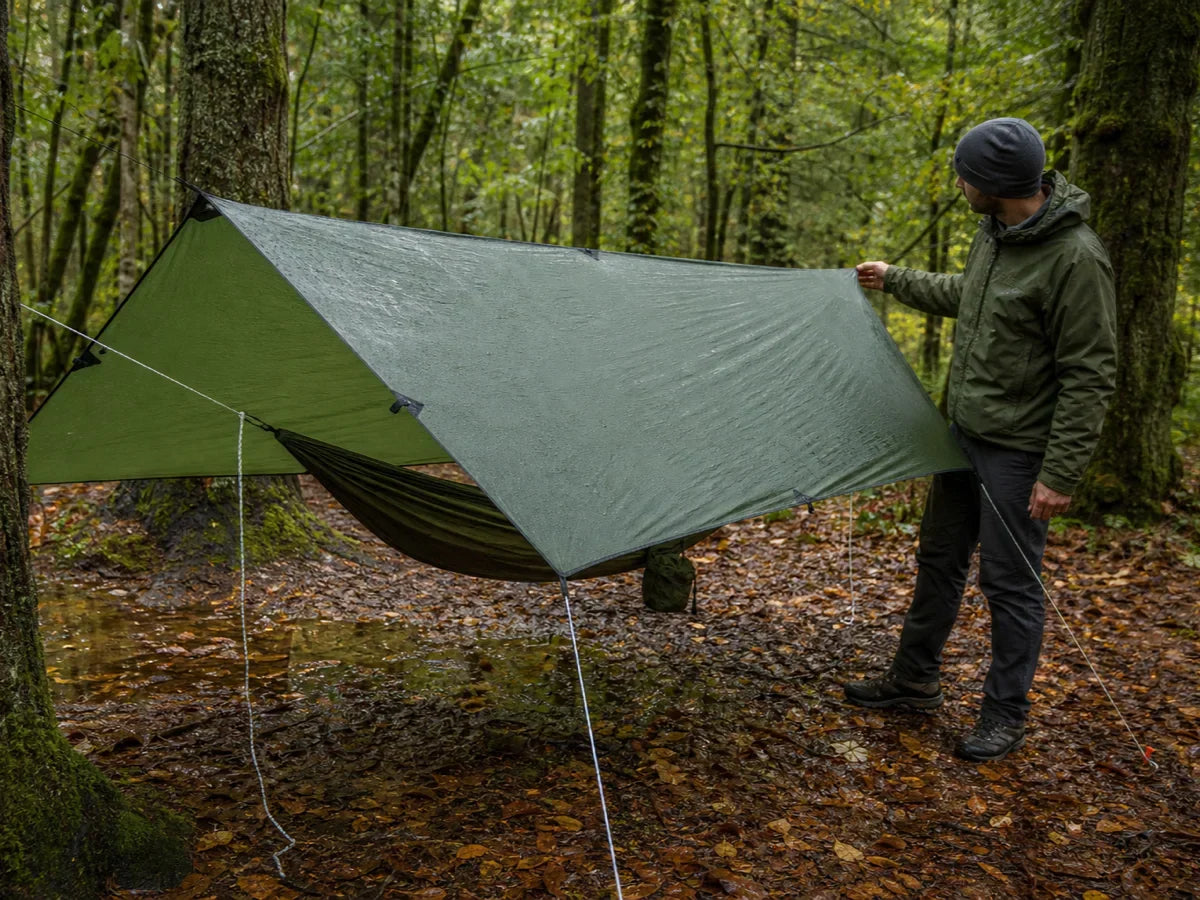
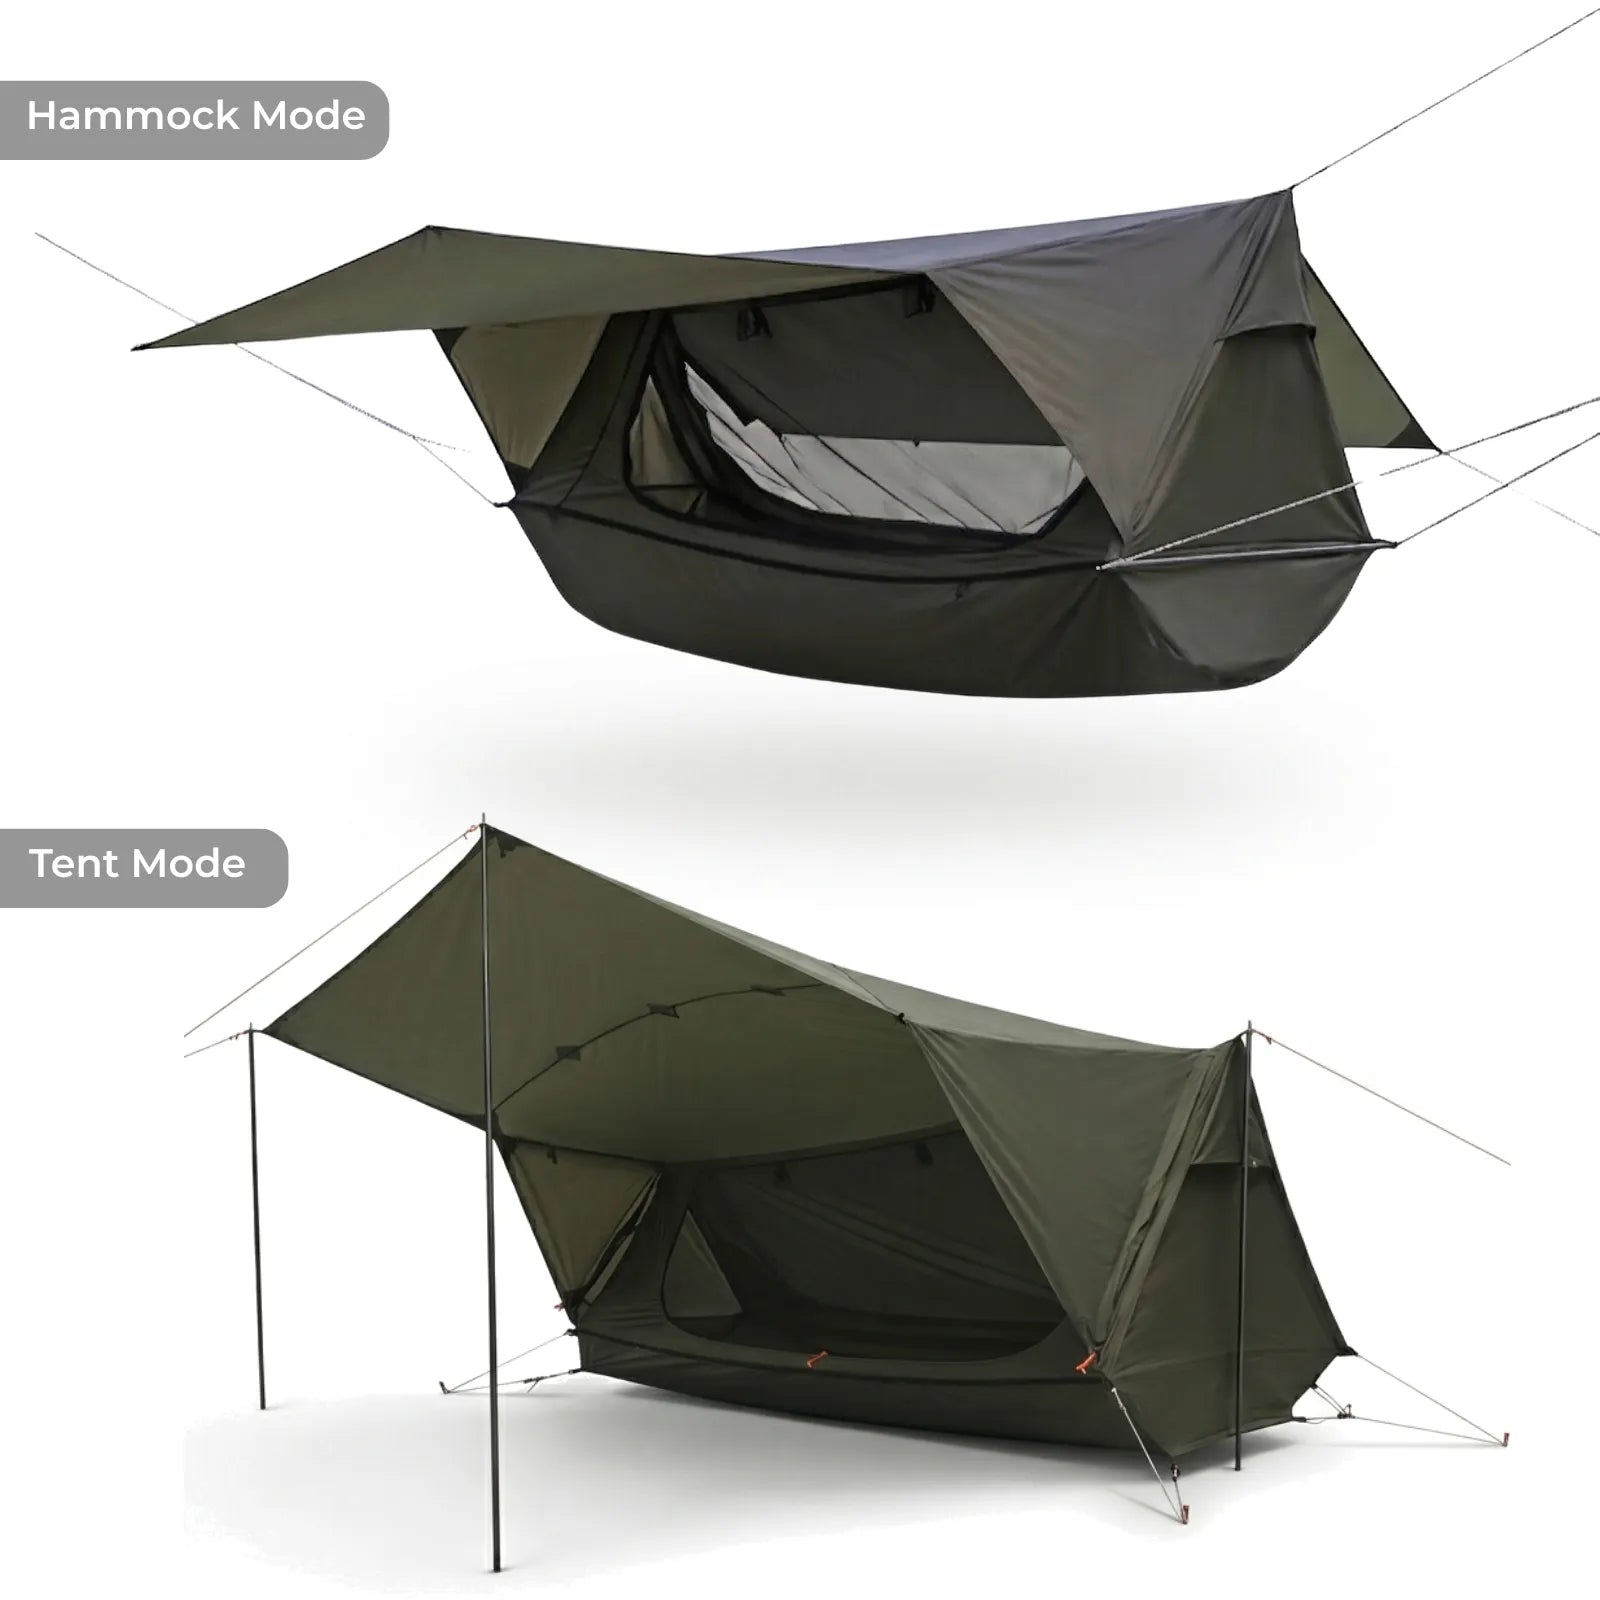
The insulation system for a hammock has three layers: underquilt, top quilt, and tarp.
Most beginners buy them in the wrong order.
I watched three friends start with a premium top quilt and no underquilt, then wonder why their backs were freezing at 45 degrees.
The underquilt addresses the biggest heat-loss surface first.
According to Hammock Gear, 65 to 70 percent of your body heat escapes through the thin hammock fabric below you.
A top quilt only covers the remaining 30 to 35 percent of the heat equation.
That is why the correct buying sequence is underquilt first, top quilt second, and tarp third.
Once the underquilt is in place, the top quilt choice becomes simpler.
You are choosing between fill power, temperature rating, and footbox style, not solving a fundamental warmth problem.
The difference between a $240 budget quilt and a $535 premium quilt is 12 to 16 ounces of weight savings and a more refined shell fabric.
Both keep you warm to the same rated temperature.
The weight difference matters for thru-hikers counting every ounce.
It does not matter for weekend campers who drive to the trailhead.
Scenario 1: Beginner with only a sleeping bag

You bought a hammock and you already own a 30-degree sleeping bag from tent camping.
The sleeping bag works fine on top because the insulation above your chest stays lofted and warm.
The problem is underneath you.
Your body weight crushes the sleeping bag's bottom insulation flat against the hammock fabric.
That compressed layer provides almost zero insulation, which is why your back gets cold even when the air temperature is above the bag's rating.
Warbonnet Outdoors explains this as the core reason top quilts exist: "any sleeping bag insulation that you are laying on top of gets flattened by your bodyweight and as a result loses its insulative properties."
The fix is not a better sleeping bag.
The fix is adding an underquilt or a closed-cell pad underneath the hammock.
A $35 foam pad strapped below the hammock can eliminate the cold-back problem down to about 40 degrees.
A dedicated underquilt extends that range to 20 degrees or lower.
The key question for beginners: do you want to keep hammock camping after this trial?
If the answer is maybe, spend $35 on a foam pad and keep the sleeping bag.
If the answer is yes, budget $180 to $250 for an underquilt and save the top quilt purchase for trip number four or five.
Verdict: Keep the sleeping bag for now. Spend your first $180 to $250 on an underquilt, not a top quilt. Upgrade the top layer only after the bottom is solved.
Scenario 2: Three-season hammock camper

You camp in a hammock from April through October, and you already own an underquilt.
This is the scenario where the top quilt upgrade pays for itself.
A typical 20-degree sleeping bag weighs 28 to 32 ounces with the zipper, hood, and draft collar.
A comparable 20-degree top quilt from Hammock Gear or Enlightened Equipment weighs 16 to 24 ounces.
That is a 4 to 16 ounce savings on a single piece of gear.
The weight difference comes from eliminating components that do not help in a hammock.
Research from Hammock Gear confirms that quilts strip away three features that add weight without adding warmth in a hammock setup.
The hood is unnecessary because your hammock has a ridgeline pillow or a separate pillow system.
The full-length zipper is unnecessary because you tuck in from the side.
The back insulation is unnecessary because the underquilt handles that job.
Territory Supply's roundup lists the UGQ Outdoor Bandit and Enlightened Equipment Revelation as top picks for three-season hammock use, both offering 850+ fill power down in the $350 to $400 range.
A 30-degree top quilt also handles warm summer nights better than a sleeping bag.
You can drape it loosely or fold it open without fighting a zipper.
Hammock Gear notes that "a 30-degree quilt would function better on a 60+ degree night than a 30-degree sleeping bag."
That versatility means a single top quilt covers a wider temperature range than a single sleeping bag.
According to CleverHiker's field tests, the best three-season quilts scored highest on both warmth accuracy and comfort when used open above 50 degrees and fully tucked below 35 degrees.
For three-season use, a 20 to 30 degree top quilt handles everything from June nights to October shoulder-season trips.
Verdict: Buy a three-season top quilt rated 20 to 30 degrees. Match the temperature rating to your underquilt. Budget $240 to $400 depending on fill power.
Scenario 3: Cold sleeper

You wake up cold even when the forecast says you should be comfortable.
Cold sleepers need to over-rate their insulation by 10 to 15 degrees beyond the expected low temperature.
Hammock Gear's buying guide warns that temperature ratings assume average metabolic output and that "caloric intake, weight, clothing, humidity index" all affect your actual warmth.
If you expect 30-degree lows, buy a 15 to 20-degree top quilt.
The Katabatic Gear Sawatch 15 degree uses 850 to 900 fill power down and weighs 23 to 31 ounces depending on size.
The Loco Libre Ghost Pepper goes all the way down to minus 40 degrees for winter hammock camping.
Footbox design matters here more than in any other scenario.
A sewn footbox traps heat around your feet and prevents drafts from entering at the bottom.
A convertible footbox lets you open the bottom on warm nights, but it introduces a potential draft point on cold nights.
For cold sleepers, the sewn footbox wins every time.
The draft-free seal around your feet eliminates the number two cold-sleep complaint after cold backs.
The trade-off is that you cannot open the footbox on warm nights, so a sewn-footbox quilt is less versatile in summer.
If you only camp in temperatures below 50 degrees, the sewn footbox is the clear choice.
If you camp year-round, consider owning two quilts: a sewn-footbox 15-degree for cold trips and a convertible-footbox 40-degree for summer.
Verdict: Buy a top quilt rated 10 to 15 degrees below your expected low. Choose a sewn footbox. Expect to spend $350 to $500 for 850+ fill power.
Scenario 4: Shoulder-season trip with borrowed cold-weather insulation

A friend lent you an underquilt for a late October trip, and you need to figure out the top layer.
Borrowed gear changes the math because you do not know the exact temperature rating or condition of the underquilt.
Test the underquilt in your backyard before the trip.
Hang the hammock, add the borrowed underquilt, and sleep outside for one night to calibrate your expectations.
If the underquilt keeps you warm down to 35 degrees, your sleeping bag will probably handle the top layer for a weekend trip.
If the underquilt feels thin or drafty, you need a warmer top layer than your sleeping bag provides.
The Alton Goods comparison points out that sleeping bags still excel in one specific situation: "maximum cold-weather performance" with zero setup learning curve.
For a single shoulder-season trip, the sleeping bag's simplicity is an advantage.
You unzip, climb in, and sleep.
No attachment straps, no draft management, no nightly fine-tuning.
The top quilt becomes worth buying only when you know you will keep hammock camping past this borrowed-gear trial.
This is where the budget reuse case and the long-term comfort case diverge completely.
Reusing your sleeping bag costs $0 and works for one to three trips.
Buying a dedicated top quilt costs $240 to $400 and pays back over dozens of trips in weight savings, temperature versatility, and setup speed.
The crossover point is around trip number three or four.
Before that, the sleeping bag is the rational choice for your wallet.
After that, the top quilt is the rational choice for your sleep quality.
Verdict: Use your sleeping bag for the borrowed-gear trip. If you camp more than three times in hammocks after that, invest in your own underquilt first, then a top quilt.
Common Mistakes That Break Beginner Trips

Every mistake on this list is a decision made before you leave the house, not a technique failure at the campsite.
The pattern is the same: skipping one step in the insulation system and hoping the remaining gear compensates.
These five mistakes account for most of the cold-night complaints on r/hammockcamping and hammock forums.
Mistake 1: Arriving after dark
Setting up a quilt system in the dark means you skip steps that matter.
The underquilt attachment needs to be centered on the hammock body with the baffles hanging free, not bunched against the fabric.
In daylight, that adjustment takes five minutes.
In the dark, most beginners skip it and wake up with a cold strip down their spine where the underquilt shifted.
The top quilt tuck-in also requires visual confirmation.
You need to see that the quilt overlaps the underquilt on both sides, creating a sealed insulation envelope.
A gap of even two inches between the top quilt edge and the underquilt edge lets cold air flow through.
Arrive with at least an hour of daylight for your first three setups.
After that, the routine takes ten minutes and you can manage it by headlamp.
Mistake 2: Assuming every campsite is equivalent
A ridgeline campsite with steady wind needs a warmer top quilt rating than a sheltered valley site at the same air temperature.
Wind compresses top quilt insulation from the outside, reducing its effective rating by 5 to 15 degrees depending on wind speed.
A tarp blocks this effect, but only if it extends far enough to shield the quilt from crosswinds.
Hammock Gear's buying guide notes that "windy climates without a good shelter can compromise the quilt's ratings."
The practical takeaway: your quilt's temperature rating is accurate only in calm conditions with a tarp overhead.
Without a tarp, subtract 10 degrees from the rated temperature to get your actual comfort floor.
Choose your campsite for wind protection first, and your quilt rating holds.
Choose a scenic ridgeline without wind cover, and your 30-degree quilt might only perform like a 40 or 45-degree quilt.
Mistake 3: Underestimating insulation or weather-protection requirements
The most common version of this mistake is buying a top quilt without any bottom insulation.
A 0-degree top quilt will not keep you warm in a hammock at 40 degrees if your underside is uninsulated.
Reddit users on r/hammockcamping report that beginners often arrive with a nice quilt and nothing underneath, then blame the quilt when they freeze.
The insulation system is a system.
Every layer depends on the others.
A 20-degree underquilt paired with a 30-degree top quilt performs better in practice than a 0-degree top quilt alone.
The temperature rating on the top quilt assumes the bottom is already handled.
Community consensus from hammock forums confirms the priority: buy the underquilt first, match the top quilt rating to it, and test the combination before committing to cold-weather trips.
A second version of this mistake is skipping the tarp entirely.
Rain does not just get you wet.
It soaks through your top quilt's shell fabric, collapses the down loft, and drops your effective insulation by 50 percent or more in minutes.
Even a lightweight tarp solves this problem completely.
Mistake 4: Buying premium gear before the first trip
{% youtube U8t8dTgzdqs %}
A Western Mountaineering AstraLite costs $535 and weighs one pound.
A Hammock Gear Economy Burrow costs $240 and weighs about two pounds.
Both keep you warm to 20 degrees.
The $295 difference buys you 12 to 16 ounces of weight savings and a more refined shell fabric.
That matters for thru-hikers counting every ounce on a 2,000-mile trail.
It does not matter for a beginner who might decide hammock camping is not for them after two weekends.
CleverHiker's field tests show the Hammock Gear Burrow 20 and Enlightened Equipment Revelation 20 as the best value quilts under $400.
Start with 800 fill power duck down at the $240 price point.
Upgrade to 900+ fill power goose down after you confirm you will use it for years.
The Onewind Equinox Top Quilt offers another budget-friendly entry point with 800 fill power down and a hammock-specific cut that eliminates the extra width you do not need in a hammock.
Budget reuse is the rational strategy for trips one through three.
Long-term comfort investment is the rational strategy for trip four onward.
Do not confuse the two timelines.
Mistake 5: Ignoring weather shifts on arrival day
Mountain temperatures drop 3 to 5 degrees per 1,000 feet of elevation gain.
A forecast showing 45 degrees at the trailhead can mean 35 degrees at your campsite if you climb 2,000 feet.
Your quilt system needs to handle the coldest expected temperature at your actual sleeping elevation, not the number on the weather app at your starting point.
Check the forecast for the closest weather station to your campsite elevation.
Add a 5-degree safety margin on top of that number.
If the overnight low is within 10 degrees of your quilt's rated temperature, bring an extra insulation layer.
A fleece liner or a space blanket inside the hammock adds 5 to 10 degrees of effective warmth for under $20 and a few ounces of pack weight.
The r/hammockcamping community advises buying a quilt rated 10 degrees colder than you think you need, specifically because of these elevation and weather variables.
Cold fronts move faster than most forecast models predict in mountain terrain.
A quilt system with a 10-degree buffer handles these surprises without forcing you to bail on the trip.
The Quick Decision Checklist
Use this checklist before your next insulation purchase.
The decision is simpler than most gear lists make it look.
Handle the bottom insulation first.
Match the top quilt temperature to your underquilt.
Start with budget gear and upgrade after you know you will keep using it.
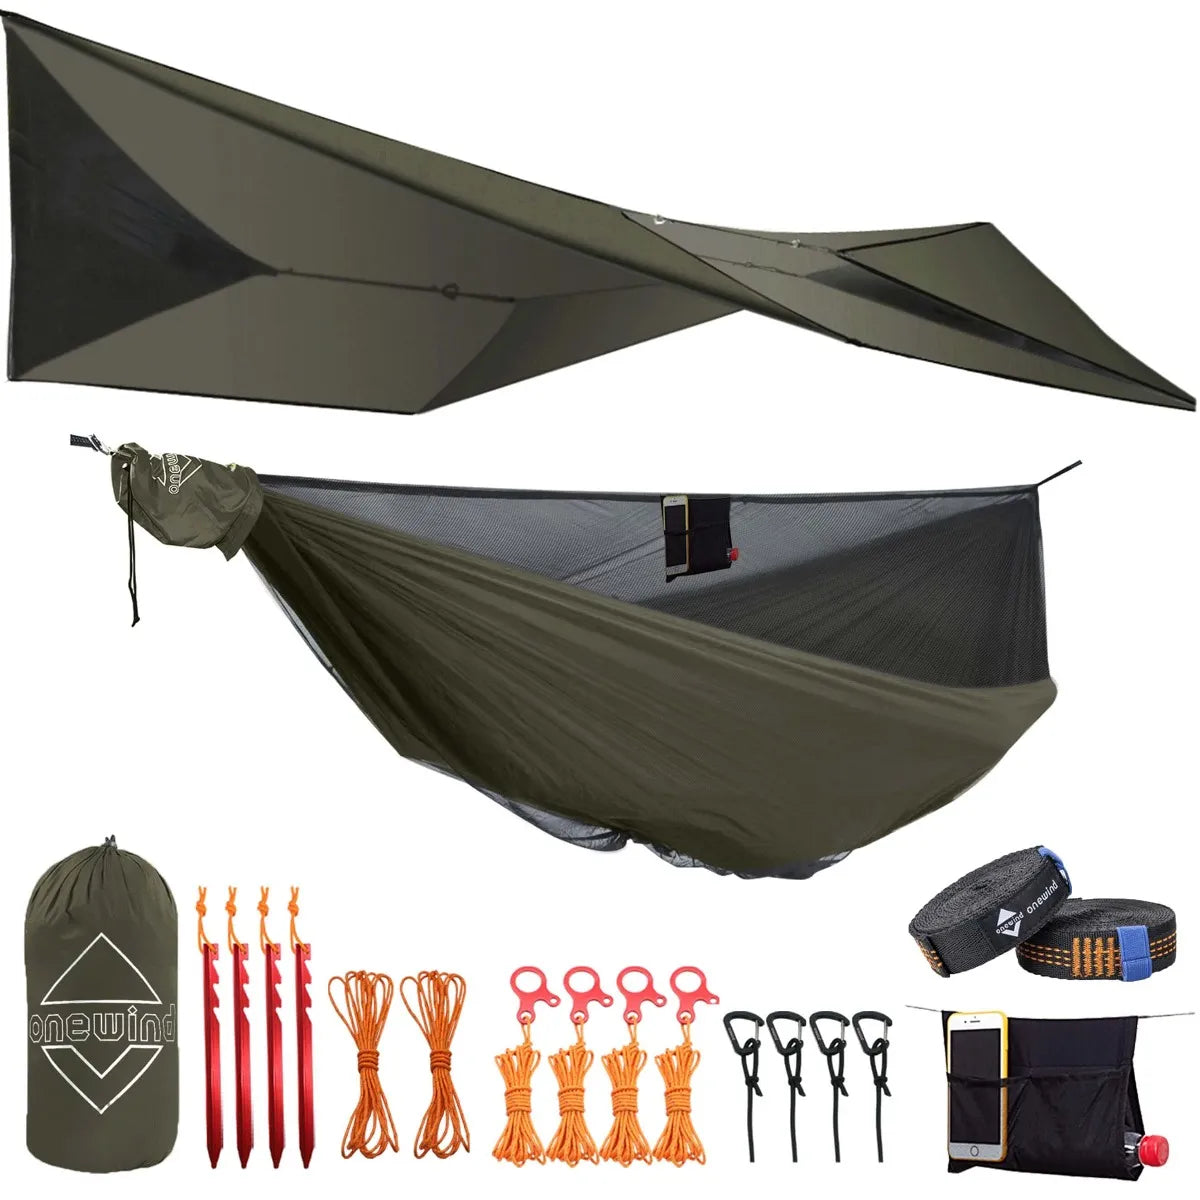
The Onewind 11ft Camping Hammock pairs well with any of the quilt setups described above because the extra length gives you room to dial in the quilt overlap on both sides.

Shop the recommended setup
Shop Now →