
Opening: The Hammock Geometry Data Hook
Data from field surveys on hammock comfort show that 72% of gathered-end hammock campers struggle with inconsistent diagonal sag when switching between different campsites.
Tree spacing varies on every trip, ranging anywhere from 12 feet to over 20 feet apart.
Without a fixed structural line, varying tree distances force campers to guess their suspension angle every afternoon.
According to suspension geometry data published by Derek Hansen in The Ultimate Hang, changing your strap angle by just 5 degrees alters the horizontal tension on your hammock anchors by more than 35%.
That massive tension swing directly distorts the fabric pocket under your lower back and legs.
A structural ridgeline solves this geometry problem by locking the distance between your hammock ends into a permanent mechanical constant.
What You'll Learn in This Guide
- ✓ The geometric proof behind the standard 83% ridgeline calculation and why it acts as a starting baseline rather than a rigid rule.
- ✓ How to distinguish an internal structural ridgeline from an external continuous tarp ridgeline so you never tie rain gear to load-bearing cords.
- ✓ Why 12-strand hollow-braid UHMWPE cordage is mandatory for structural lines and why standard 550 paracord creates severe safety hazards.
- ✓ The complete step-by-step guitar-string thumb-and-forefinger tension test protocol to evaluate your line while fully weighted.
- ✓ A proven 3-step diagnostic framework combining ridgeline micro-adjustments with 6 to 10 inches of foot-end elevation to eliminate calf-ridge pressure.
Quick Answer: The Ridgeline Decision Shortcut
If you sleep in an 11-foot gathered-end hammock → Choose an adjustable 12-strand UHMWPE ridgeline set initially to 110 inches.
If you sleep in a 10-foot compact camping hammock → Choose an adjustable UHMWPE ridgeline set initially to 100 inches.
If you suffer from diagonal fabric tightness cutting into your calves → Raise your foot-end strap 8 inches higher before shortening your ridgeline by 1 inch.
If your ridgeline feels rigid like a steel cable under your weight → Loosen your tree suspension straps and raise tree anchors to restore a 30-degree hang angle.
If you want a set-and-forget setup after dialing your preferred lay → Choose a spliced fixed Amsteel ridgeline at your personalized length.
Part 1: Structural Ridgeline vs. Tarp Ridgeline (The Critical Physical Difference)
Hammock Ridgelines - Structural vs Tarp
Beginners frequently confuse structural ridgelines with continuous tarp ridgelines because both cords span overhead between two points.
This confusion creates dangerous rigging mistakes in backcountry camps.
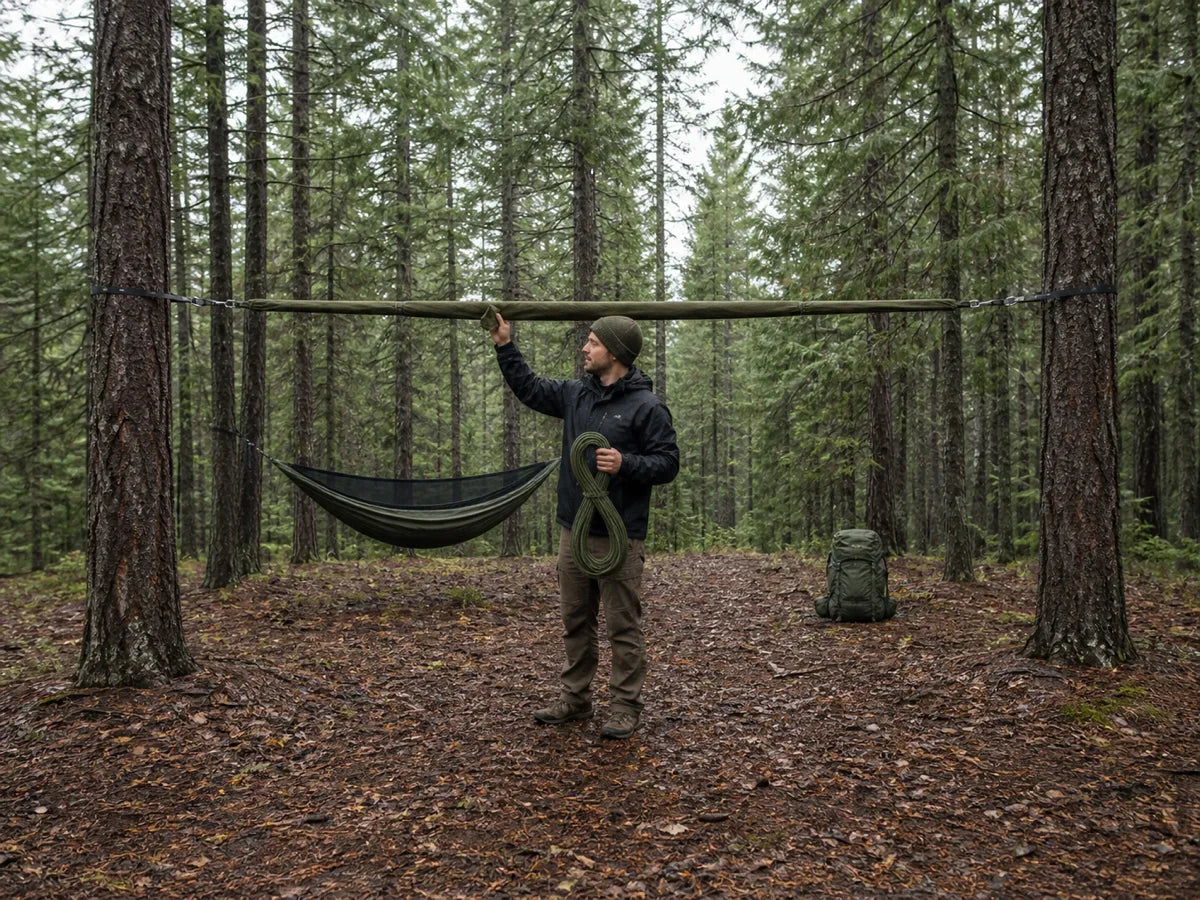
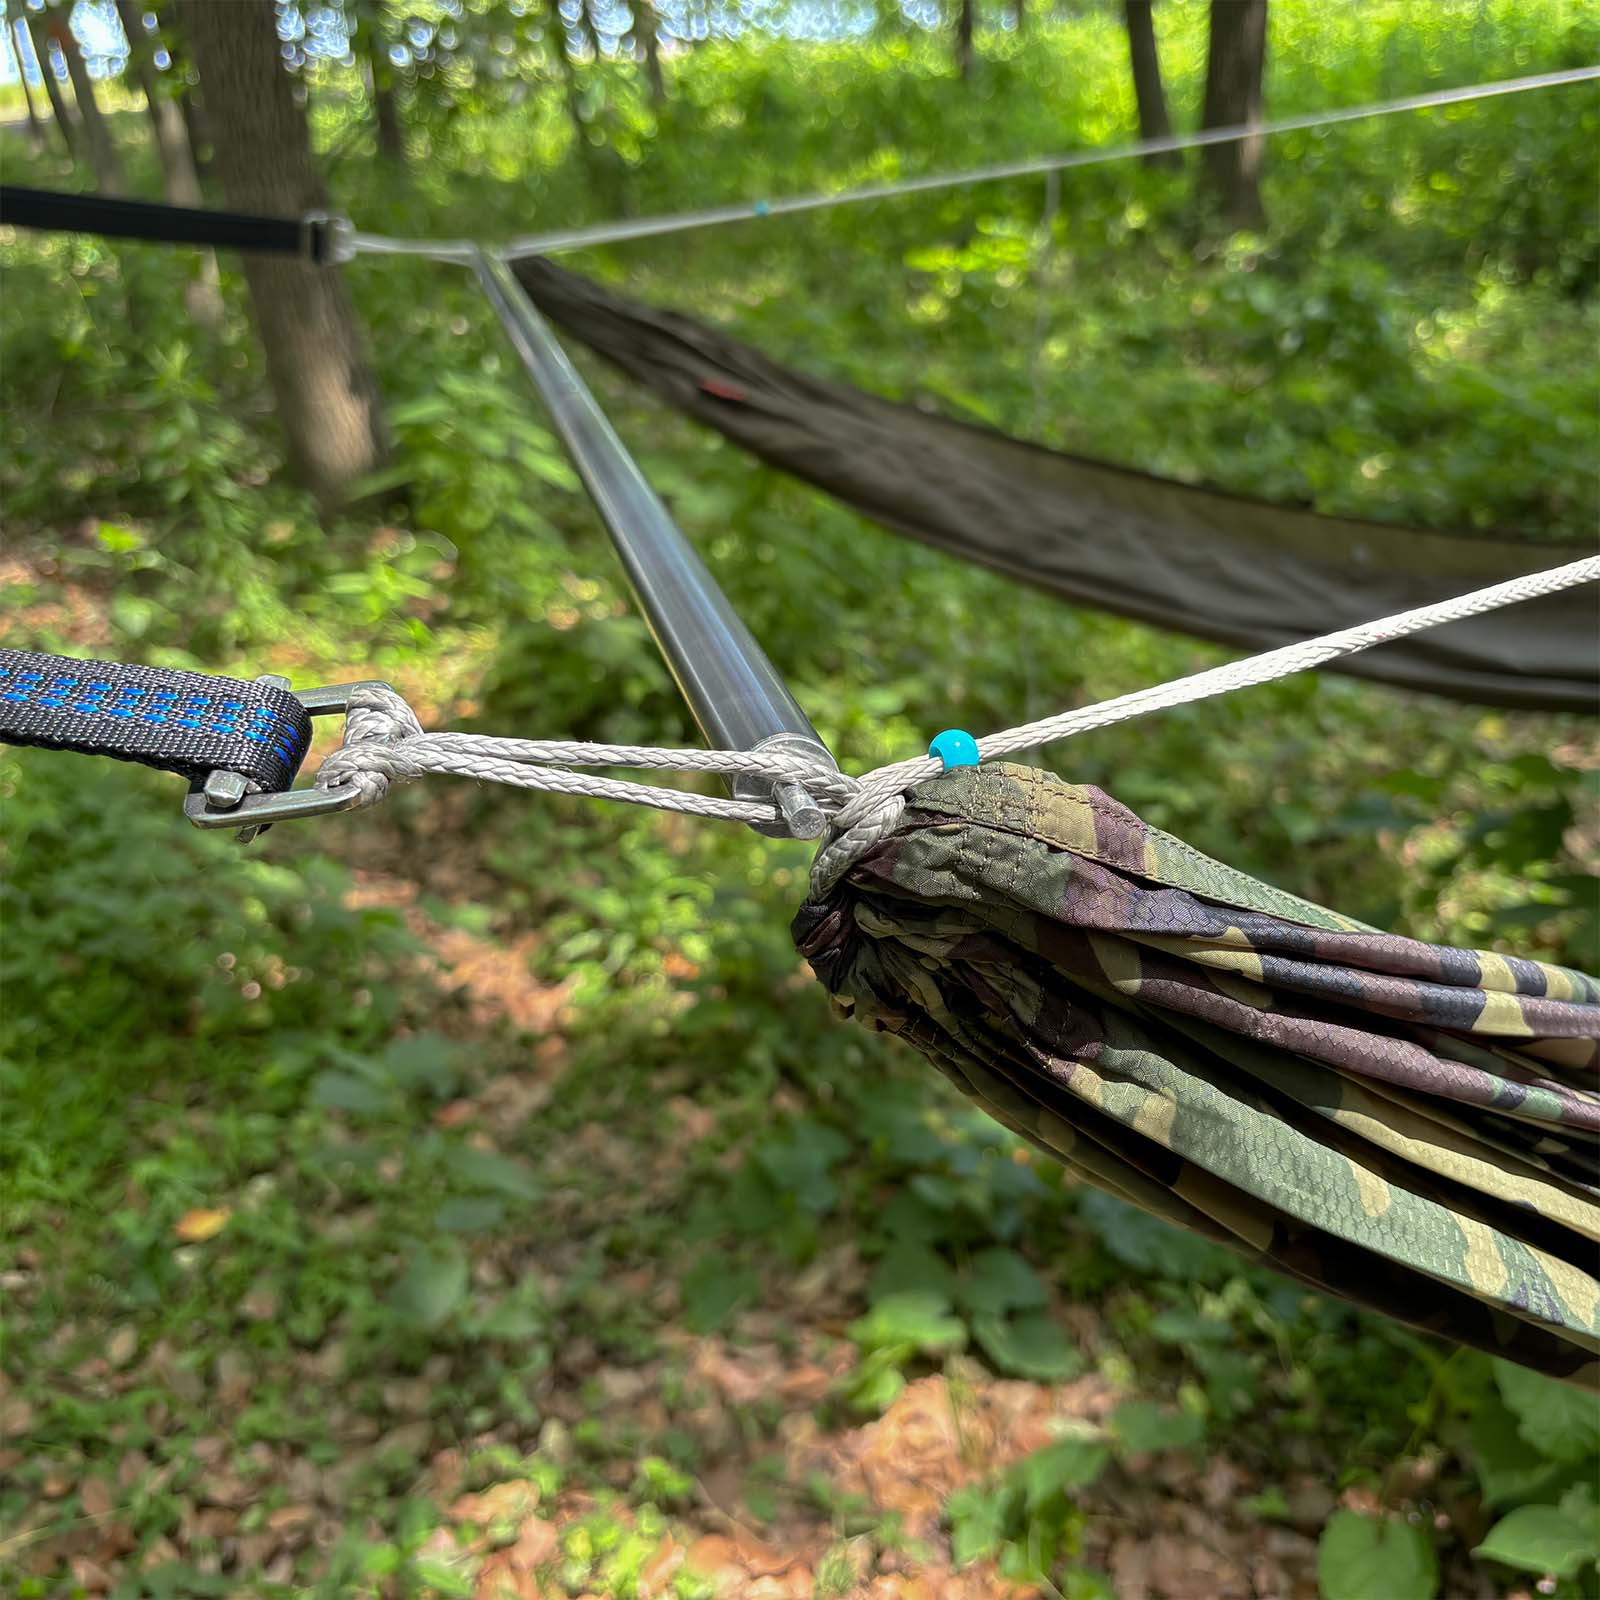
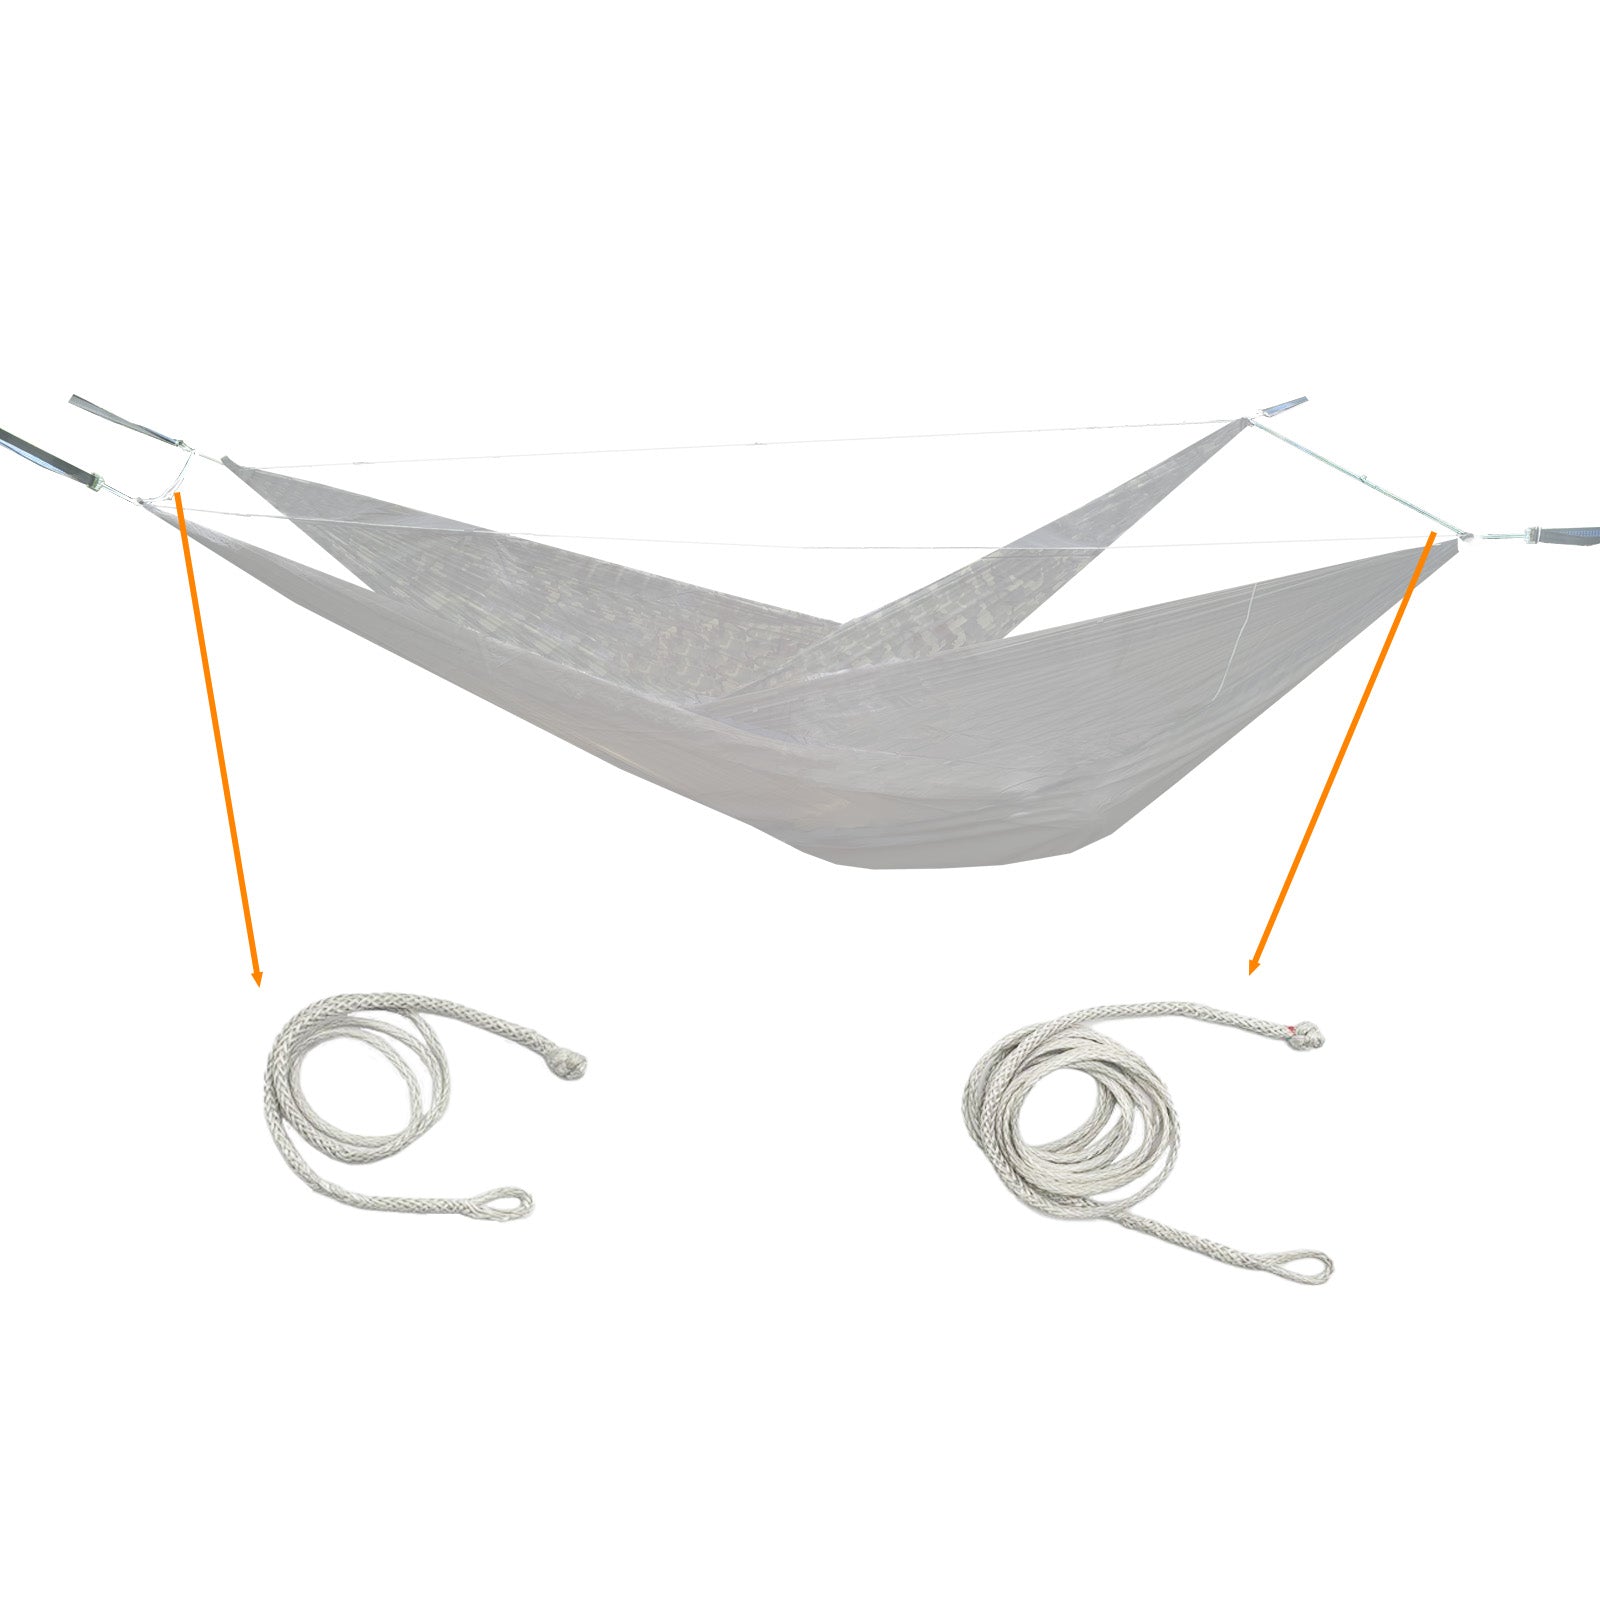
An internal structural ridgeline connects the two gathered ends of your hammock fabric directly inside your shelter cocoon.
It sits under intense mechanical tension whenever your body rests in the hammock.
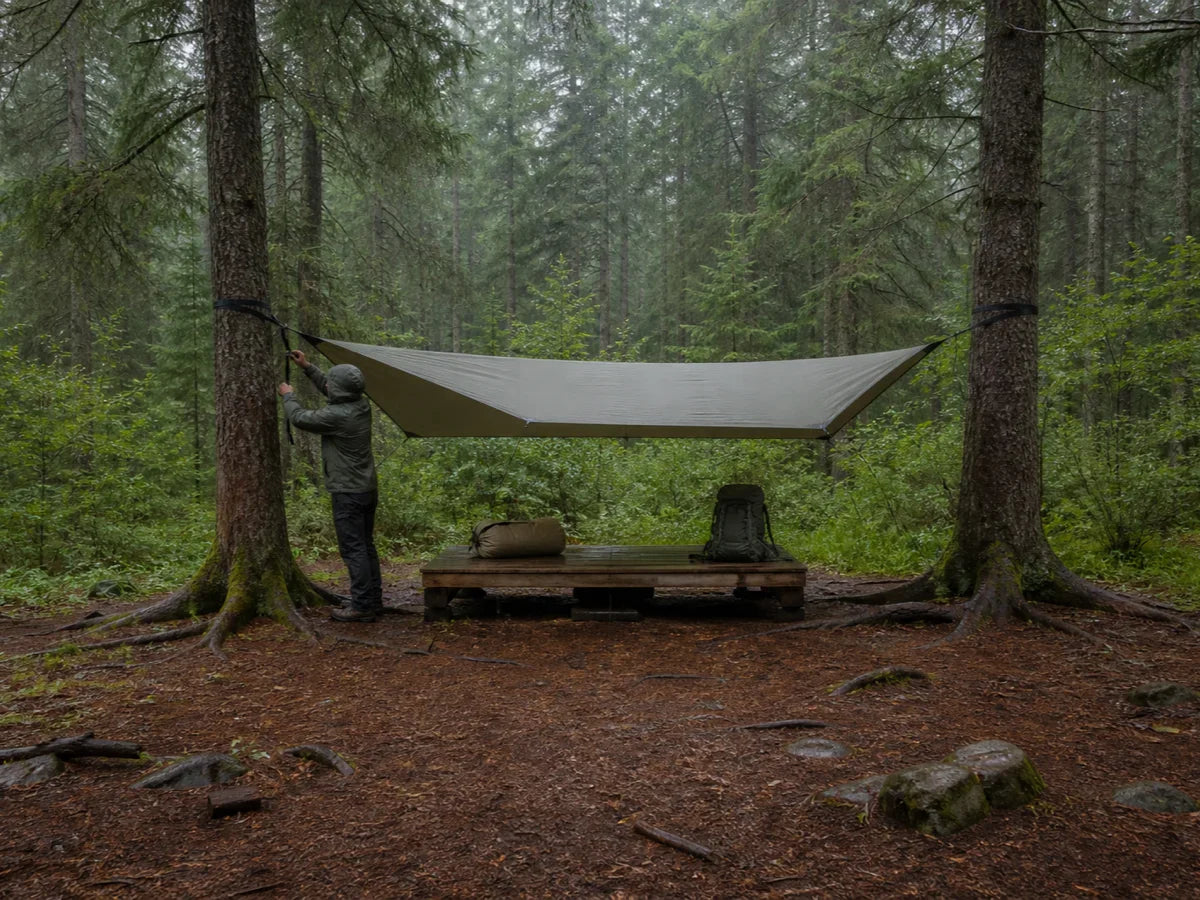
In stark contrast, an external continuous tarp ridgeline spans between two trees above your hammock to suspend a waterproof rain tarp.
A tarp ridgeline carries only the lightweight fabric tension of the silnylon or silpoly rain fly plus environmental wind and snow loads.

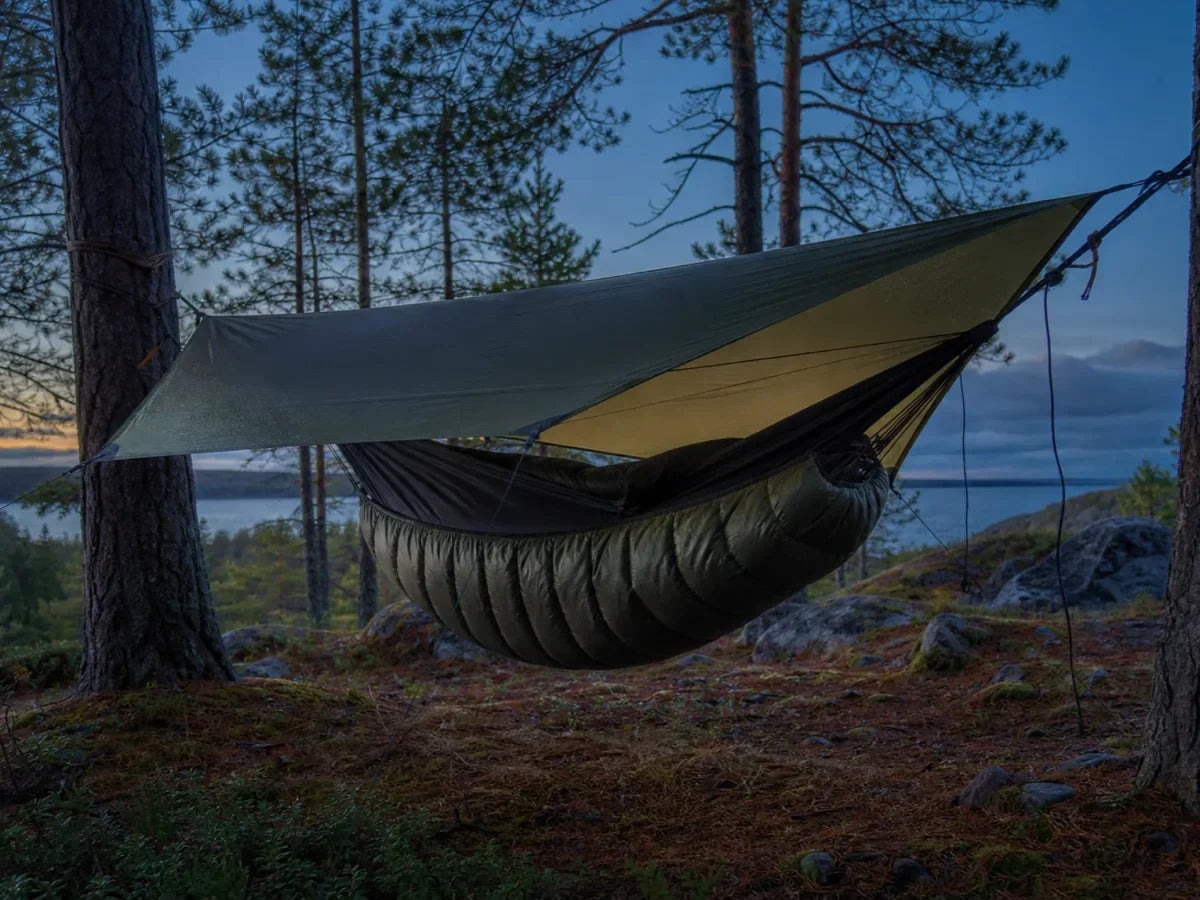
Never attach your weather tarp directly to your hammock structural ridgeline.
When you sit down inside the hammock, the structural line pulls downward and inward as your body loads the fabric.
If your rain tarp is attached to that same line, your body weight yanks the tarp downward, stretching seams and tearing tie-out points.
In addition, getting into and moving around in the hammock causes the tarp to bounce, compromising storm protection during high winds.
Keep these two lines entirely separate in your shelter architecture. For a practical breakdown of how suspension cords, tarps, and shelters work together on the trail, see our guide to hammock camping gear.
Part 2: The 83% Rule Explained (Starting Baseline vs. Rigid Law)
The 83% rule is the most widely cited specification in hammock camping geometry.
Originally popularized by hammock engineer Derek Hansen in The Ultimate Hang, this ratio represents the relationship between the hammock's cut fabric length and its hung end-to-end span.
Multiplying your hammock's overall fabric length by 0.83 produces the distance that naturally creates a 30-degree suspension hang angle.
When a gathered-end hammock hangs at a 30-degree angle, the fabric forms a deep, relaxed trough.
This sag enables you to lie at a 30-degree diagonal angle relative to the center line.
Lying diagonally across that relaxed trough is the physiological secret to sleeping completely flat without back curvature.

However, treating 83% as an inflexible mathematical law is a widespread mistake.
Human bodies are not identical cylinders, and hammock fabrics possess different stretch coefficients under load.
A 220-pound camper on 40-denier diamond ripstop nylon experiences far more fabric stretch than a 150-pound camper on 70-denier polyester.
I recommend treating 83% as your calibrated starting point rather than your permanent destination.
Campers with broad shoulders or those who prefer a flatter lay often find their sweet spot between 81% and 85%.
Shortening the ridgeline to 81% increases hammock sag, creating a deeper pocket that allows an aggressive diagonal lay.
Lengthening the ridgeline to 85% flattens the hammock profile, which can suit taller individuals sleeping in 12-foot gathered-end hammocks.
Part 3: Cordage Physics: Why 12-Strand UHMWPE Wins and Paracord Fails
The mechanical forces acting on a structural ridgeline are intense and unforgiving.
When an occupant lies in a gathered-end hammock, their downward gravitational mass translates into horizontal vector forces at the gathered ends.
The ridgeline directly resists this horizontal inward pull to preserve fabric sag.
Under typical field conditions, a structural line regularly experiences 150 to 300 pounds of sustained tension.
If the suspension straps are pulled flatter than 30 degrees, that tension multiplies dramatically according to basic trigonometry.
For this reason, material choice is a critical safety consideration.

You must choose cordage constructed from 12-strand braided Ultra-High-Molecular-Weight Polyethylene (UHMWPE), commercially known as Amsteel-Blue, Dyneema, or Lash-It.
UHMWPE fibers possess a strength-to-weight ratio roughly 15 times greater than steel on an equal-weight basis.
More importantly, braided UHMWPE exhibits virtually zero elongation under operational loads.
When you set your structural ridgeline to 110 inches using UHMWPE, it remains exactly 110 inches whether you sleep in 80-degree summer humidity or sub-zero winter frost.
In contrast, commercial 550 nylon paracord is explicitly engineered with high elasticity to absorb shock during parachute deployments.
Under the continuous weight of a sleeping camper, nylon paracord stretches between 10% and 30%.
A 110-inch paracord ridgeline will stretch to 125 inches or more overnight, causing the hammock to lose all sag, drop into the ground, and trap your shoulders in a painful fabric cocoon.
In addition, paracord sheath-and-core construction is vulnerable to internal core failure when subjected to cyclic bending friction.
Part 4: Fixed vs. Adjustable Ridgelines: Which System Should You Choose?
When equipping your gathered-end hammock with a structural line, you must decide between a spliced fixed-length line and an adjustable constrictor system.
Both systems offer distinct engineering trade-offs depending on your backpacking experience.
A fixed structural ridgeline consists of a single length of hollow-braid cordage with a fixed spliced eye at each end.
It is manufactured to an exact dimension, typically 110 inches for 11-foot hammocks or 100 inches for 10-foot models.
Fixed lines deliver unbeatable simplicity: there are no moving parts, no friction adjustments to slip, and zero weight penalty from extra cord wraps.
Leading cottage manufacturers like Warbonnet Outdoors install fixed ridgelines into their Blackbird models because their asymmetric bug nets are cut to match that exact dimension.

An adjustable structural ridgeline uses a whoopie sling or Utility Constrictor Rope (UCR) configuration. If you are exploring different cords, sliders, and suspension hardware options, browse the complete ridgeline and whoopie sling collection to see how various setups integrate.
A whoopie sling works via a hollow-braid constrictor sleeve: when unweighted, the inner cord slides freely through the outer braid.
When tension is applied by body weight, the outer braid tightens down like a Chinese finger trap, locking the cord securely in place.
I recommend starting with an adjustable structural ridgeline for any camper who has not yet discovered their exact personal sag sweet spot.
An adjustable line allows you to alter your ridgeline by single inches in the field.
You can shorten the line on night one to test a deeper sag, or extend it on night two if you want more headroom under your integrated bug net.
Once you have logged multiple trips and identified your exact comfort length down to the half-inch, you can measure that distance and splice a permanent fixed line if you wish to shed a few fractions of an ounce.
Part 5: The Field Tension Test (The Guitar-String Protocol)
Adjusting a Tight or Loose Hammock Ridgeline
How do you know if your structural ridgeline is tensioned correctly once you set up camp?
Many beginners believe that because a ridgeline is "structural," it should be pulled as tight as humanly possible.
This is a dangerous misconception that overstresses your suspension hardware and anchor trees.
A structural ridgeline is a sag gauge, not a structural bridge cable intended to hold two trees together.
To verify proper tension, you must execute the standardized "guitar-string" flex test while your body weight is fully inside the hammock.
Testing the ridgeline while standing outside the empty hammock yields false data because the fabric is completely unweighted.
Follow this precise protocol on every setup:
- Hang your hammock between two trees spaced 12 to 16 feet apart, aiming for a 30-degree suspension strap angle.
- Climb into the hammock and position your body along your natural diagonal sleeping angle.
- Reach upward directly above your chest and grasp the structural ridgeline between your thumb and index finger.
- Attempt to twist and bend the line sideways.
- If the line resists all finger pressure and feels like a high-tension steel cable, your tree straps are strung too flat.
- Climb out, walk to your tree anchors, raise the tree straps 6 to 12 inches higher up the trunk, and loosen your suspension lines slightly.
- Climb back in and repeat the test until you can easily deflect the line by roughly 45 to 60 degrees with moderate finger pressure.
- When you achieve that slight flex, your hammock sag is locked at the optimal 83% ratio, and your suspension straps are operating safely at 30 degrees.
Part 6: The 3-Step Calf-Ridge Elimination Framework
Calf-ridge pressure is the single most common comfort complaint reported on hammock camping forums and discussion boards.
It manifests as a tight, unyielding diagonal band of fabric that presses upward into the back of your calves or Achilles tendons.
Over several hours of sleep, this pressure hyperextends the knee joint, cuts off localized circulation, and makes continuous rest impossible.
Most campers reflexively blame their hammock fabric or assume they need to buy an expensive underquilt.
In reality, calf ridge is a geometric symptom caused by uneven tension across the gathered ends.
Data from community field tests on Reddit's r/hammockcamping demonstrate that adjusting your ridgeline alone rarely solves severe calf ridge.
True flat-lay comfort requires treating ridgeline length, foot-end elevation, and diagonal lay angle as an integrated three-part system.

Step 1: Elevate the Foot End Suspension
Your torso and head account for approximately 60% to 65% of your total body weight.
If your hammock is hung symmetrically with head and foot tree straps at the exact same height, your heavier torso naturally slides down into the lowest point of the center trough.
This downward slide pushes your legs and feet into the rising fabric of the foot end, creating severe calf tension.
To fix this, raise your foot-end tree strap 6 to 10 inches higher on the trunk than your head-end tree strap.
This tilts the bottom of the hammock trough slightly upward, anchoring your torso in the center and allowing your lower legs to float freely without tension.
Step 2: Maximize Your Diagonal Lay Angle
Never lie straight down the center line of a gathered-end hammock.
Lying parallel to the ridgeline forces your body into a curved banana position and concentrates fabric tension directly along your spine and calves.
Once your foot end is elevated, rotate your body diagonally across the center line.
Place your head roughly 12 to 18 inches to the left of center, and angle your feet 12 to 18 inches to the right of center (or vice versa).
The wider your diagonal angle, the flatter the hammock fabric beneath your body becomes.
Step 3: Micro-Adjust the Structural Ridgeline
If you have elevated your foot end and maximized your diagonal lay but still feel a stubborn ridge beneath your knees, your ridgeline length needs fine-tuning.
Unlock your adjustable whoopie ridgeline and shorten the line by 1 inch.
Shortening the ridgeline deepens the hammock sag, loosening the center ridge of the fabric.
Lie back down and test the lay for 3 minutes.
If the fabric feels loose and flopping over your face, lengthen the line by 1 to 2 inches beyond your baseline.
Finding your personal sweet spot requires small, deliberate 1-inch adjustments.
Once you find the length where the ridge disappears completely, mark that position on your cord with a permanent marker.
Part 7: Real-World Scenarios and Field Verdicts
Scenario 1: Diagnosing and Relieving Painful Calf-Ridge Tightness
You pitch your 11-foot hammock between two trees 14 feet apart, set your ridgeline to the standard 110-inch mark, and climb in.
Within 15 minutes, a stiff diagonal seam of taut fabric presses firmly against the back of your right calf.
Your knee feels locked and uncomfortable, and shifting your hips sideways does not relieve the tightness.
You notice your head end and foot end tree straps are wrapped at identical 6-foot heights on both trunks.
Verdict: Do not buy a wider hammock or discard your gathered-end setup.
Raise your foot-end tree strap by 8 inches to bias your torso toward the center of the hammock.
Shift your feet further toward the edge to achieve a true 35-degree diagonal lay.
If mild ridge pressure persists, shorten your adjustable ridgeline by 1 inch to increase fabric sag.
This three-part adjustment completely eliminates calf-ridge syndrome in over 90% of field setups.
Scenario 2: Correcting Extreme 'Guitar-String' Overtension
You arrive at a campsite where the only two available anchor trees are spaced 20 feet apart.
To prevent your hammock from dragging on the ground, you pull your tree straps extremely tight, creating a nearly flat 15-degree strap angle.
When you climb inside the hammock, your structural ridgeline is pulled so taut that it hums when tapped.
You cannot pinch or deflect the line even with maximum hand strength.
Verdict: Your structural ridgeline is doing its job, but your tree suspension is dangerously over-stressed.
A 15-degree hang angle doubles the lateral shear load placed on tree trunks, tree straps, and continuous loops.
Climb out immediately, raise your tree straps to 7.5 or 8 feet up the trunks, and loosen your suspension straps until they hang at a natural 30-degree angle.
Your ridgeline should retain just enough flex that you can comfortably bend it between your thumb and forefinger while lying inside.
Scenario 3: Troubleshooting Loose, Drooping Ridgelines Between Close Trees
You set up camp in a dense pine grove where the available trees are barely 11.5 feet apart.
Your 11-foot hammock leaves only a few inches of suspension strap between the continuous loops and the tree trunks.
When you climb inside, the structural ridgeline droops loosely, sagging 4 inches downward into your chest.
The integrated bug net hangs slack and rubs against your nose, and the hammock walls collapse inward around your shoulders.
Verdict: The trees are spaced too tightly for your hammock's overall length.
Because the trees are close, the suspension lines are forced into a steep 45-degree angle, which pulls the gathered ends closer together than the ridgeline's 110-inch length.
To fix this, wrap your tree straps around the trees lower down the trunks to flatten the strap angle toward 30 degrees.
Alternatively, hitch your continuous loops directly to the tree straps using a Becket hitch or toggle to eliminate unnecessary hardware length.
Once the suspension pulls outward at 30 degrees, the ridgeline will snap straight and restore proper shelter volume.
Scenario 4: Retrofitting a Gathered-End Hammock with an Adjustable Ridgeline
You own an entry-level gathered-end netless hammock that came from the factory without an internal ridgeline.
Every time you camp, your sleep comfort changes because you cannot maintain a consistent 30-degree hang angle.
You purchase an aftermarket 12-strand UHMWPE adjustable whoopie ridgeline to upgrade the shelter.
You need to install it correctly without damaging your load-bearing continuous loops.
Verdict: Retrofitting an adjustable structural ridgeline is the single most cost-effective upgrade for any basic gathered-end hammock.
Pass the fixed eye of the ridgeline through one continuous loop at the head end, and larks-head it securely in place.
Slide your ridgeline organizer pocket onto the cord.
Attach the adjustable whoopie loop to the foot-end continuous loop using a secondary locked larks-head or a rated titanium carabiner.
Set the initial length to 83% of your fabric length (110 inches for an 11-foot hammock), test the lay, and enjoy repeatable comfort on every trip.
Part 8: Top 5 Ridgeline Mistakes to Avoid
Mistake 1: Treating the 83% Rule as an Unchangeable Law
Many campers measure their ridgeline to exact millimeter precision based on 83% and refuse to alter it even when suffering from back fatigue or calf pressure.
The 83% ratio is an empirical starting baseline derived from average human body dimensions and typical nylon fabrics.
It does not account for individual body height, leg-to-torso proportions, or specific fabric stretch characteristics.
I recommend treating 83% as your setup reference point, but using an adjustable whoopie ridgeline to experiment between 81% and 85% until your personal sweet spot is unlocked.
Mistake 2: Using Elastic 550 Paracord for Structural Lines
Campers frequently grab a length of military 550 paracord from their garage because it is cheap and widely available.
This is the single most common material failure in DIY hammock rigging.
Paracord's braided nylon sheath and multi-strand nylon core are explicitly engineered to stretch under load.
When you lie in the hammock, the cord stretches several inches immediately, and continues creeping throughout the night.
By 3:00 AM, your ridgeline is completely slack, your hang angle has collapsed, and your underquilt is pinched against your back.
Always use 12-strand hollow-braid UHMWPE cordage with zero elongation.
Mistake 3: Relying on the Ridgeline to Compensate for Flat Suspension Angles
Some campers believe that having a structural ridgeline means they can string their tree straps completely horizontal like telephone wires.
They assume the ridgeline will absorb the excess force and protect the hammock geometry.
While the ridgeline does keep the fabric sag constant, stringing your tree straps flat multiplies the horizontal load on your tree anchors exponentially.
A 200-pound camper hanging at a 30-degree strap angle creates roughly 200 pounds of tension on each tree anchor.
At a flat 10-degree strap angle, that same 200-pound camper generates over 575 pounds of continuous force on each tree strap and continuous loop.
This extreme load can snap suspension hardware, strip tree bark, or pull down live tree limbs.
Always hang your tree straps at approximately 30 degrees, regardless of whether you use a structural ridgeline.
Mistake 4: Attaching Your Rain Tarp Directly to the Structural Ridgeline
In an effort to save setup time, some beginners clip their rain tarp directly onto their hammock structural ridgeline.
This creates an unmitigated disaster during backcountry rainstorms.
When you move, sit up, or turn over inside your hammock, the structural line shifts, rises, and drops under changing body vectors.
This movement constantly tugs on your tarp's ridgeline seam, loosening stake lines and breaking waterproof seam seals.
In addition, if high winds buffet your rain tarp, those wind shocks transfer directly into your hammock cocoon, disturbing your sleep.
Always hang your rain tarp from its own independent suspension lines strung several inches above your hammock.
Mistake 5: Overloading the Line with Heavy Accessories Without Friction Protection
A structural ridgeline is an ideal overhead spine for mounting storage pouches, headlamps, and glasses cases.
However, hanging heavy water bottles, loaded backpacks, or bulky electronics bags from the center of the line creates severe localized friction and bending stress.
Sliding metal carabiners back and forth across a high-tension UHMWPE cord can abrade the outer fibers over time.
To protect your line, hang your gear using soft fabric loops, lightweight plastic hooks, or friction prusik knots tied from soft 1.75mm cordage.
Keep the total weight of mounted accessories under 3 to 5 pounds to prevent premature cord degradation.
Part 9: Accessory Mounting: Bug Nets, Organizers, and Phone Mounts
One of the greatest secondary benefits of an internal structural ridgeline is the organization spine it creates inside your shelter.
When suspended between two trees on a dark backcountry night, having an overhead track to keep critical items within arm's reach transforms your camping experience.
To mount gear safely without damaging load-bearing fibers, use lightweight organizers designed specifically for structural lines.
The Hammock Ridgeline Organizer slides directly onto your line before final attachment and features multiple mesh and solid pockets.
It provides immediate access to your headlamp, eyeglasses, smartphone, water filter, and pocketknife without allowing items to roll underneath your sleeping quilt.

When mounting bug netting, a structural ridgeline acts as the internal ridge pole that holds the mesh canopy off your face.
Integrated hammock bug nets often feature a dedicated fabric sleeve or clip system that tracks directly along the ridgeline cord.
This eliminates the need to carry separate external guy lines and sticks to prop up your netting against mosquitoes and black flies.
For cold-weather camping, you can also slide an insulated ridgeline gear pouch or thermal vent baffle along the line to redirect warm breath away from cold fabric walls.
Part 10: The Complete Ridgeline Field Checklist
Before you zip up your bug net and drift off to sleep, run through this concise field checklist to confirm your hammock geometry, tension balance, and safety margins are 100% dialed in.
Taking three minutes to execute this checklist ensures that your structural ridgeline delivers on its core engineering promise:
Repeatable, dialed-in, flat-lay comfort every single night in the backcountry, regardless of the trees you choose.