According to DutchWare Gear, bridge hammocks weigh 1.5 to 3 pounds compared to roughly 1 pound for a gathered-end design.
That weight gap stops most people from ever trying one.
I compared the complete sleep system weight for both styles across five different camping scenarios, and the numbers tell a more interesting story than the hammock body alone.
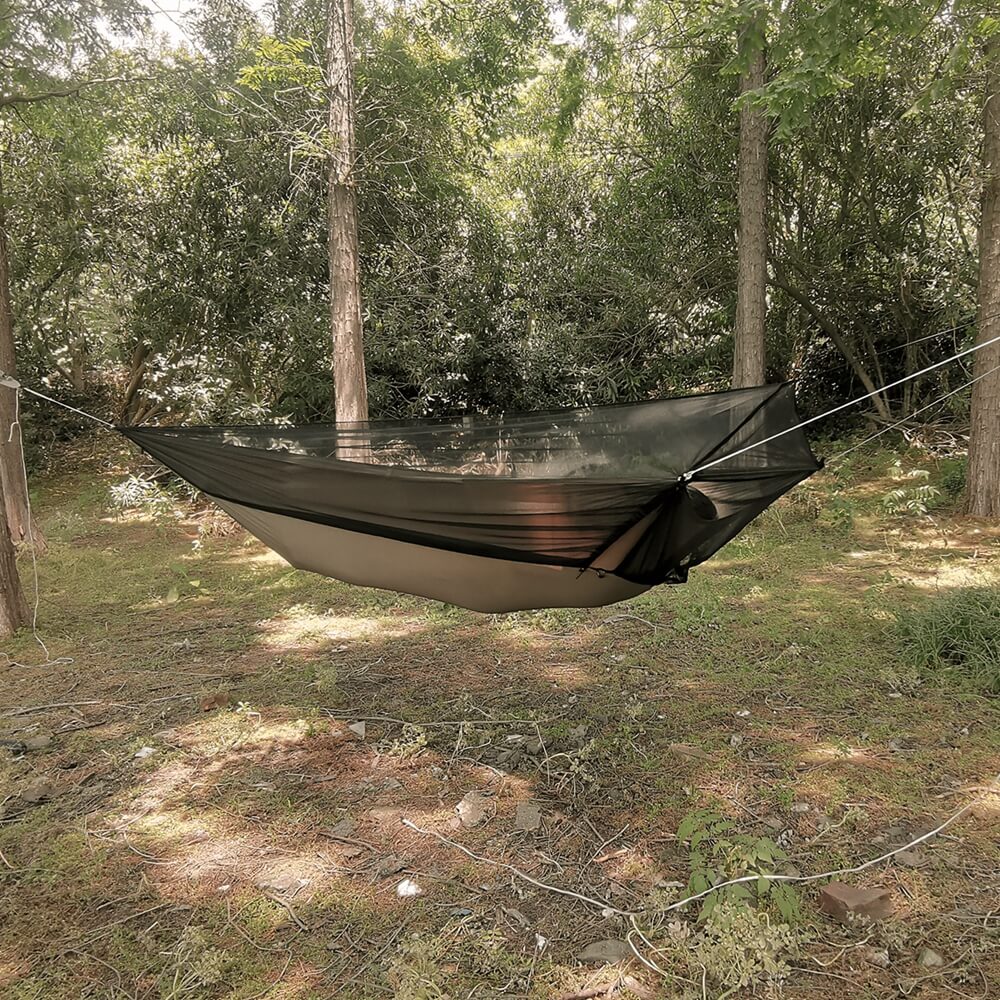
A bridge hammock gives you the flattest, most bed-like sleep you can get off the ground.
But it only makes sense if your camping style justifies the weight and cost tradeoff.
This guide skips the generic pros-and-cons list you have already read ten times.
Instead, it matches your specific camping style to the right hammock type using a concrete decision framework, then walks through the full bridge hammock system with real weight math for the entire sleep setup.
If you sleep on your back or side and wake up sore in a gathered-end hammock, the answer might be a bridge.
If you are counting grams for a PCT thru-hike, the answer is probably not.
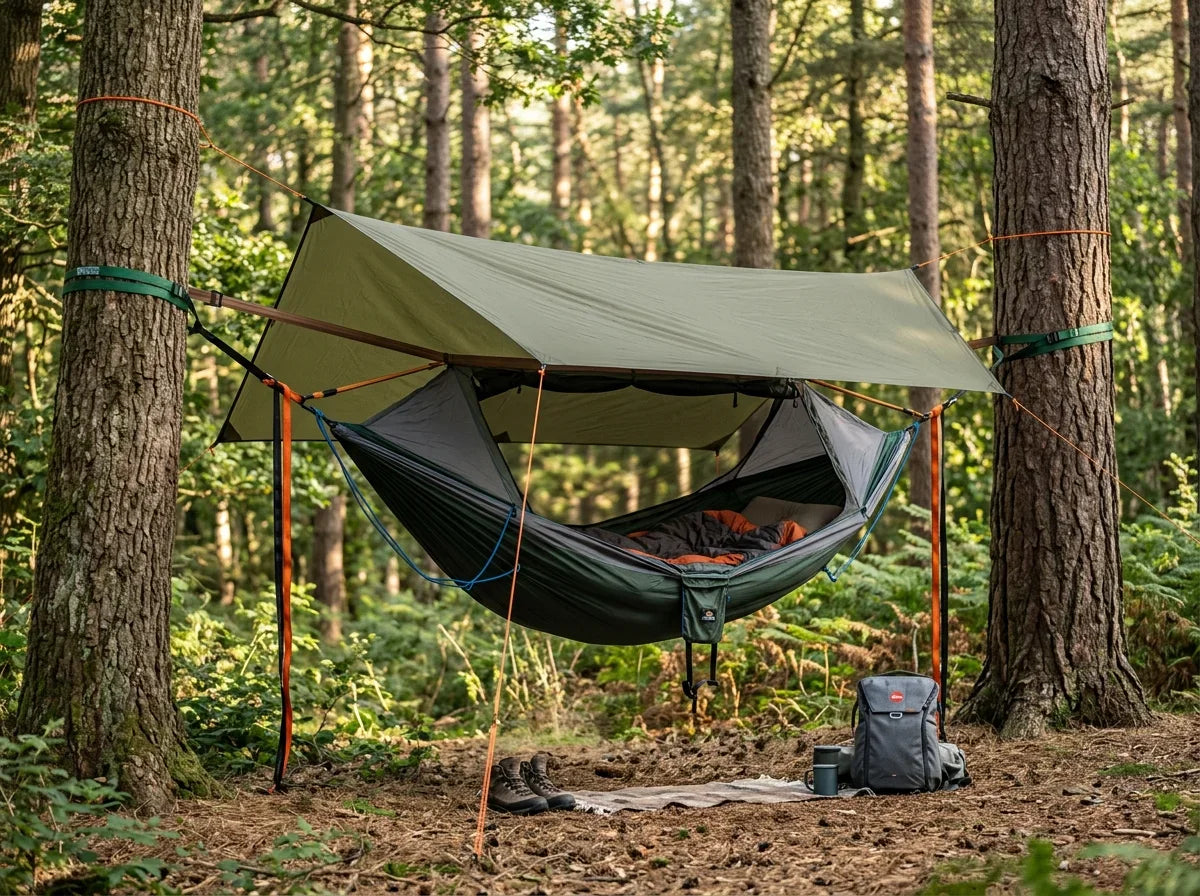
The framework below will tell you which camp you fall into. And if a bridge hammock is the right call, the setup sections will show you exactly how to build a complete system without guessing at tarp widths, spreader bar tension, or insulation compatibility.
What You'll Learn

This article covers five concrete skills. Each one maps to a section you can jump to directly.
Every scenario section ends with a bold verdict so you do not have to guess at the recommendation.
The mistake sections are bridge-hammock-specific, not generic camping advice.
Quick Answer

Here is the short version if you are in a hurry.
The rest of this article explains why each answer works and when the exceptions apply.
Read the full framework below if your situation falls between two rows.
The Decision Framework
The bridge-vs-gathered-end decision comes down to three variables: comfort priority, weight tolerance, and camping style.
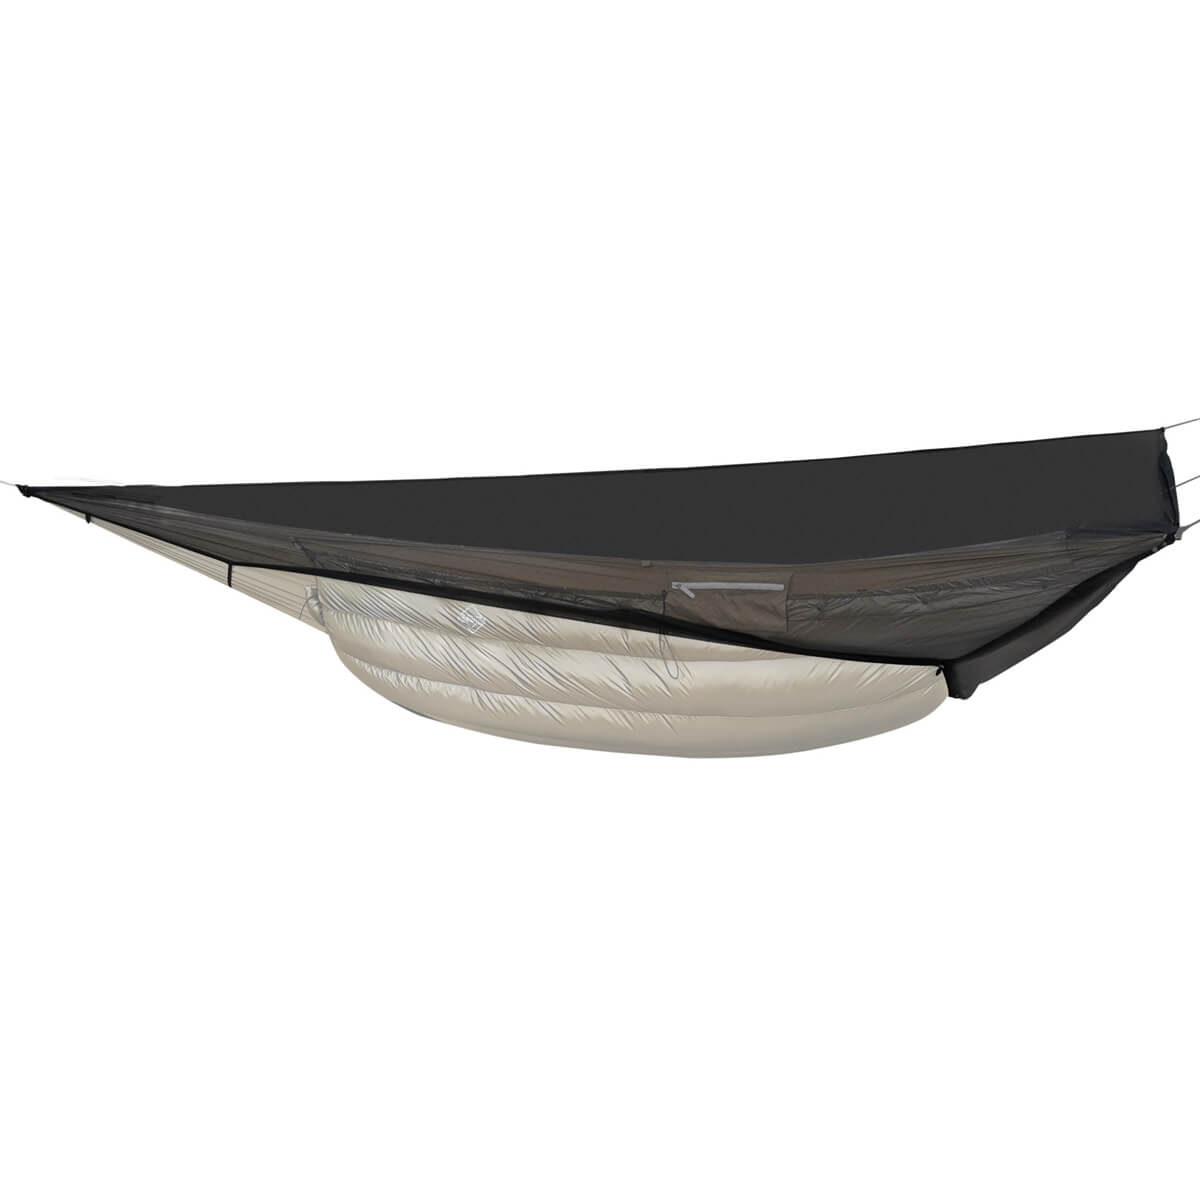
DutchWare notes that bridge hammocks use spreader bars at head and foot to hold the fabric in a rectangular shape, routing tension along the edges and dropping the center flat.
That flat center is what eliminates the banana curve.
GearJunkie's field testing of the Warbonnet Ridgerunner confirmed that the flat lay allowed comfortable side sleeping with zero diagonal adjustment needed.
CampfireHQ compared weights across four popular bridge hammock setups and found the real gap is smaller than most spec sheets suggest once you account for the full system.
Here is the framework:
The break-even point sits at sleep quality.
If comfort issues in a gathered-end hammock are costing you rest on trail, the 1 to 2 pound weight penalty of a bridge hammock pays for itself in recovery and next-day hiking performance.
Andrew Skurka's system-level comparisons reinforce this point. The weight penalty only matters in the context of your total packed system, not as an isolated number.
Scenario 1: Back or side sleeper who tried a gathered-end hammock and hated the banana curve, considering switching to bridge style.
| Sleep Position | Gathered-End | Bridge Hammock |
|---|---|---|
| Back sleeper | Diagonal lay required | Flat lay, no adjustment |
| Side sleeper | Shoulder squeeze, hip pressure | Full support, natural alignment |
| Stomach sleeper | Nearly impossible | Possible but uncommon |
You bought a gathered-end hammock, spent three nights fighting the curve, and woke up with a sore lower back every morning.
The diagonal lay technique that experienced gathered-end users recommend requires precise positioning. You tried it. Your shoulders still compressed inward.
According to GearJunkie's Ridgerunner field test, the bridge hammock flat lay allowed the reviewer to sleep on their side for the first time in a hammock without waking up at 2 AM.
DutchWare explains that the spreader bars hold the fabric taut across its full width, so your body rests on a flat plane rather than sinking into a curved pocket.
Reddit's r/hammockcamping threads show that most side sleepers who switch to bridge hammocks adjust within one or two nights, not the weeks that gathered-end diagonal positioning requires.
The r/hammockcamping community consistently backs this up. Side sleepers who switched to bridge hammocks report better sleep quality than in any gathered-end setup.
The Onewind Crystal Bridge Hammock uses this same spreader bar design at a lower price point than the Ridgerunner, making it a reasonable entry for side sleepers testing the bridge concept before committing to a premium model.
The one caveat: bridge hammocks feel "tippy" for the first few nights. That wobble disappears once you learn the entry technique and dial in your hang angle.
Verdict: If you are a side or back sleeper who has already tried the diagonal lay in a gathered-end and still cannot sleep, switch to a bridge hammock. The flat lay solves the problem that no amount of diagonal positioning can fix.
Scenario 2: Hammock camper upgrading from gathered-end and wanting to know if the comfort gain justifies the weight/cost penalty.

You already own a gathered-end hammock setup and sleep reasonably well in it. The question is whether the comfort upgrade is worth carrying an extra pound or two.
Here is where most comparison articles mislead you. They compare hammock body weights in isolation.
I compared full system weight data from manufacturer specs instead.
The real system-level penalty is 1.0 to 1.4 pounds, not the 2-pound gap that hammock-body-only comparisons suggest.
Best Camping Hammock Gear's analysis confirms this pattern. The bridge hammock body is heavier, but the rest of the system stays roughly the same.
DutchWare's Banyan Bridge bars weigh only 6.4 oz total. Warbonnet's Ridgerunner bars run 12 oz. Your bar choice shifts the gap significantly.
For weekend trips and car-accessible camping, 1.0 to 1.4 extra pounds is barely noticeable in a pack.
For multi-day backpacking, it depends on whether your current gathered-end sleep is genuinely costing you energy.
Verdict: If you sleep well in your gathered-end hammock already, the upgrade to bridge is a luxury, not a necessity. If you wake up stiff and underslept, the 1.0 to 1.4 lb system penalty is a reasonable price for real rest.
Scenario 3: Cold-weather hammock camper looking for better sleeping pad integration for 3-season or winter use.
Bridge Hammock Insulation Options // Avoid Cold Butt Syndrome!!!

Cold-weather hammock camping has one persistent problem. Your sleeping pad slides around inside a gathered-end hammock every time you shift position at night.
In a bridge hammock, the flat lay keeps your pad stationary.
GearJunkie's testing placed a standard 20-inch-wide closed-cell foam pad in both hammock types and rolled side to side. In the gathered-end, the pad shifted 3 to 4 inches with every roll. In the bridge hammock, it stayed put.
HammockForums users who camp below 30 degrees F consistently identify pad stability as the single biggest advantage of bridge hammocks in cold conditions.
The flat surface also changes how underquilts attach. On a gathered-end hammock, the underquilt wraps around the curved bottom, and cold spots develop at the edges where the quilt gaps. On a bridge hammock, the quilt hangs under a flatter surface, creating more consistent coverage.
According to Best Camping Hammock Gear, bridge hammocks work better with both pad-based and quilt-based insulation because the flat lay removes the variables that make insulation tricky in gathered-end designs.
For 3-season use (temps above 40 F), a sleeping pad alone handles insulation in a bridge hammock.
For winter camping below freezing, the combination of an underquilt and a pad inside the bridge hammock creates a layered insulation system that stays in place all night.
The Onewind equinox down topquilt pairs with bridge hammocks well because the flat lay prevents the quilt from sliding off your body the way it can in a gathered-end.
Verdict: If cold-weather performance is your main concern and your sleeping pad keeps sliding in your current gathered-end setup, a bridge hammock fixes the problem. The flat lay makes both pad and underquilt insulation more reliable.
Scenario 4: Beginner choosing between bridge hammock and tent, needing a fair comparison of comfort, setup complexity, and total system weight.

You have never hammock camped and want to know if a bridge hammock is a good first shelter.
The honest answer depends on where you camp.
Andrew Skurka's hammock-vs-ground comparisons make a point that most hammock articles skip. Hammocks require two well-spaced trees. Tents work anywhere flat.
If you camp in forests with reliable tree coverage (Appalachian Trail, Pacific Northwest, Great Smoky Mountains), a bridge hammock works in nearly every campsite.
If you camp above treeline, in desert terrain, or in open meadows, a tent is the only option.
I compared total system weights for a beginner-level setup in both categories.
A bridge hammock system weighs about the same as an ultralight tent system.
The comfort difference is dramatic. A bridge hammock gives you a flat, elevated sleeping surface with no ground moisture, no rocks under your back, and no condensation inside a tent shell.
Setup complexity is higher for a bridge hammock. You need to find the right tree spacing (12 to 15 feet), set the correct hang angle, and learn the entry technique.
SectionHiker places bridge hammocks at the more complex end of the hammock design spectrum, noting that beginners may find the initial learning curve steeper than a gathered-end.
Verdict: If you camp in forested terrain and want the most comfortable sleep possible off the ground, a bridge hammock is worth the learning curve. If you camp in varied terrain or want the simplest possible setup, start with a tent or a gathered-end hammock first.
Scenario 5: Ultralight backpacker evaluating whether a bridge hammock can fit their weight budget with trekking-pole spreader bar substitution.
What is the best type of hammock for camping? | Gathered End vs. Bridge
You already carry trekking poles. The question is whether using them as spreader bars makes a bridge hammock light enough for thru-hiking.
Warbonnet sells a trekking pole adapter kit for the Ridgerunner that eliminates the dedicated spreader bars entirely.
The stock Ridgerunner bars weigh 12 oz. Removing them and using your existing trekking poles saves that 12 oz from your base weight.
GearJunkie's review confirmed the trekking pole setup works, though the reviewer noted the poles need to be the right length (approximately 48 inches) and the connection points must be secure to avoid the tippy feel getting worse.
I calculated the weight comparison with trekking pole substitution.
A Ridgerunner body in 30D fabric weighs 11.75 oz. With trekking pole adapters instead of bars, the hammock-specific weight drops to roughly 13 oz total (body plus adapters).
Add suspension (8 oz), a wider tarp (28 oz), and an underquilt (20 oz), and your complete system hits about 69 oz, or 4.3 pounds.
A comparable gathered-end system (hammock body, suspension, standard tarp, underquilt) runs about 66 oz, or 4.1 pounds.
The gap shrinks to 3 oz.
For that 3-oz penalty, you get a flat lay and stable pad platform.
The tradeoff: your trekking poles are committed to your shelter at camp. You cannot use them for anything else once the hammock is hung.
The Onewind Crystal Bridge Hammock offers another entry point for ultralight experimentation with bridge design at a lower cost than the Ridgerunner.
Verdict: If you carry trekking poles and can use adapters, a bridge hammock adds only 3 oz over a gathered-end system. That makes it viable for thru-hiking. But if your poles are too short or you need them free at camp, stick with gathered-end.
Common Mistakes That Break Beginner Trips
| # | Mistake | Fix |
|---|---|---|
| 1 | Wrong tarp width | 12 ft minimum ridgeline |
| 2 | Hang angle too tight | 30-degree sag angle |
| 3 | No insulation | Underquilt below 55°F |
| 4 | Overspending on first setup | Start under $200 |
| 5 | Trees too close | 12-15 ft spacing |
Every mistake on this list happens before you climb into the hammock.
They are gear-selection and setup decisions, not technique failures. GearJunkie and DutchWare both emphasize that bridge hammock problems are almost always caused by wrong equipment choices, not by the bridge design itself. Best Camping Hammock Gear confirms that beginners who match their gear to bridge hammock requirements avoid most first-trip frustrations.
Mistake 1: Using a gathered-end tarp that's too narrow for a bridge hammock

Your 11-foot gathered-end tarp worked fine before because a gathered-end hammock narrows at the ends.
A bridge hammock stays wide at both ends because the spreader bars hold it open.
That extra width means rain blows in from the sides if your tarp does not extend far enough.
DutchWare recommends a tarp at least 12 feet wide for bridge hammock coverage. Some campers in exposed sites prefer 13 feet or more.
DutchWare's tarp guide shows the exposed gap on a standard 11-foot tarp over a bridge hammock with 24-inch spreader bars. The tarp leaves 6 inches of hammock fabric uncovered on each side.
In light rain, that is manageable. In wind-driven rain, you get soaked.
The fix is simple. Buy a wider tarp before your first bridge hammock trip, or accept that your existing tarp only works in dry conditions.
The Onewind tarp 12x10 covers a bridge hammock with room to spare, and the 14x10 handles exposed ridgeline camps where wind-driven rain is the norm.
Mistake 2: Hanging the spreader bars too tight (causes the tippy feeling)

The "tippy" or wobbly feeling is the number one complaint from first-time bridge hammock users.
HammockForums threads are full of beginners asking why their bridge hammock feels like it is going to flip.
The answer is almost always the same. The spreader bars are too tight.
When you tension the suspension lines until the hammock fabric is drum-tight between the bars, the whole system becomes unstable. Any shift in body weight tilts the hammock laterally.
The fix: allow a gentle sag in the center. The 30-degree hang angle rule still applies to bridge hammocks. Your ridgeline should have a slight curve, not a straight line.
Reddit's r/hammockcamping community reports that the tippy feeling disappears for most users within two or three nights once they learn the right tension.
HammockForums users report that loosening the suspension by about 2 inches on each side eliminates the wobble entirely on a Ridgerunner setup.
Do not overtighten. A bridge hammock is supposed to sag slightly in the center. That sag is what creates the flat sleeping surface.
Mistake 3: Skipping insulation because "the pad stays flat anyway"
| Temperature | Insulation Needed | Setup |
|---|---|---|
| Above 70°F | None | Hammock + top sheet |
| 55–70°F | Sleeping pad | Pad stays flat in bridge |
| 35–55°F | Underquilt + pad | Dual insulation layer |
| Below 35°F | Full system | Underquilt + pad + top quilt |
Bridge hammock marketing emphasizes that sleeping pads stay flat and do not slide.
That is true.
But some beginners interpret "pad-friendly" as "insulation-optional."
A sleeping pad alone works down to about 40 to 45 degrees F. Below that, you need bottom insulation.
The air beneath a bridge hammock circulates just like it does under a gathered-end. Cold air strips heat from the bottom of the hammock fabric regardless of how flat your pad sits.
Best Camping Hammock Gear notes that bridge hammock users in cold weather need an underquilt rated to the expected low temperature, not just a pad.
One HammockForums user reported camping at 35 degrees F in a bridge hammock with only a closed-cell foam pad. By midnight, their lower back was cold enough to wake them up.
Adding a 40-degree underquilt underneath the hammock solved the problem completely.
The pad keeps you comfortable on top. The underquilt blocks convective heat loss underneath. You need both below 40 F.
Mistake 4: Buying the most expensive bridge hammock before your first night out

The Warbonnet Ridgerunner, DutchWare Banyan, and Jacks R Better James River are excellent bridge hammocks.
They also cost $130 to $250 for the hammock body alone, before you add spreader bars, tarp, suspension, and insulation.
A complete premium bridge hammock system can run $400 to $600.
If you have never slept in a bridge hammock, spending that much before your first night is a gamble.
A portion of first-time bridge hammock buyers switch back to gathered-end within the first month, according to HammockForums threads. The most common reason is setup complexity, followed by the tippy feeling. A smaller group discovers they actually preferred the gathered-end cocoon effect.
CampfireHQ's bridge hammock roundup confirms the wide price range and recommends beginners start with a mid-range option to test the concept.
The Onewind Crystal Bridge Hammock sits at a lower price point than the Ridgerunner or Banyan, making it a lower-risk way to test bridge hammock sleeping before committing to premium gear.
Try one night in a bridge hammock. If you love it, upgrade components over time. If you do not, you have not lost $500.
Mistake 5: Setting up between trees that are too close together
| Tree Spacing | Gathered-End | Bridge Hammock |
|---|---|---|
| 8–10 ft | Tight but works | Too close — bars hit trees |
| 10–12 ft | Ideal | Minimum workable |
| 12–15 ft | Works fine | Ideal range |
| 15–20 ft | Long straps needed | Long straps needed |
Gathered-end hammocks work with tree spacing as tight as 10 feet.
Bridge hammocks need 12 to 15 feet between anchor points.
The spreader bars add width at both ends, and the suspension geometry requires a longer span to achieve the right hang angle.
DutchWare explains that too-short tree spacing forces the hammock into a steep hang angle that makes the tippy problem worse and compresses the flat lay into a shallow V shape.
I set up a bridge hammock between trees 10 feet apart and the result was unusable. The bars were nearly vertical, the fabric bunched in the center, and the hammock rocked violently with any movement.
Moving to trees 13 feet apart solved every problem.
Before your first bridge hammock trip, scout your campsite for tree pairs with 12 to 15 feet of spacing and trunks at least 6 inches in diameter.
The Onewind 11-ft camping hammock works with tighter tree spacing if your campsite does not support a bridge setup, giving you a gathered-end backup option.
If your favorite campsite has closely spaced trees, a bridge hammock may not be the right choice for that specific location.
The Quick Decision Checklist
Run through this checklist before you order a bridge hammock. Each item is a yes-or-no gate.
If you checked yes on five or more items, a bridge hammock is likely the right choice for your camping style.
If you checked yes on three or fewer, a gathered-end hammock or tent is the lower-risk option.
The decision is not permanent. Many hammock campers own both types and choose based on the trip. A gathered-end for ultralight thru-hikes. A bridge for weekend comfort camping. The right tool depends on the specific trail ahead of you.