Une tente bivouac se trouve dans l’espace étroit entre deux abris familiers.
Il offre au campeur solo davantage de structure, de dégagement en maille et de protection contre les intempéries qu’un sac de bivouac plat.
Il ne crée toujours pas l’espace pour s’asseoir, le rangement dans le vestibule ni le confort par temps de pluie prolongé d’une tente pour une personne.
C’est la décision dans son intégralité.
Choisissez une tente bivouac lorsque le voyage récompense un abri compact axé sur le sommeil et que vous souhaitez que le tissu reste éloigné de votre visage.
Choisissez quelque chose de plus grand lorsque le confort au camp, la protection du matériel ou plusieurs nuits humides comptent davantage qu’un profil discret.
Ce que vous apprendrez
- ✓ Décidez si une tente bivouac est une véritable amélioration par rapport à un sac bivouac plat pour vos voyages.
- ✓ Savoir quand une bâche doit encore être installée au-dessus d’un abri à structure basse.
- ✓ Utilisez un processus de configuration en 6 étapes avant la première nuit humide.
- ✓ Comparez le Solo Skyshade Tartent et le SoloVent sans considérer l’un ou l’autre comme un remplacement universel de tente.
Vous n’obtiendrez pas une liste de produits générique.
Vous recevrez un champ de décision.
La question utile n’est pas « une tente bivy sack est-elle vraiment une tente ? »
La question utile est : « quel problème suis-je en train d’essayer de résoudre par rapport à un bivouac normal ? »
Si la réponse est un dégagement au niveau du visage, une moustiquaire anti-insectes, une entrée plus rapide et une forme de couchage plus stable, la catégorie peut avoir du sens.
Si la réponse consiste à changer de vêtements à l’abri, ranger un sac à l’intérieur, cuisiner par mauvais temps ou attendre une tempête assis, un abri plus grand est le choix le plus judicieux.
Selon les catégories de test de bivouac d'OutdoorGearLab, les critères de performance utiles sont la protection contre les intempéries, le confort, l’encombrement une fois plié et la ventilation.
Ce cadre de référence est utile, car une tente bivouac peut améliorer le confort et le contrôle de la ventilation sans résoudre automatiquement tous les problèmes liés aux intempéries ou au rangement.
Réponse rapide
Une tente-sac de bivouac est idéale pour les courts voyages en solo où l’espace de couchage compte plus que l’espace de vie.
C’est une meilleure solution qu’un sac plat lorsque le dormeur n’aime pas le tissu près du visage, veut une séparation en maille contre les insectes ou souhaite un abri qui conserve sa forme sans l’encombrement d’une grande tente.
C’est une mauvaise réponse lorsque le campeur veut vraiment une petite chambre de tente.
Les abris bas récompensent une installation disciplinée.
Ils sanctionnent les attentes vagues.
Le cadre de décision
Commencez par le volume de l’abri.
Une tente vous offre de l’espace autour du corps.
Un sac de bivouac vous offre du tissu autour du système de couchage.
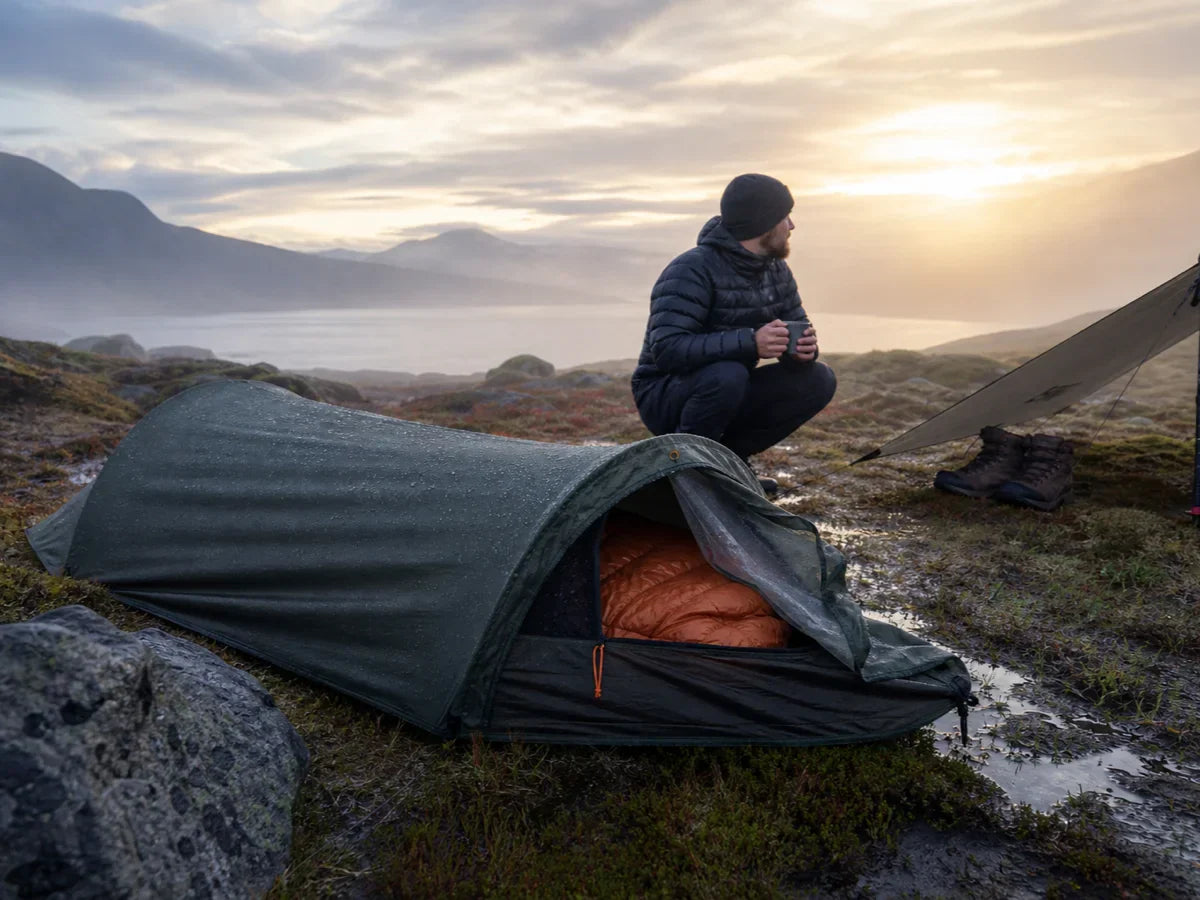
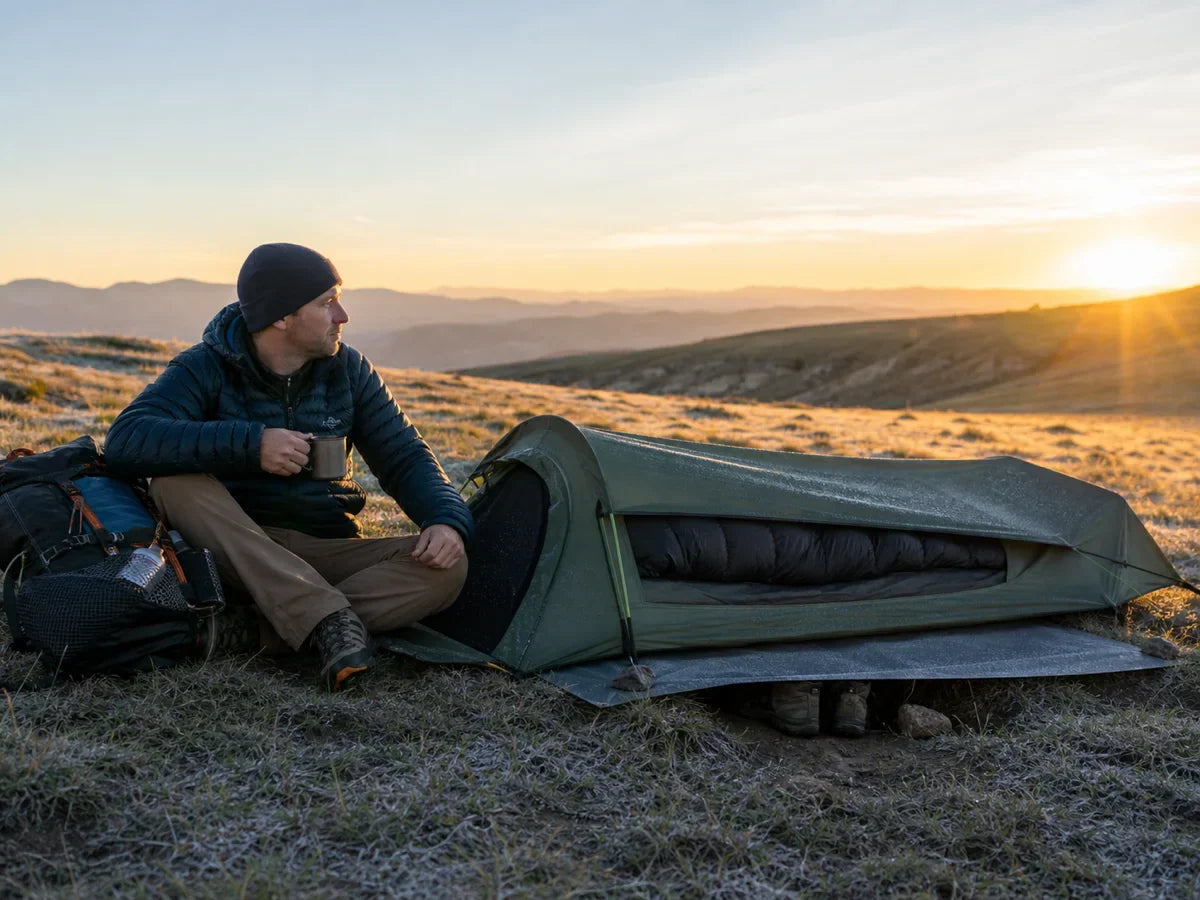
Une tente-sac de bivouac ajoute juste assez de structure pour rendre l’expérience du bivouac moins exiguë.
Cette structure peut maintenir le filet éloigné de votre visage, surélever l’extrémité de la tête, créer une entrée plus propre et empêcher la coque de s’affaisser sur l’isolation.
Il ne crée pas de porche.
Cela ne fait pas disparaître les bottes mouillées.
Il ne vous permet pas de rester assis pendant deux heures sous la pluie tout en triant votre équipement confortablement.
Le meilleur acheteur est honnête sur ces limites avant la première nuit.
Ce qu’apporte une tente bivouac
Le premier avantage est psychologique.
Un bivouac plat peut sembler efficace sur le papier et étouffant à minuit.
La structure supplémentaire d’une tente bivouac donne à la zone de la tête une forme fixe, de sorte que la personne qui dort n’a pas à composer avec du tissu lâche à chaque fois qu’elle se retourne.
Le deuxième avantage est le contrôle de la ventilation.
Lorsque le filet et les aérations restent à leur place, la circulation de l’air est plus facile à maîtriser.
Cela ne signifie pas que la condensation disparaît.
Cela signifie que l’abri vous offre de meilleurs outils.
Le troisième avantage est une entrée plus propre.
Une ouverture façonnée est plus facile à utiliser dans l’obscurité qu’une ouverture de sac souple, surtout lorsque les bottes, la lampe frontale et la veste imperméable sont rangées à l’extérieur.
Ce sont de véritables gains.
Ce sont aussi des gains modestes.
L’abri reste axé sur le sommeil avant tout.
Ce que cela ne résout toujours pas
N’achetez pas la structure et n’attendez pas une pièce.
Cette erreur est courante parce que le mot « tente » modifie les attentes.
Une tente de type sac de bivouac peut être plus confortable qu’un sac de bivouac plat, sans pour autant se comporter comme une tente.
La différence compte surtout par mauvais temps.
Par une nuit sèche, l’équipement peut rester rangé, les bottes peuvent rester à côté de l’abri, et l’empreinte compacte semble efficace.
Par une nuit humide, chaque objet exposé devient un petit problème.
Votre sac a besoin d’une housse.
Votre veste imperméable a besoin d’un endroit pour s’égoutter.
Vos bottes doivent rester accessibles sans tremper la couette.
Si ces tâches sont essentielles au voyage, résolvez-les avant de choisir l’abri.
L’échelle hybride
Cette échelle maintient la catégorie claire.
Un bivouac d’urgence n’est pas un abri de week-end simplement parce qu’il est petit.
Un bivy anti-insectes n’est pas un abri de pluie simplement parce qu’il a une fermeture éclair.
Un bivouac à arceaux et une tente-sac de bivouac améliorent la forme, mais ce sont toujours des abris à faible volume.
Une tente pour une personne est plus grande parce qu’elle accomplit davantage de travail.
Le bon choix n’est pas l’article le plus petit que vous pouvez supporter.
Le bon choix est l’article le plus petit qui permet néanmoins de faire le voyage réel.
Si l’itinéraire comporte des campings connus, une météo clémente et un plan de couchage en solo, le plus petit modèle de l’échelle peut convenir.
Si l’itinéraire présente une météo incertaine, de longues heures de camp ou une gestion d’équipement mouillé, gravissez l’échelle avant que le voyage ne vous impose la leçon.
Flux de configuration
Vidéo : comparaison entre un abri de type bivy avec arceau et un abri de type bivy
Entraînez-vous au tangage avant le premier vrai voyage.
Les abris bas laissent moins de place à une tension approximative.
Un panneau qui s’affaisse, ce qui serait gênant dans une tente, peut toucher votre couette dans une tente bivy sack.
Commencez par le sol.
Évitez les creux, les voies d’écoulement évidentes et l’herbe qui imbibera le dessous d’ici le matin.
Puis orientez l’entrée.
La direction du vent, les gouttes provenant des arbres et la pente sous votre épaule comptent davantage lorsque l’abri est bas.
Piquez l’abri jusqu’à ce que la moustiquaire et la coque conservent la forme prévue.
Ne serrez pas trop un coin et ne laissez pas l’extrémité de la tête s’affaisser.
Aérez l’abri avant de sentir l’humidité.
Le matin est le bulletin scolaire.
Touchez la paroi intérieure, la zone pour les pieds du sac de couchage et le bord du matelas.
S’ils sont humides, changez l’emplacement, l’aération ou la couverture de la bâche la prochaine fois.
Ventilation et condensation
La condensation n’est pas un défaut d’une marque ou d’un modèle.
C’est la principale compétence de refuge à faible encombrement.
Les discussions ultralégères sur Reddit rapportent sans cesse le même partage : les utilisateurs qui apprécient les bivi-sacs louent leur encombrement minimal et leur montage rapide, tandis que ceux qui les abandonnent mentionnent généralement la condensation, l’espace réduit au niveau du visage ou les désagréments par temps humide.
Une tente bivouac a moins d’air autour du dormeur qu’une tente.
Votre souffle, la chaleur corporelle, les chaussettes humides et le tissu extérieur mouillé partagent tous ce petit espace d’air.
La structure est utile, car elle permet de maintenir le tissu hors du quilt et de garder les aérations dans des positions pratiques.
Il ne peut pas éliminer l’humidité.
La meilleure habitude est une bonne circulation de l’air dès le matin.
Ouvrez l’aération avant que l’intérieur ne devienne humide.
Empêchez la couette d’appuyer contre le mur.
Évitez d’introduire des vêtements de pluie mouillés dans la zone de couchage.
Si le temps force tout à fermer, l’abri essaie de vous dire quelque chose.
Vous pourriez avoir besoin d’une bâche au-dessus de votre tête ou d’une tente plutôt que d’un abri de type bivouac.
Quand une bâche reste encore à sa place au-dessus de vous
Vidéo : comparaison d’abris de bivouac à arceaux pour le camping compact
Une bâche n’est pas un aveu que la tente bivy sack a échoué.
C’est une façon de donner à un abri bas une zone de travail.
La bâche protège l’entrée, les bottes, le sac à dos et la veste de pluie.
Cela vous permet également d’aérer le sursac de bivouac avec plus de confiance, car l’ouverture est moins exposée.
Pour les sorties sous la pluie, cela compte davantage que quelques onces sur un tableau.
L’erreur consiste à penser qu’un tissu imperméable à lui seul résout le problème du camp.
Un tissu imperméable peut protéger le système de couchage tout en vous laissant avec des bottes mouillées, un sac mouillé et une entrée exiguë.
Si vous prévoyez de la pluie ou une forte rosée, associez la tente-sac de bivouac à une petite bâche ou choisissez une tente avec un vestibule.
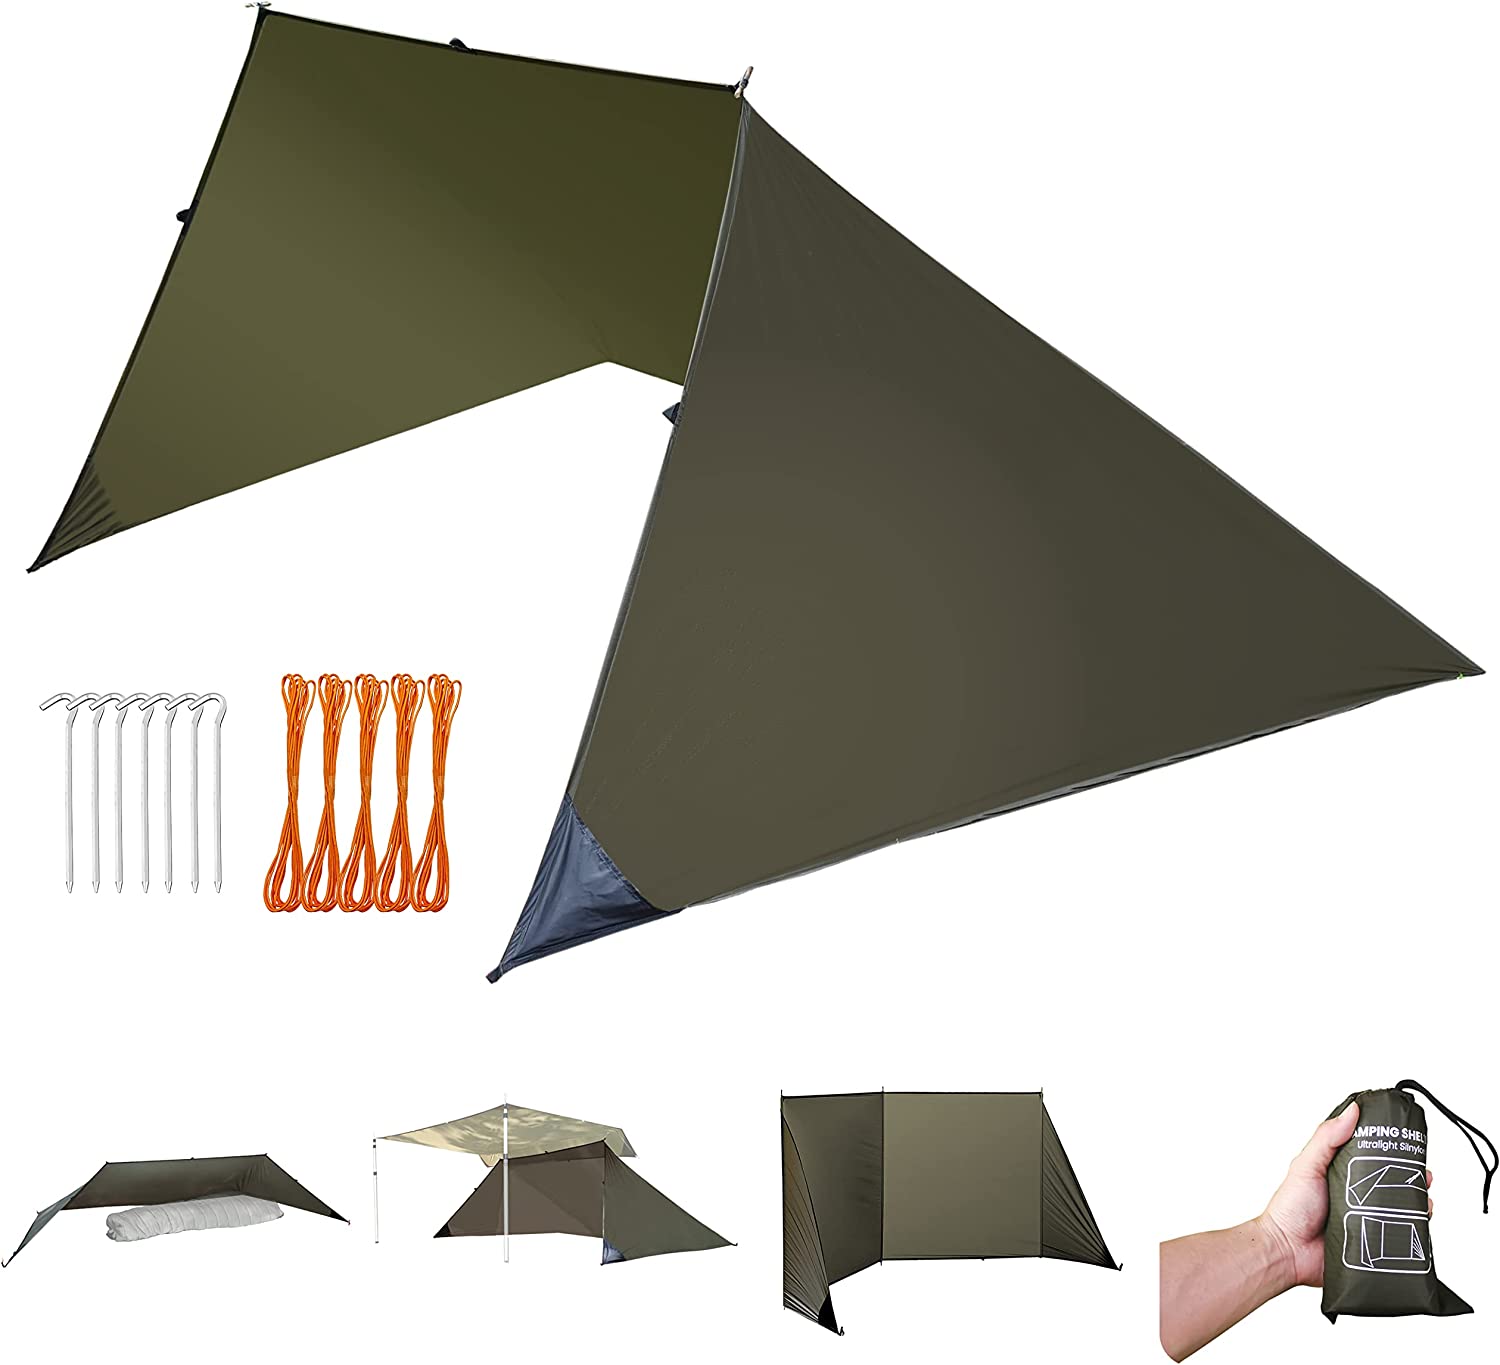
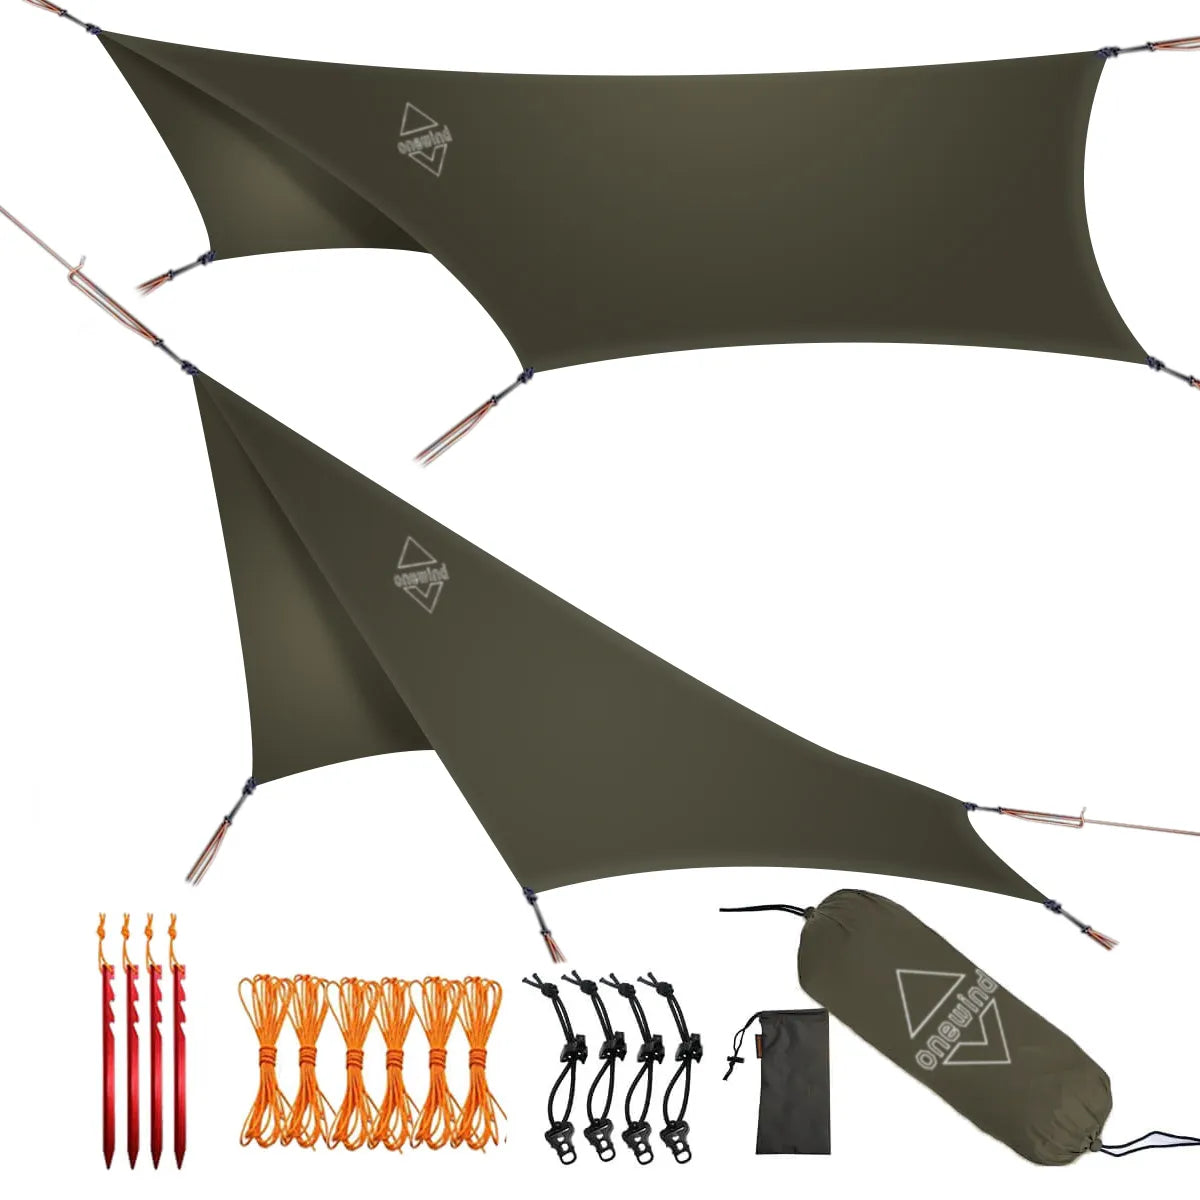
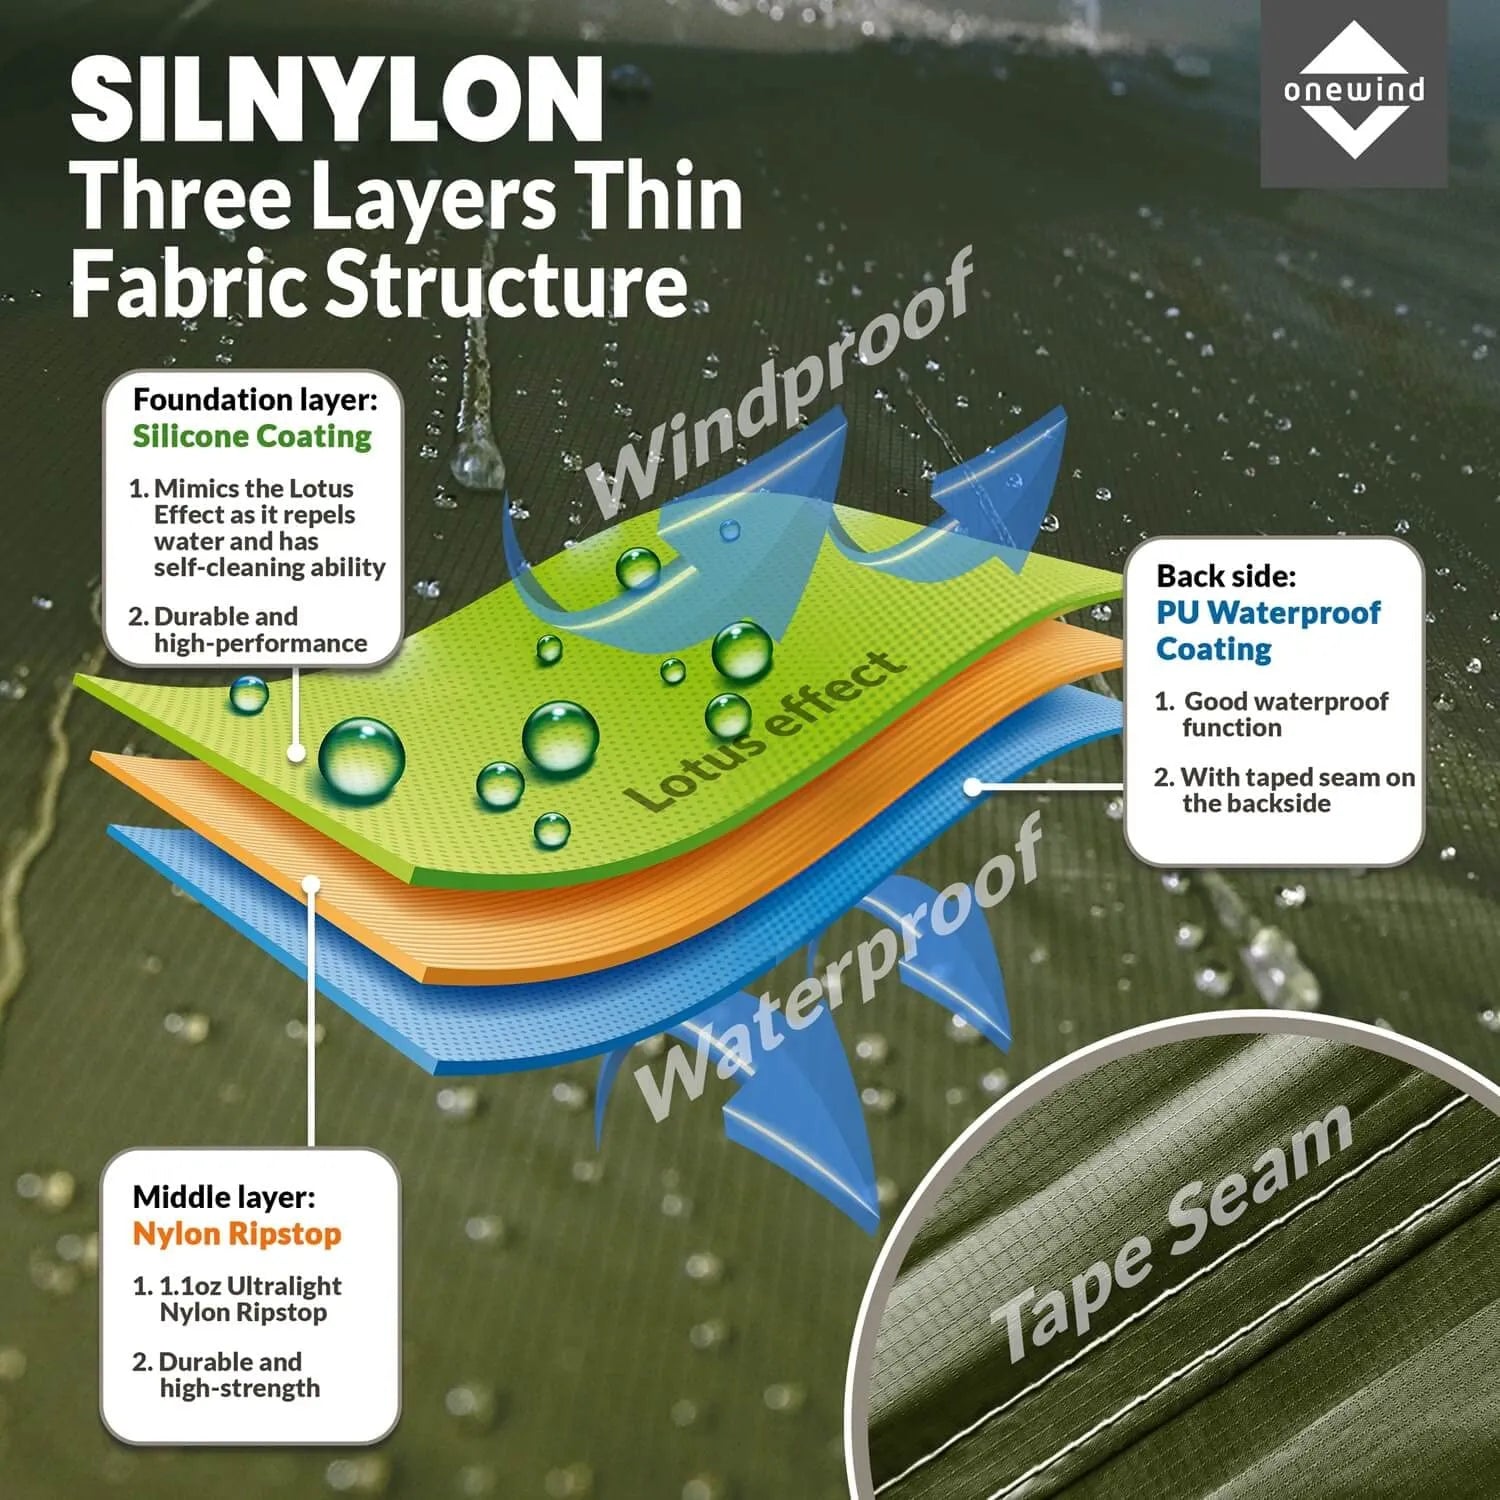
Pour les acheteurs de Onewind, le Tarp en silnylon Onewind de 12 pieds peut supporter ce travail d’entrée humide lorsque l’itinéraire exige une couverture par le haut.
Les rapports de terrain des utilisateurs disposant de peu d’abri montrent pourquoi cela est important : une fois que les bottes, le sac à dos et la protection extérieure sont mouillés, l’abri de couchage doit faire plus que couvrir la couette.
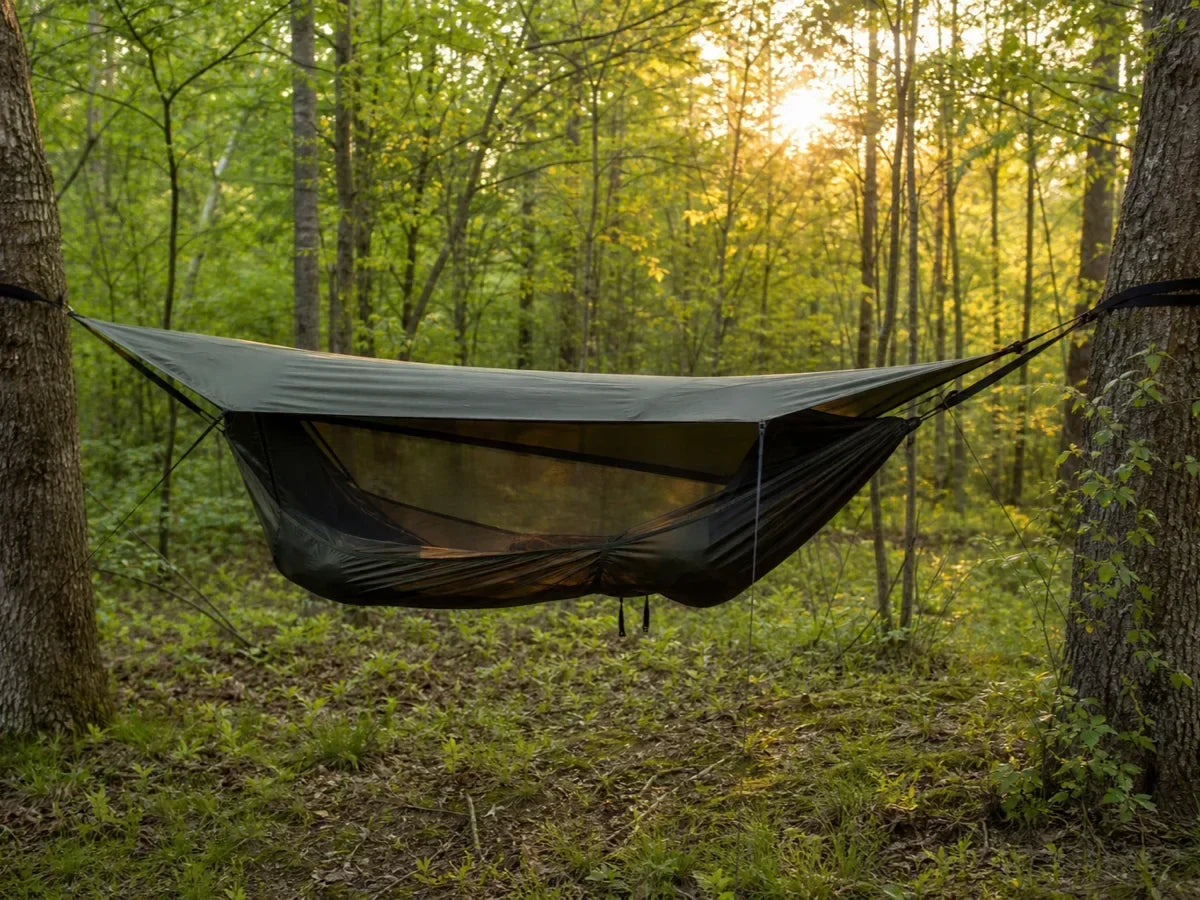
Où le Solo Skyshade Tartent s’adapte
Le Tente Solo Skyshade Tartent le lien du produit à commencer si vous souhaitez un abri solo davantage de type bâche/tente dans ce choix proche d’un bivy.
Il est positionné comme un produit de tente bivouac avec un angle d’abri modulaire, une variante vert OD, et un prix produit en direct de 149,99 $ au moment où cet article a été तैयारé.
La bonne façon d’interpréter cela n’est pas « cela remplace chaque tente pour une personne ».
La façon utile de le lire est : « cela appartient à la catégorie des abris individuels structurés. »
Cela convient à un campeur qui souhaite une couverture discrète, une forme plus structurée qu’un simple sac plat et une installation compacte en solo.
Cela a moins de sens pour quelqu’un qui recherche un intérieur spacieux, un espace de campement partagé ou un abri privilégiant d’abord le vestibule.
Utilisez-le lorsque le voyage correspond à l’abri.
N’essayez pas d’adapter l’abri à un voyage inadapté.
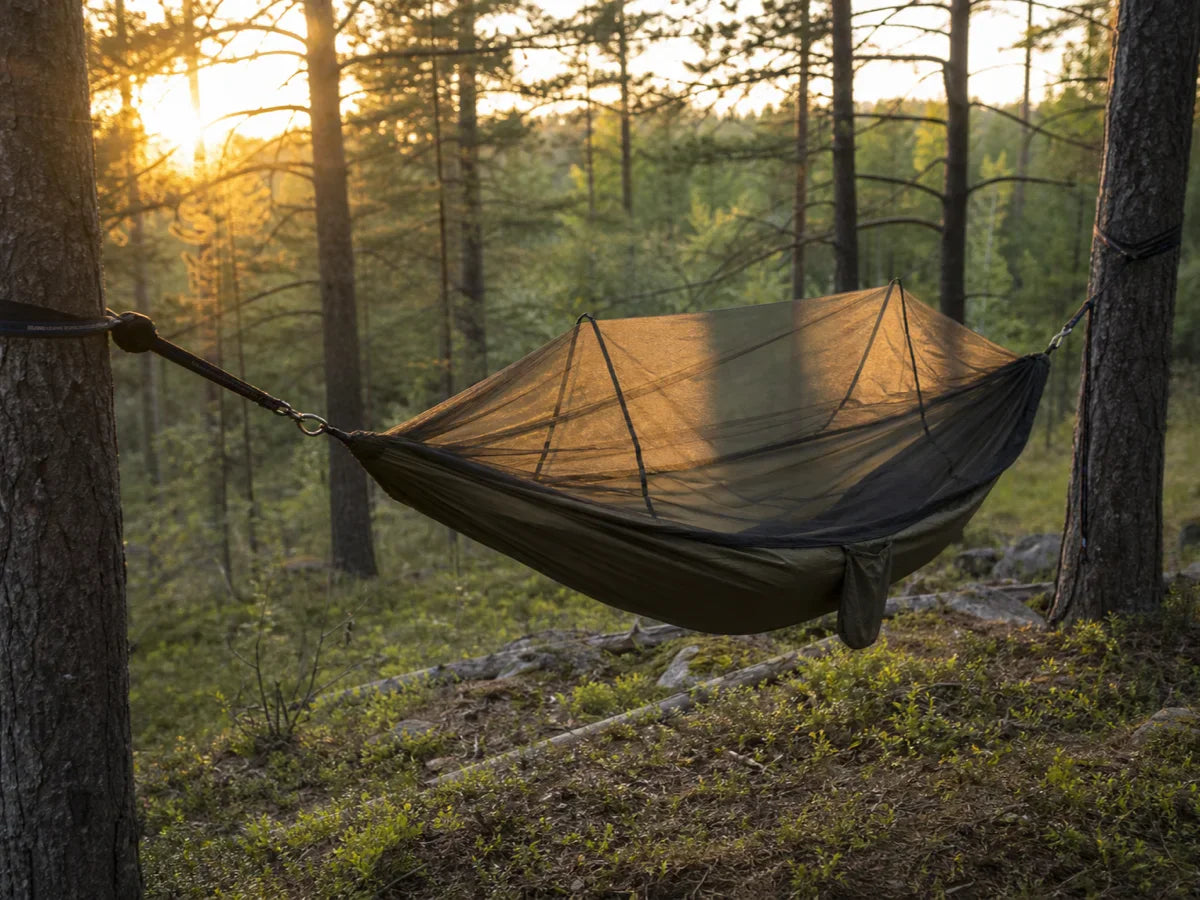
Où SoloVent convient-elle
La page produit actuelle de bivy en direct de Onewind est la Tente bivouac SoloVent ultralégère.
Cela compte parce que les anciennes poignées peuvent créer de la confusion lorsque les lecteurs comparent des produits de type bivy.
Utilisez le lien du produit actuel lorsque le lecteur souhaite un abri bivouac structuré pour une personne, pensé avant tout pour dormir.
La gamme SoloVent est dégagée : plus de forme et de dégagement qu’un sac bivouac plat, sans pour autant offrir l’espace d’une tente.
Cela le rend utile pour le campeur qui accepte déjà le fonctionnement du bivouac, mais qui souhaite moins de contact avec le visage, un meilleur contrôle de la moustiquaire et un montage plus défini.
Si le lecteur hésite encore entre les catégories plus larges, envoyez-le vers la guide du bivouac contre la tente.
S’ils ont besoin d’abord de la définition de base, envoyez-les à qu’est-ce qu’un sac de bivouac.
Scénario 1 : Débutant inquiet de la claustrophobie
Verdict : choisissez une tente bivouac uniquement pour un premier voyage contrôlé.
La structure est essentielle ici.
Un débutant inquiet de claustrophobie ne devrait pas commencer avec l’abri le plus étroit possible et espérer que la sensation s’améliore à 2 h du matin.
Utilisez un terrain dans le jardin ou une nuit courte pour tester si la structure de l’extrémité de tête est suffisante.
Entrez entièrement dans l’abri, fermez la moustiquaire à glissière, prenez de l’eau, retournez-vous et ressortez.
Si cette séquence vous semble gérable, la catégorie peut convenir.
Si cela semble stressant avant le début du voyage, la solution est une tente pour une personne.
L’abri devrait réduire l’anxiété, et non devenir la leçon.
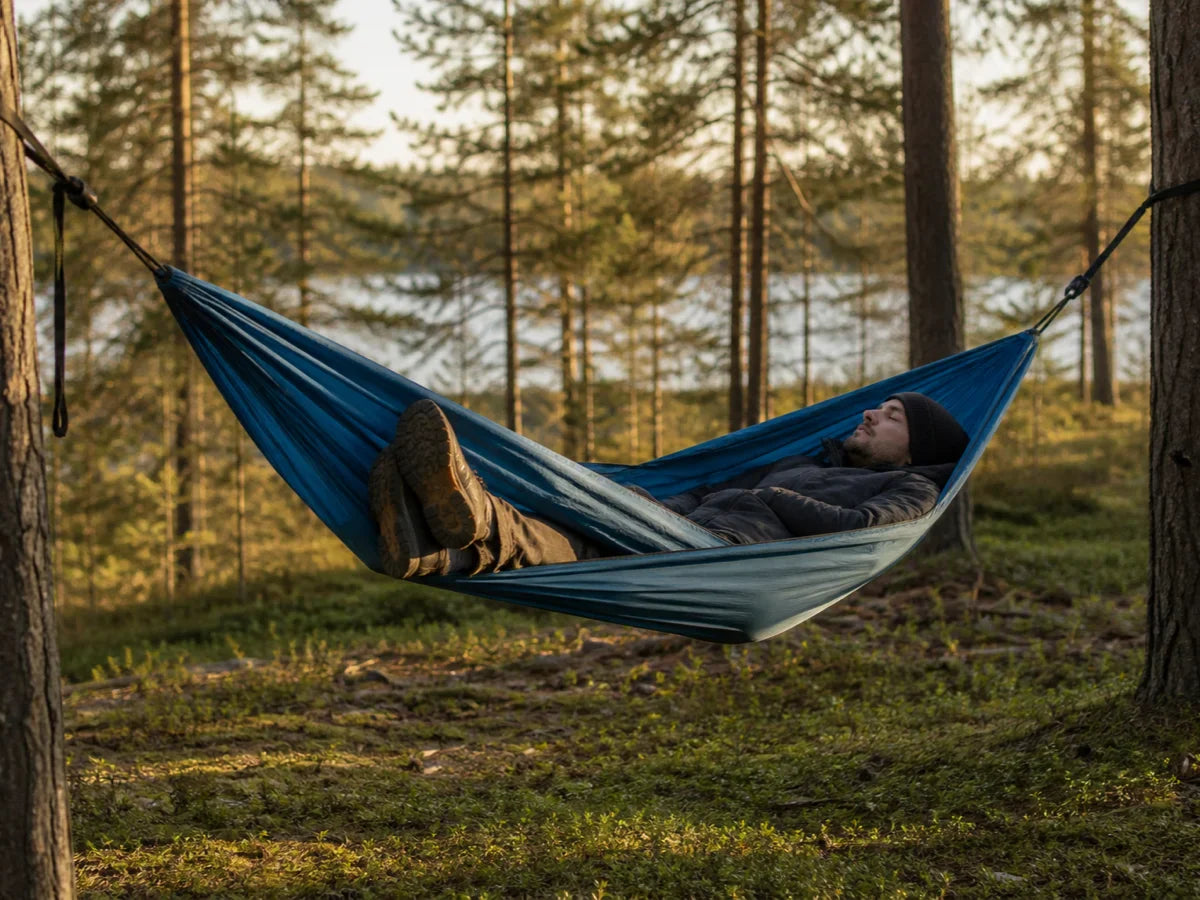
Scénario 2 : Sac de bivouac plat contre tente-sac de bivouac structurée
Verdict : choisissez l’option structurée lorsque le confort est le véritable obstacle.
Un sac de bivouac plat est efficace lorsque le dormeur accepte déjà un espace restreint.
Il brille lorsque les prévisions sont douces, que le sol est durable et que le campeur souhaite l’abri de couchage prévu le plus petit possible.
Une tente-sac de bivouac gagne sa structure supplémentaire lorsque les faiblesses du sac plat comptent.
Ces faiblesses concernent généralement le tissu extérieur, la position de la moustiquaire, la forme de l’entrée et le contact avec la couette.
Si ce sont les raisons pour lesquelles vous hésitez, la structure n’est pas un luxe.
C'est la fonctionnalité que vous achetez.
Si vous recherchez uniquement l’article le plus compact une fois rangé, restez à plat.
Si vous recherchez une meilleure nuit, passez à la structure.
Scénario 3 : Bikepacker avec des sacs compacts
Verdict : choisissez une tente bivouac si vos bagages de vélo privilégient davantage la compacité que l’espace de campement.
Les bikepackers se soucient souvent autant de la forme repliée que du poids replié.
Un abri qui s’adapte à un sac de guidon ou à une sacoche de cadre peut être plus facile à utiliser qu’un ensemble de tente plus encombrant.
C’est là qu’une tente-sac de bivouac peut prendre tout son sens.
Il offre à un voyageur solitaire un abri de sommeil bien défini sans exiger un grand emplacement de tente.
Le point faible est la gestion de l’équipement.
Chaussures de vélo, casque, coque imperméable et petits sacs nécessitent encore un plan.
Par temps sec, ce plan peut être simple.
Sous la pluie, ajoutez une protection au-dessus de la tête ou choisissez un abri avec vestibule.
Le vélo ne rend pas les équipements mouillés moins mouillés.
Cela ne fait que rendre l’emballage compact encore plus précieux.
Scénario 4 : Campeur par temps pluvieux
Verdict : ajoutez une bâche ou choisissez une tente.
Une tente de bivouac peut résister à certaines conditions météorologiques, mais les tâches de camp sous la pluie sont plus contraignantes que le sommeil.
Vous devez toujours entrer sans traîner d’eau sur la couette.
Vous devez toujours garder les bottes à portée de main.
Il vous faut encore un endroit pour le sac.
Vous avez néanmoins besoin d’une circulation d’air suffisante pour que l’intérieur ne devienne pas moite.
Une bâche résout plusieurs de ces problèmes à la fois.
Cela vous offre une zone d’entrée sèche, un espace pour déposer votre équipement, et davantage de confiance pour laisser les aérations ouvertes.
Si le trajet est court et que la pluie est légère, cette combinaison peut convenir.
Si le voyage est long et pluvieux, une tente est souvent l’abri le plus simple.
Scénario 5 : Tente pour une personne ou sac de bivouac pour 1 à 2 nuits
Verdict : choisissez la tente bivouac pour dormir rapidement, choisissez la tente pour le temps au camp.
Pour une ou deux nuits, la tente-sursac peut être un choix intermédiaire judicieux.
Le voyage est suffisamment court pour que la compacité ait une réelle valeur et que les erreurs liées à la météo aient moins de temps pour s’accumuler.
Cela fonctionne mieux lorsque vous arrivez tard, dormez et partez le matin.
Cela fonctionne moins bien lorsque vous prévoyez de rester au camp, de changer de couches à l’abri, d’organiser votre équipement ou d’attendre que le temps s’améliore.
C’est la différence honnête.
Une tente n’est pas toujours meilleure.
C'est mieux quand vous avez besoin des fonctions qu'une tente remplit.
Une tente de type sac de bivouac est préférable lorsque vous ne voulez pas transporter ce matériel.
Erreurs courantes avec les tentes-bivouac de type sac de couchage
Le motif est simple.
La plupart des échecs viennent du fait qu’on s’attend à ce qu’une tente de type bivouac se comporte comme autre chose.
Ce n’est pas un sac d’urgence plat.
Ce n’est pas une tente complète.
Il s’agit d’un abri individuel compact et structuré.
Utilisez-le ainsi.
Erreur 1 : Faire trop confiance au tissu imperméable
Le tissu imperméable protège uniquement les parties qu’il couvre réellement.
Il ne couvre pas toutes les tâches de camping.
Votre sac peut quand même être mouillé.
Vos bottes peuvent encore se remplir d’eau de pluie.
Votre couette peut encore toucher un mur humide si le montage s’affaisse.
La solution consiste à séparer la protection contre les intempéries de l’espace de vie.
Si vous avez besoin d’une zone de travail sèche, ajoutez une bâche ou choisissez une tente.
Si vous n’avez besoin que d’une protection pour dormir lors d’un court voyage par temps clément, la tente bivy peut rester simple.
Erreur 2 : fermer chaque évent parce que cela semble plus sûr
Fermer chaque évent peut donner au refuge une impression de protection pendant les dix premières minutes.
Cela peut rendre l’intérieur humide au matin.
Un abri bas a besoin de circulation d’air, car la personne qui dort y crée de l’humidité toute la nuit.
La solution consiste à évacuer avant que le problème ne commence.
Utilisez une moustiquaire, des ouvertures protégées et une couverture de bâche lorsque les conditions météorologiques le permettent.
Si la pluie oblige toutes les ouvertures à se fermer, considérez cela comme un signal de sélection d’abri.
Le trajet peut nécessiter davantage de couverture en hauteur ou un volume intérieur plus important.
Erreur 3 : transposer les attentes d’une tente à un abri bivouac
Une tente de type sac de bivouac peut être excellente lorsque sa fonction est de dormir.
Cela peut être frustrant lorsque le travail consiste à vivre au camp.
Ne prévoyez pas de ranger un sac à dos entier à l’intérieur.
Ne prévoyez pas de changer les couches volumineuses à l’intérieur.
Ne prévoyez pas d’attendre une longue tempête à l’intérieur, sauf si vous savez déjà que vous supportez bien les abris bas.
La solution consiste à nommer le comportement de votre camp avant d’acheter.
Si vous faites de la randonnée jusqu’à la nuit tombée, que vous dormez et partez tôt, la catégorie est solide.
Si vous aimez les soirées tranquilles au camping, apportez un abri plus spacieux.
Erreur 4 : ignorer l’ajustement du produit
Ne choisissez pas un produit simplement parce qu’il se trouve dans la bonne catégorie.
Choisissez-le parce que le voyage correspond à son design.
Le Tente Solo Skyshade Tartent est le meilleur lien interne lorsque le lecteur souhaite un abri solo structuré de type bâche/tente.
Le Tente bivouac SoloVent ultralégère est le meilleur lien interne lorsque le lecteur est plus proche d’une tente bivouac axée sur le sommeil.
Les deux appartiennent à la conversation sur l’abri individuel structuré.
Aucun des deux ne devrait être décrit comme un remplacement universel de tente.
Cette distinction honnête crée la bonne attente avant le paiement.
Liste de contrôle avant de faire vos valises One
Utilisez cette liste de contrôle avant le premier vrai voyage.
Montez l’abri une fois à la lumière du jour.
Placez votre matelas et votre couette à l’intérieur.
Allongez-vous pendant dix minutes.
Rouler des deux côtés.
Attrapez la lampe frontale et la bouteille d’eau.
Sortez sans traîner la couette par l’entrée.
Ensuite, décidez où placer les bottes, le sac à dos et la veste de pluie.
Si le terrain d’entraînement sec vous semble maladroit, un terrain de sentier mouillé vous semblera pire.
Réparez cela à la maison.
Verdict final
Une tente sac bivouac est un abri individuel compact pour les campeurs qui souhaitent une structure sans transporter une tente complète.
Il résout les problèmes de dégagement du visage, de forme de la moustiquaire et de confort liés aux sacs bivy plats.
Il ne résout pas le rangement dans le vestibule, l’espace pour s’asseoir ou la vie prolongée par temps humide.
Si vous souhaitez la face de la catégorie de type bâche/tente, commencez par le Tente Solo Skyshade Tartent.
Si vous souhaitez le côté tente bivouac axé sur le sommeil, comparez-le avec le Tente bivouac SoloVent ultralégère.
Si la protection contre les intempéries est la pièce manquante, parcourez la gamme plus large Collection d'abris Onewind et ajoutez une couverture de bâche avant que les prévisions ne prennent la décision à votre place.