A bivy sack tent sits in the narrow space between two familiar shelters.
It gives a solo sleeper more shape, mesh clearance, and weather structure than a flat bivy sack.
It still does not create the sit-up room, vestibule storage, or long-rain comfort of a one-person tent.
That is the whole decision.
Choose a bivy sack tent when the trip rewards a compact sleep-first shelter and you want the fabric away from your face.
Choose something larger when camp comfort, protected gear handling, or multiple wet nights matter more than a low profile.
What You'll Learn
- ✓ Decide whether a bivy sack tent is a real upgrade over a flat bivy sack for your trips.
- ✓ Know when a tarp still belongs above a low structured shelter.
- ✓ Use a 6-step setup workflow before the first wet overnight.
- ✓ Compare the Solo Skyshade Tartent and SoloVent without treating either one as a universal tent replacement.
You will not get a generic product list.
You will get a field decision.
The useful question is not "is a bivy sack tent really a tent?"
The useful question is "what problem am I trying to fix compared with a normal bivy sack?"
If the answer is face clearance, bug mesh, faster entry, and a more stable sleep shape, the category can make sense.
If the answer is changing clothes under cover, storing a pack inside, cooking in bad weather, or sitting through a storm, a larger shelter is the cleaner call.
According to OutdoorGearLab's bivy testing categories, the useful performance buckets are weather protection, comfort, packed size, and ventilation.
That source framework is helpful because a bivy sack tent can improve comfort and ventilation control without automatically solving every weather or storage problem.
Quick Answer
A bivy sack tent is best for short solo trips where sleep space matters more than living space.
It is a better answer than a flat sack when the sleeper dislikes fabric near the face, wants mesh separation from bugs, or wants a shelter that holds shape without a large tent footprint.
It is the wrong answer when the camper really wants a tiny tent room.
Low shelters reward disciplined setup.
They punish vague expectations.
The Decision Framework

Start with shelter volume.
A tent gives you volume around the body.
A bivy sack gives you fabric around the sleep system.
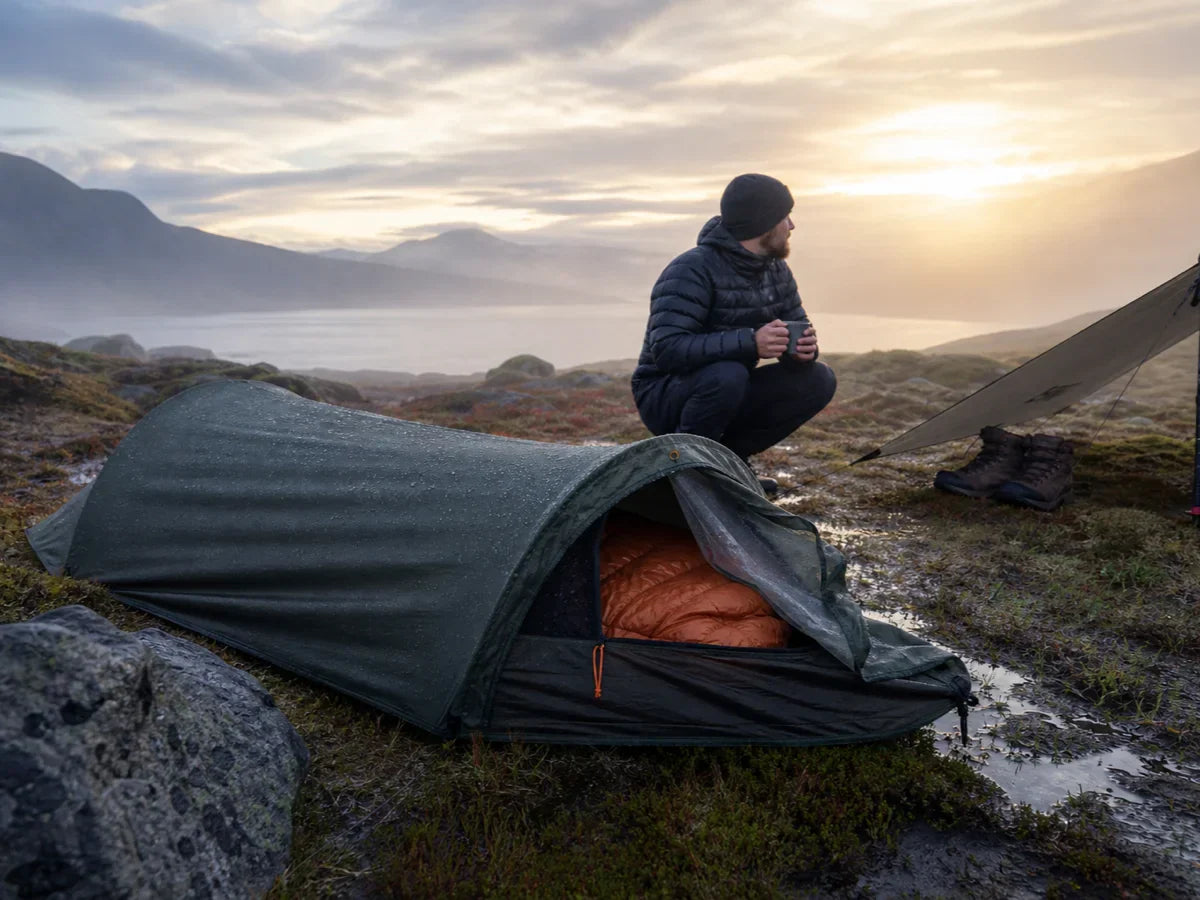
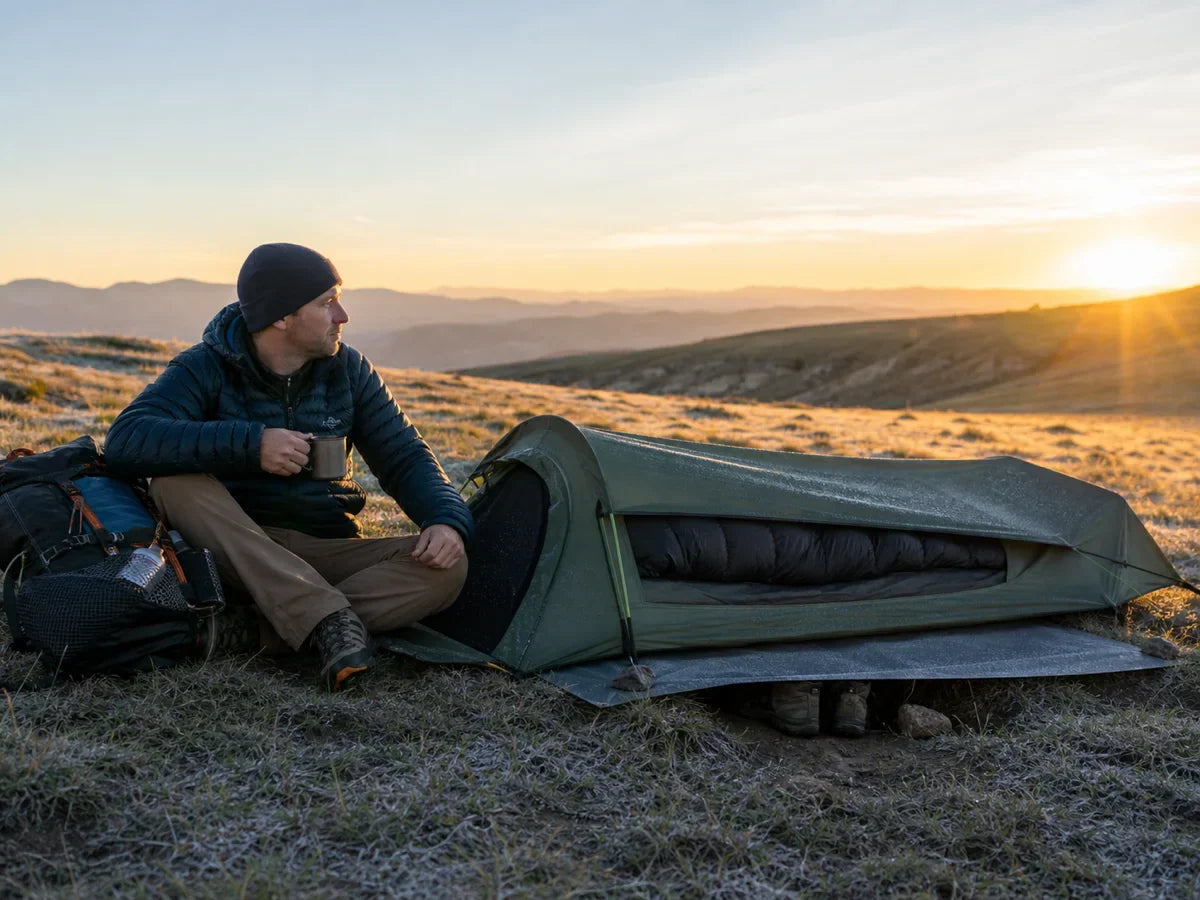
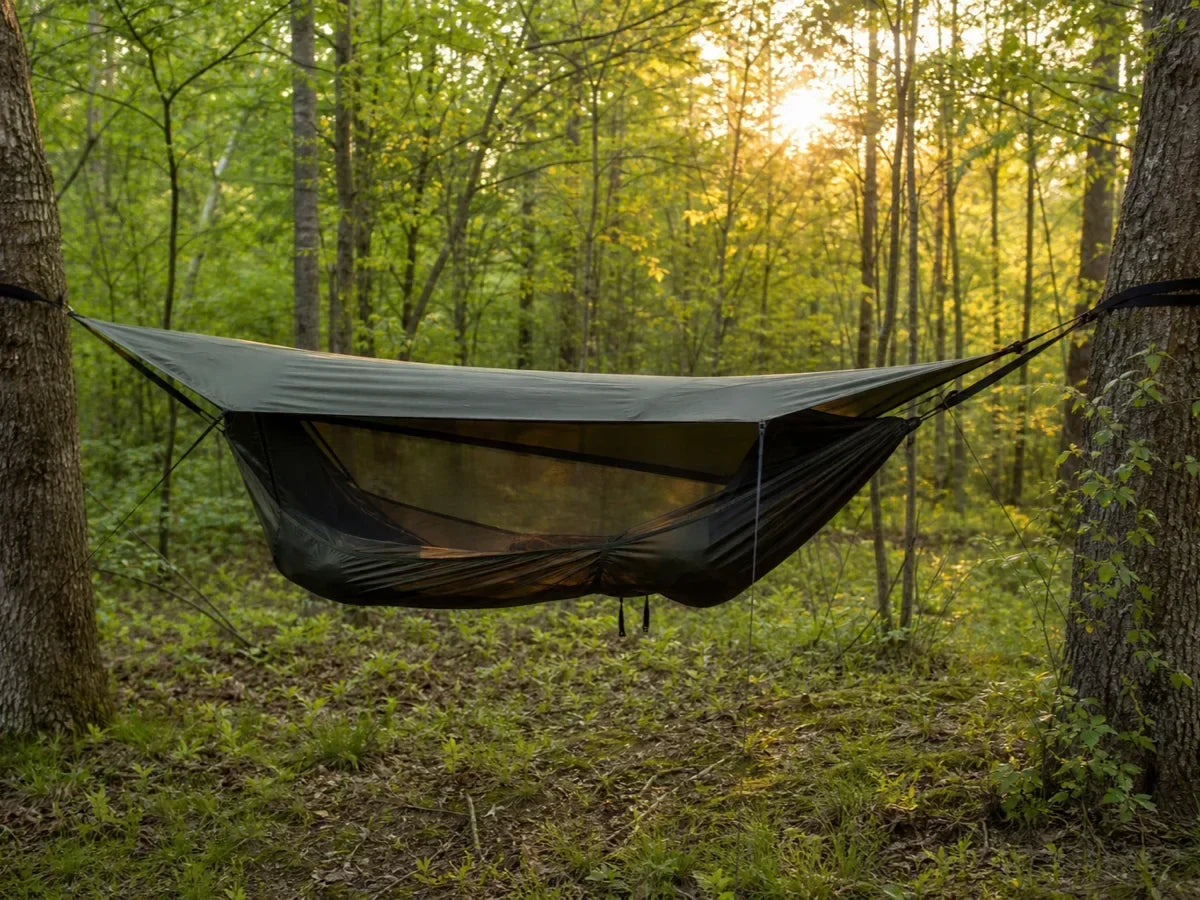
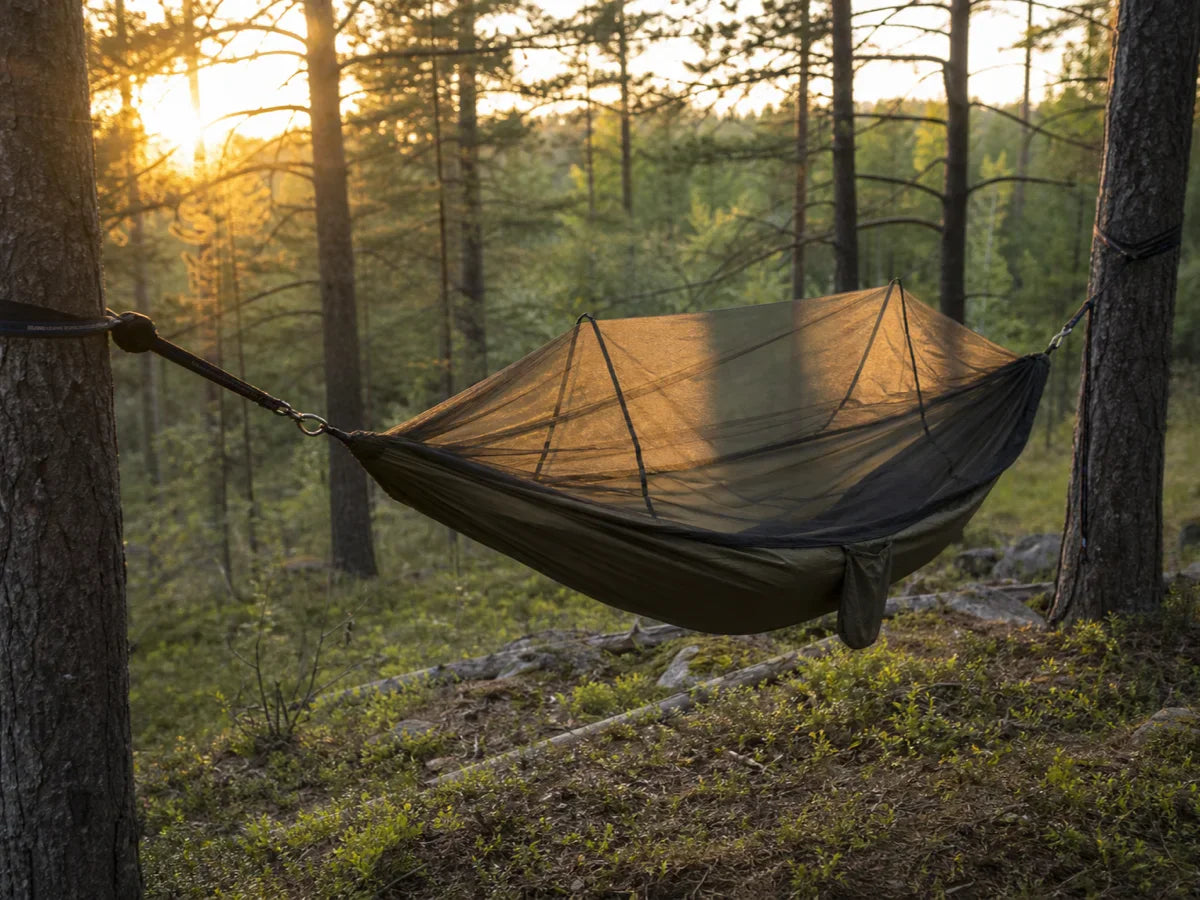
A bivy sack tent adds just enough structure to make the bivy experience less cramped.
That structure can hold mesh off your face, lift the head end, create a cleaner entry, and keep the shell from collapsing onto insulation.
It does not create a porch.
It does not make wet boots disappear.
It does not let you sit through two hours of rain while sorting gear in comfort.
The best buyer is honest about those limits before the first night.
What a Bivy Sack Tent Adds

The first benefit is psychological.
A flat bivy can feel efficient on paper and confining at midnight.
The extra structure of a bivy sack tent gives the head area a fixed shape, so the sleeper is not negotiating with loose fabric every time they roll over.
The second benefit is ventilation control.
When mesh and vents stay where they belong, airflow is easier to manage.
That does not mean condensation disappears.
It means the shelter gives you better tools.
The third benefit is a cleaner entry.
A shaped opening is easier to use in the dark than a limp sack opening, especially when boots, headlamp, and rain shell are staged outside.
These are real gains.
They are also narrow gains.
The shelter is still sleep-first.
What It Still Does Not Solve

Do not buy structure and expect a room.
That mistake is common because the word "tent" changes expectations.
A bivy sack tent can be more comfortable than a flat bivy sack without behaving like a tent.
The difference matters most in bad weather.
On a dry night, gear can stay packed, boots can sit beside the shelter, and the small footprint feels efficient.
On a wet night, every exposed item becomes a small problem.
Your pack needs cover.
Your rain shell needs a place to drip.
Your boots need to stay accessible without soaking the quilt.
If those jobs are central to the trip, solve them before choosing the shelter.
The Hybrid Ladder

This ladder keeps the category clear.
An emergency bivy is not a weekend shelter just because it is small.
A bug bivy is not a rain shelter just because it has a zipper.
A hooped bivy and a bivy sack tent improve shape, but they are still low-volume shelters.
A one-person tent is bigger because it is doing more work.
The right choice is not the smallest item you can tolerate.
The right choice is the smallest item that still handles the actual trip.
If the route has known campsites, mild forecast, and a solo sleep plan, the smaller end of the ladder can work.
If the route has uncertain weather, long camp hours, or wet gear management, move up the ladder before the trip forces the lesson.
Setup Workflow
Video: hooped bivy and bivy-style shelter comparison

Practice the pitch before the first real trip.
Low shelters leave less room for sloppy tension.
A sagging panel that would be annoying in a tent can touch your quilt in a bivy sack tent.
Start with the ground.
Avoid low pockets, obvious runoff paths, and grass that will soak the underside by morning.
Then orient the entry.
Wind direction, drip lines from trees, and the slope under your shoulder all matter more when the shelter is low.
Stake the shelter until the mesh and shell hold their intended shape.
Do not over-tighten one corner and leave the head end collapsed.
Vent the shelter before you feel damp.
Morning is the report card.
Touch the inside wall, the quilt footbox, and the pad edge.
If they are damp, change site choice, venting, or tarp coverage next time.
Venting and Condensation

Condensation is not a defect in one brand or one model.
It is the main low-volume shelter skill.
Reddit ultralight discussions report the same split again and again: users who like bivies praise tiny footprint and fast setup, while users who quit them usually mention condensation, cramped face space, or wet-weather friction.
A bivy sack tent has less air around the sleeper than a tent.
Your breath, body heat, damp socks, and wet shell fabric all share that small air space.
Structure helps because it can keep fabric off the quilt and hold vents in useful positions.
It cannot delete moisture.
The best habit is early airflow.
Open the vent before the inside feels clammy.
Keep the quilt from pressing into the wall.
Avoid dragging wet rainwear into the sleeping area.
If the weather forces everything closed, the shelter is telling you something.
You may need a tarp overhead or a tent instead of a bivy-style shelter.
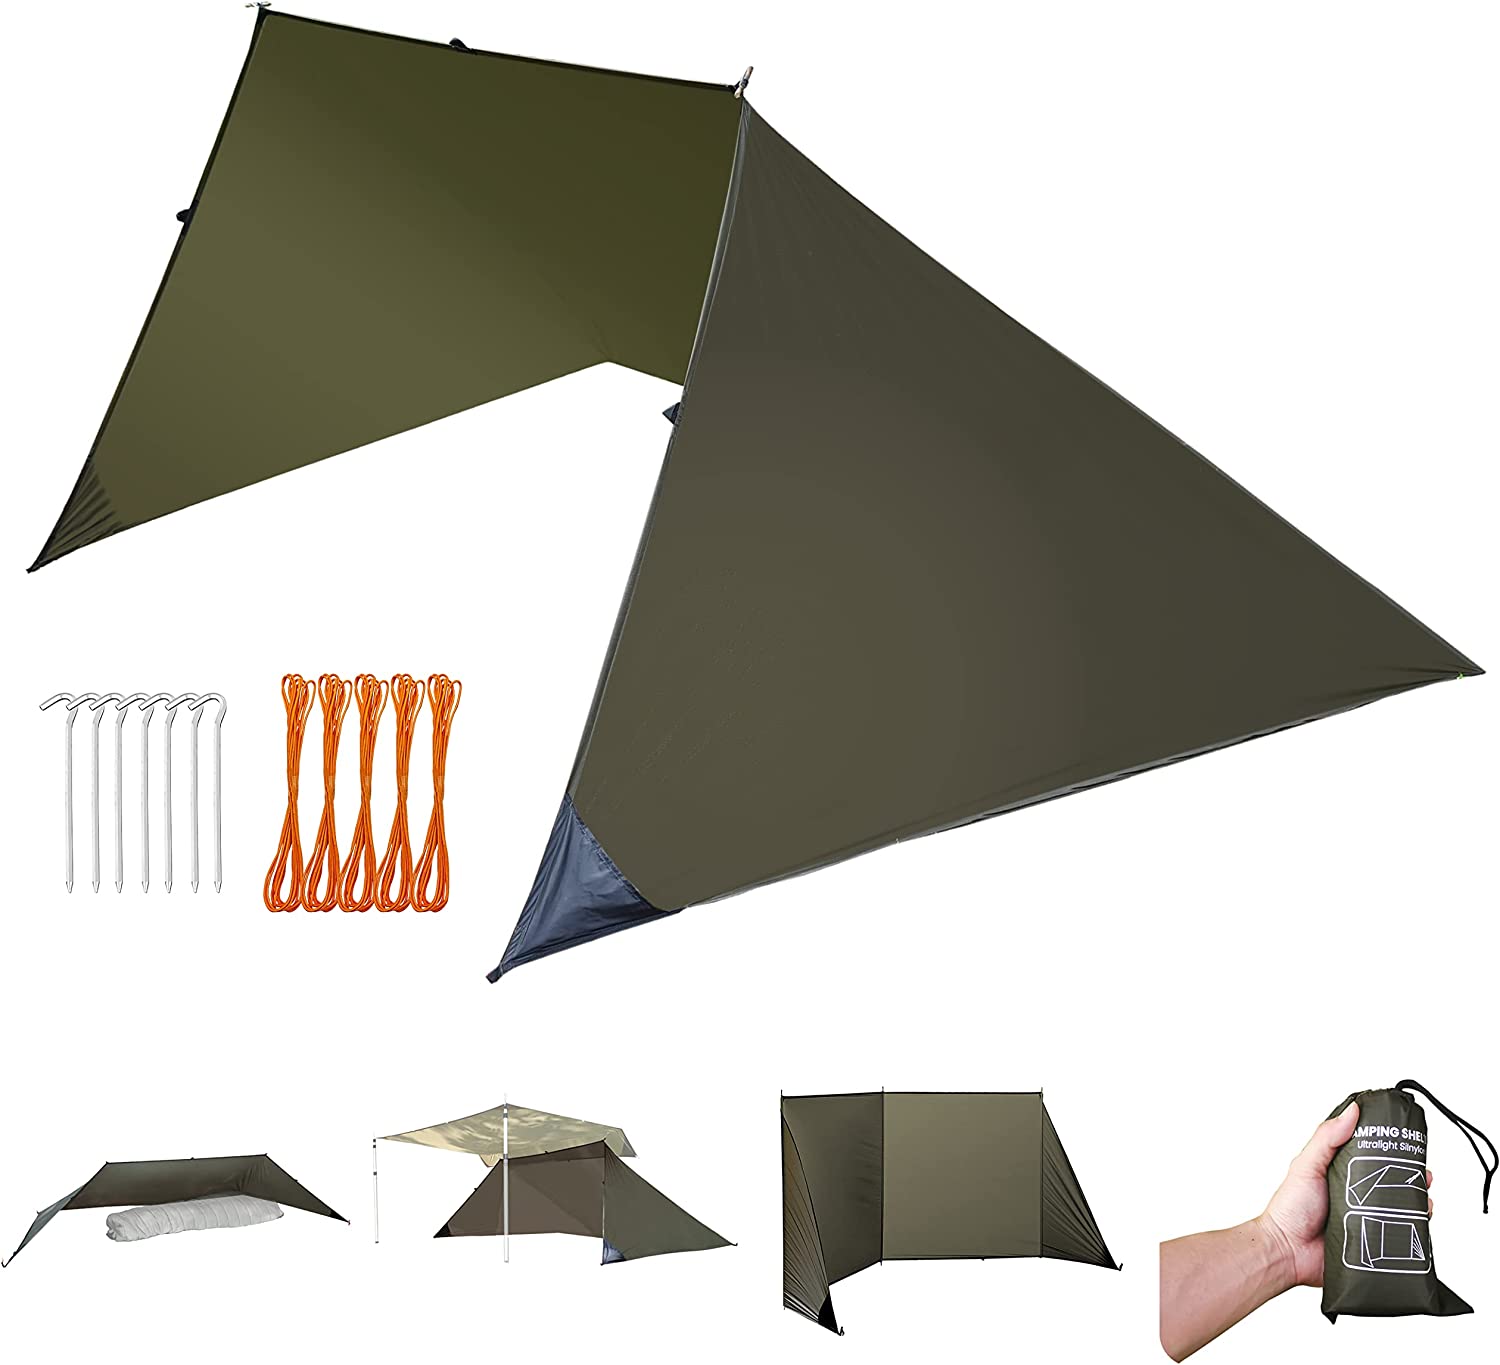
When a Tarp Still Belongs Above It
Video: hooped bivy shelter comparison for compact camping

A tarp is not an admission that the bivy sack tent failed.
It is a way to give a low shelter a working zone.
The tarp protects entry, boots, pack, and rain shell.
It also lets you vent the bivy more confidently because the opening is less exposed.
For wet trips, this matters more than a few ounces on a spreadsheet.
The mistake is thinking waterproof fabric alone solves camp.
Waterproof fabric can protect the sleep system and still leave you with wet boots, a wet pack, and a cramped entry.
If you expect rain or heavy dew, pair the bivy sack tent with a small tarp or choose a tent with a vestibule.
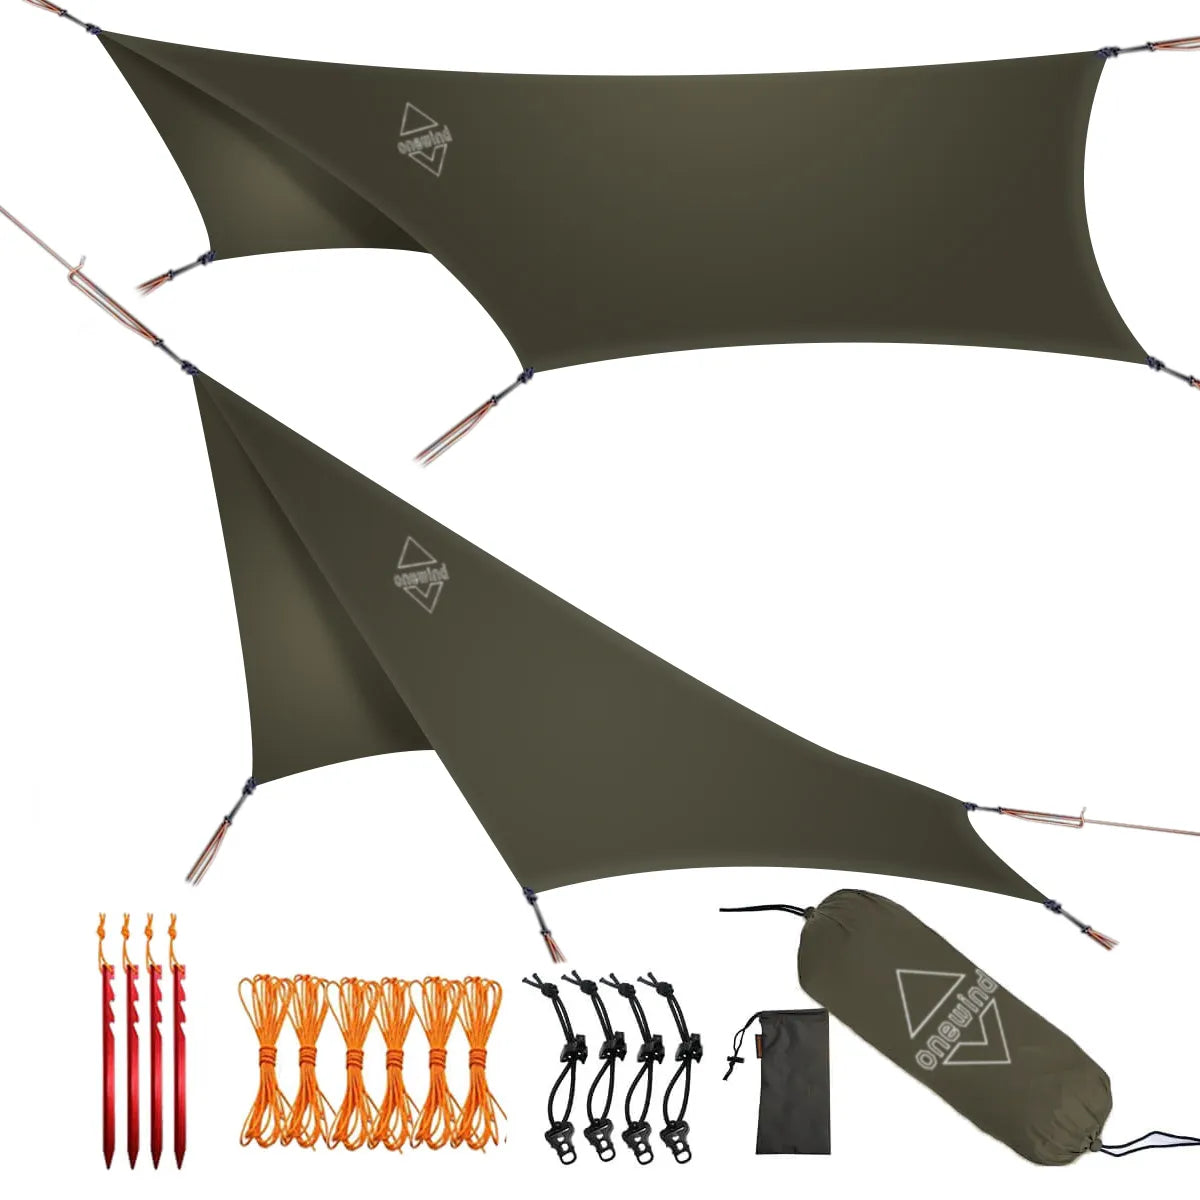
For Onewind shoppers, the Onewind 12 ft silnylon tarp can support that wet-entry job when the route calls for overhead coverage.
Field reports from low-shelter users show why this matters: once boots, pack, and shell are wet, the sleeping shelter has to do more than cover the quilt.
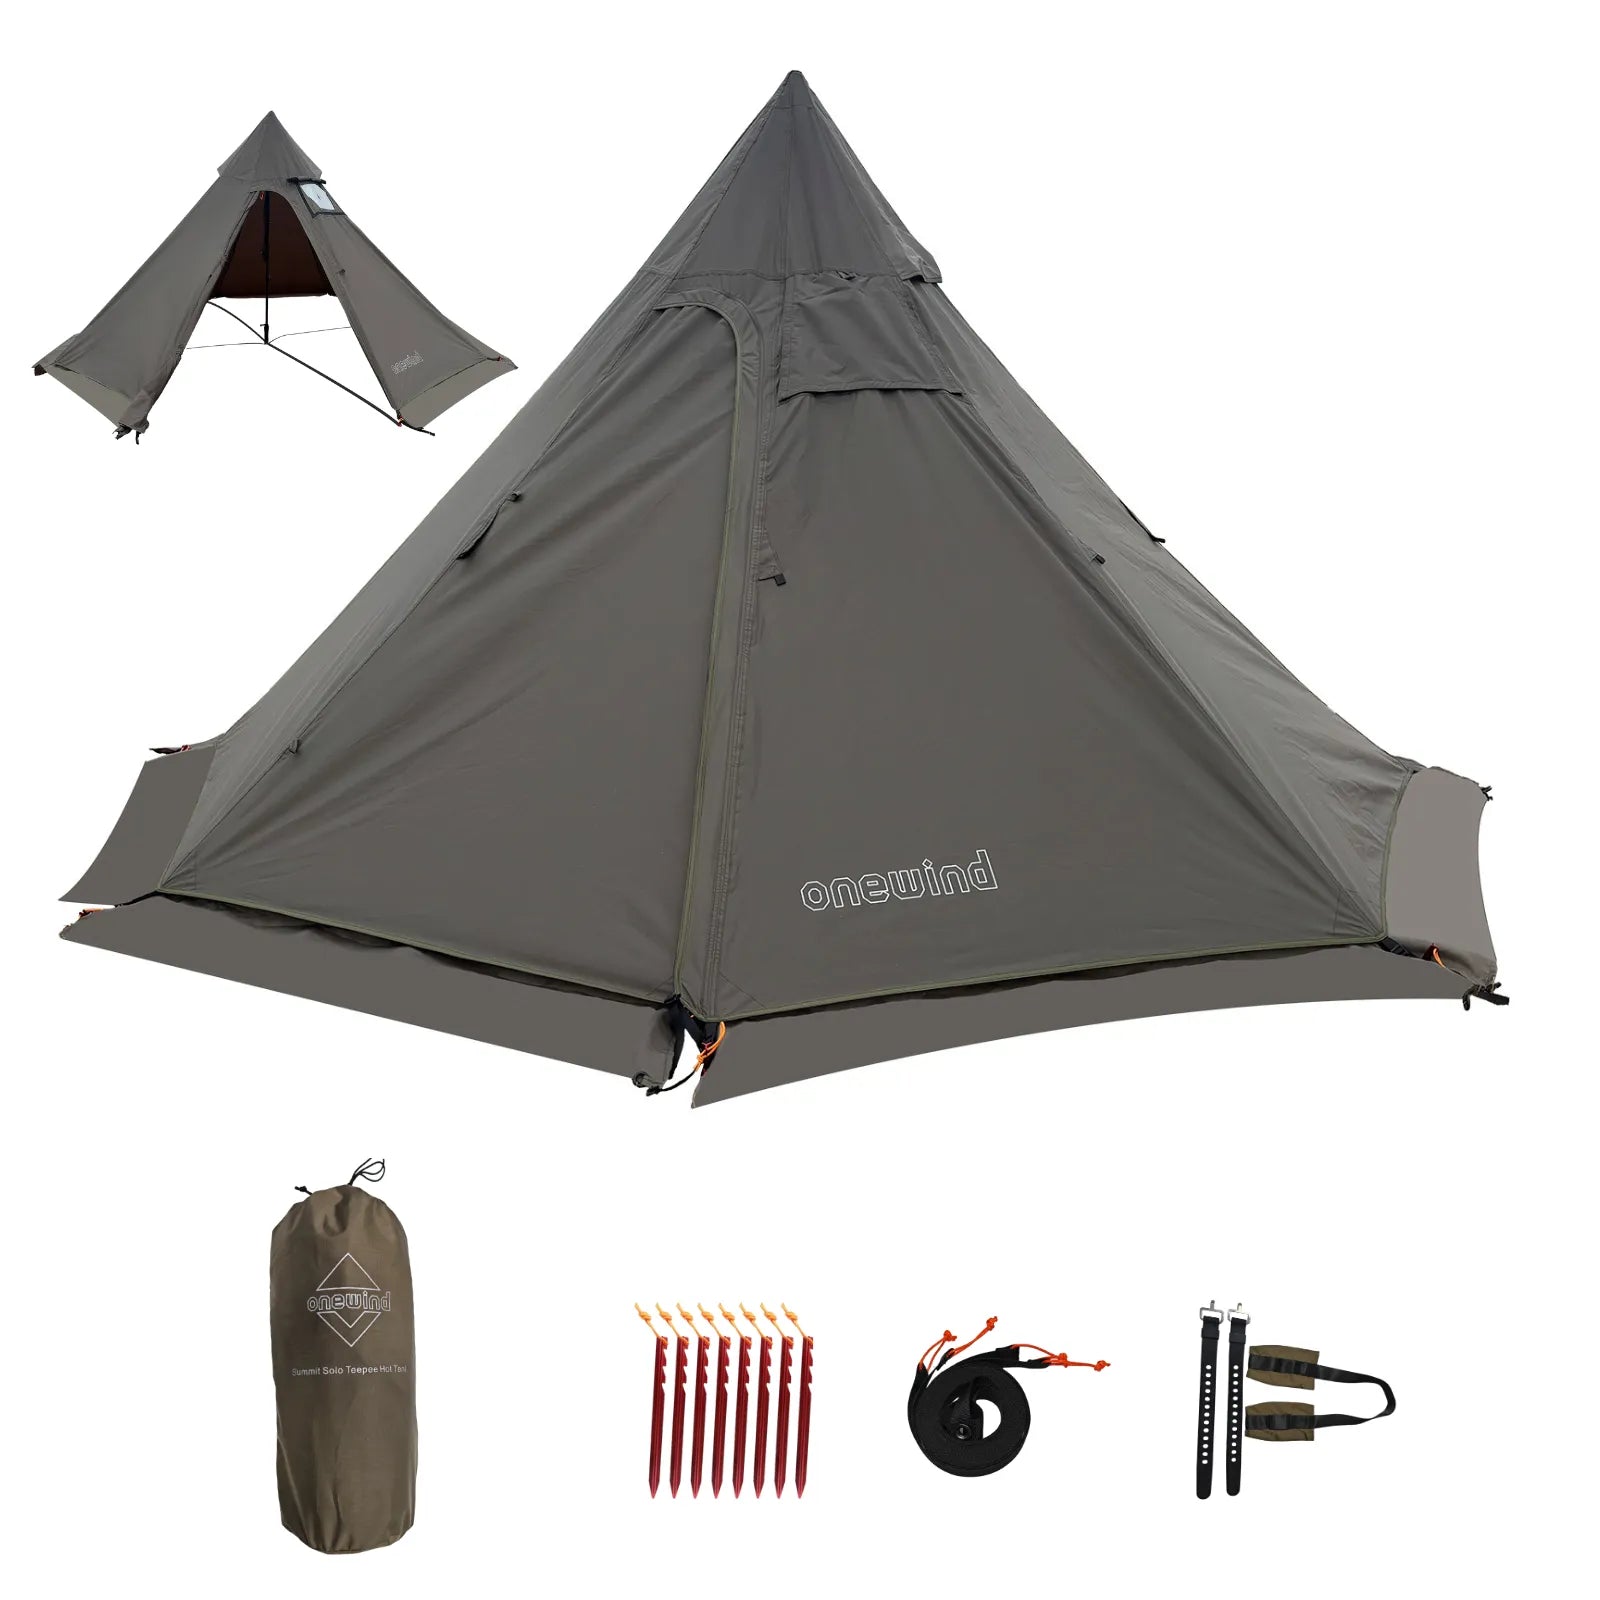
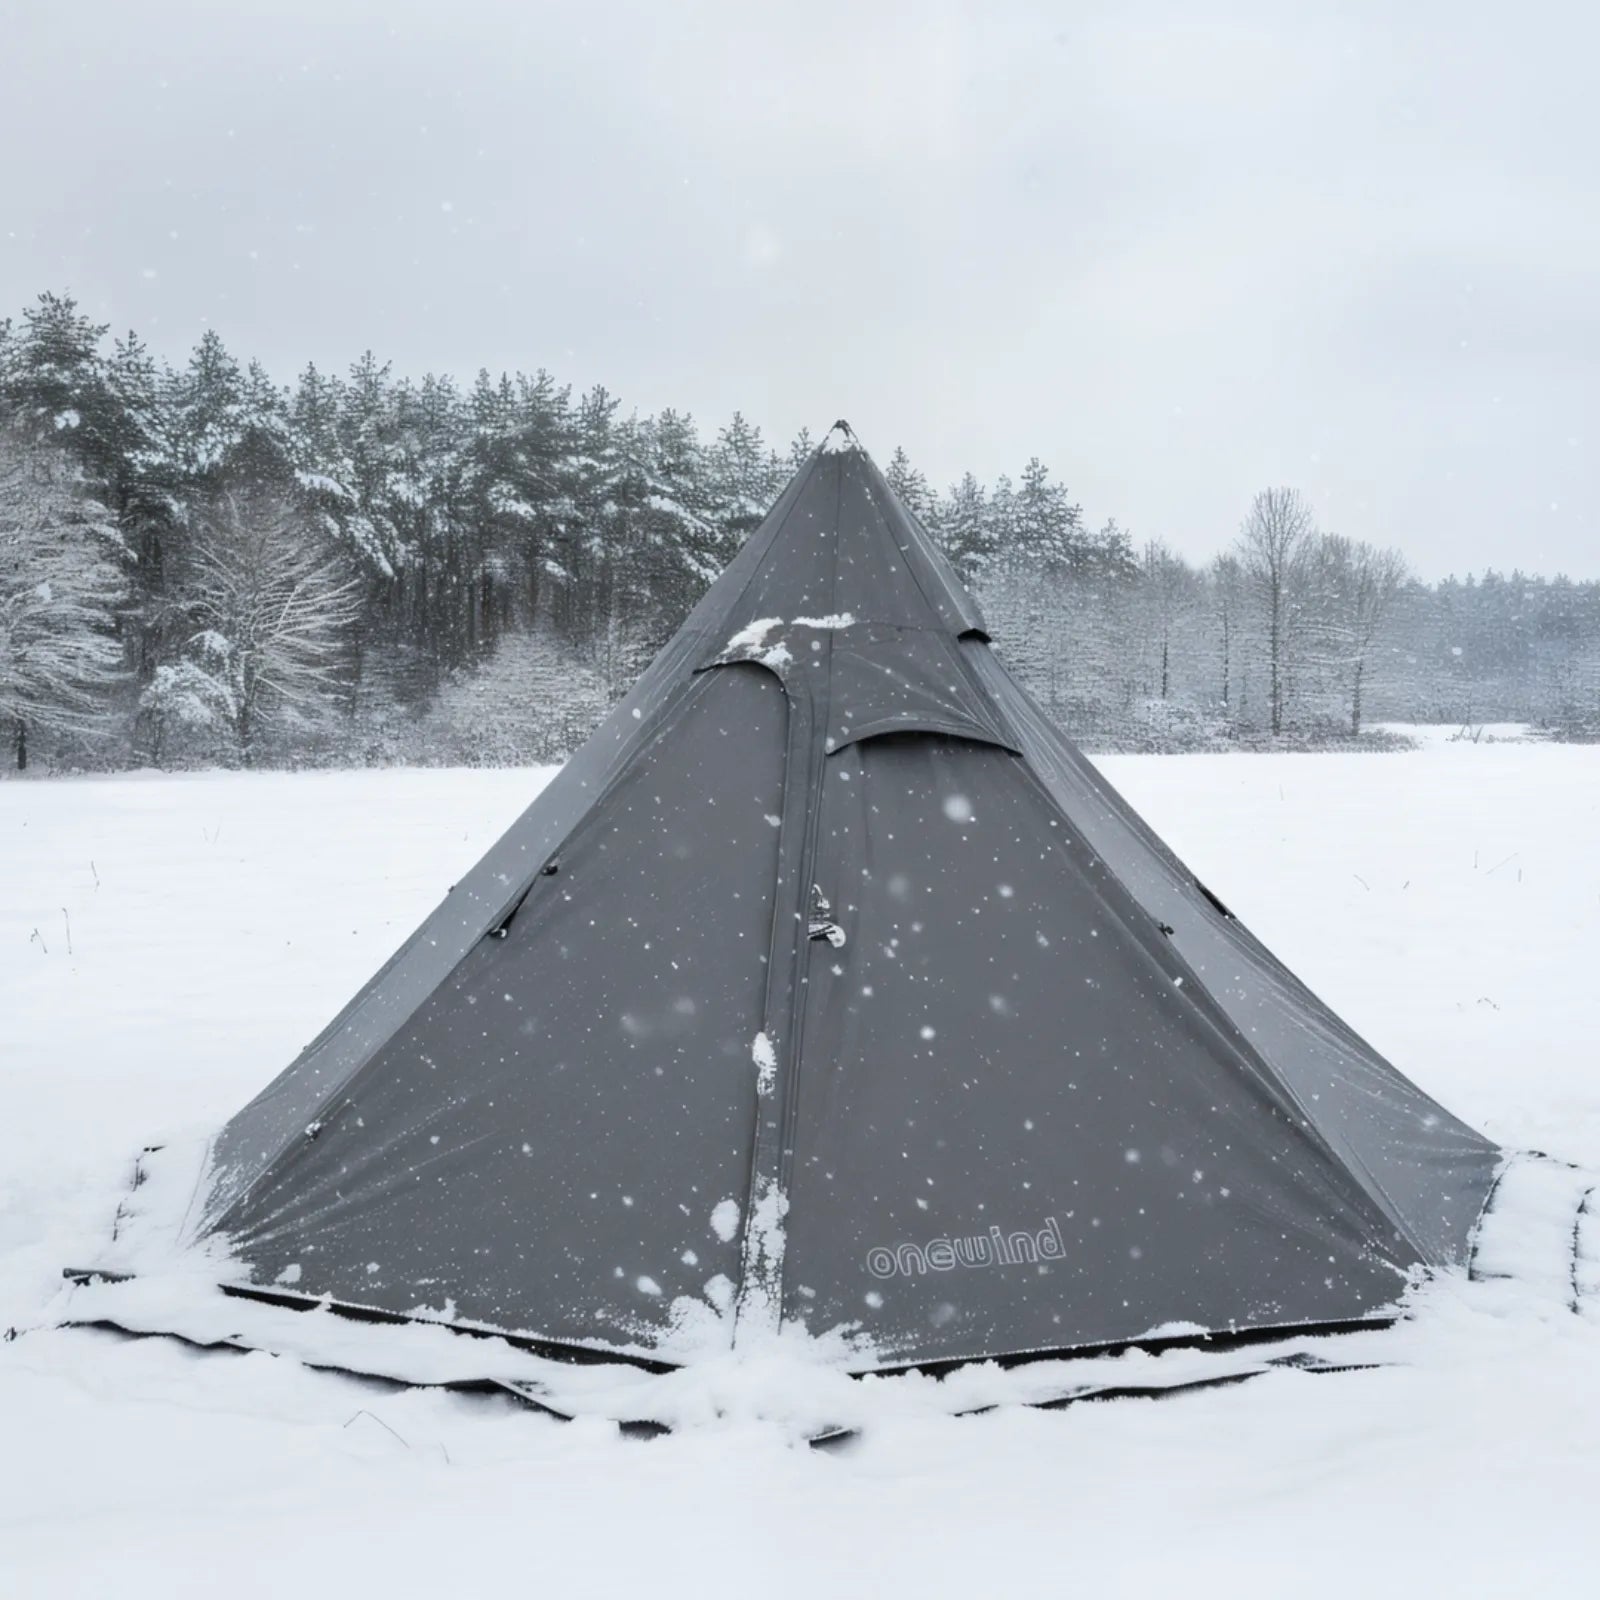
Where Solo Skyshade Tartent Fits

The Solo Skyshade Tartent is the product link to start with if you want a more tarp/tent-style solo shelter inside this bivy-adjacent decision.
It is positioned as a Bivy Tent product with a modular shelter angle, OD Green variant, and a live product price of $149.99 at the time this article was prepared.
The useful way to read that is not "this replaces every one-person tent."
The useful way to read it is "this belongs in the structured solo shelter lane."
It makes sense for a camper who wants low-profile coverage, more shape than a flat sack, and a compact solo setup.
It makes less sense for someone who wants a roomy interior, shared camp space, or a vestibule-first shelter.
Use it when the trip matches the shelter.
Do not force the shelter to match the wrong trip.
Where SoloVent Fits

Onewind's current live bivy product page is the Ultralight SoloVent Bivy Tent.
That matters because older handles can create confusion when readers are comparing bivy-style products.
Use the current product link when the reader wants a structured bivy-style solo shelter with a sleep-first job.
The SoloVent lane is clear: more shape and clearance than a flat bivy sack, still not a tent room.
That makes it useful for the camper who already accepts the bivy workflow but wants less face contact, better mesh control, and a more defined pitch.
If the reader is still deciding between the broader categories, send them to the bivy vs tent guide.
If they need the basic definition first, send them to what is a bivy sack.
Scenario 1: Beginner Worried About Claustrophobia

Verdict: choose a bivy sack tent only for a controlled first trip.
The structure is the point here.
A beginner who is worried about claustrophobia should not start with the tightest possible shelter and hope the feeling improves at 2 a.m.
Use a backyard pitch or short overnight to test whether the head-end structure is enough.
Enter the shelter fully, zip the mesh, reach for water, roll over, and get out again.
If that sequence feels manageable, the category may work.
If it feels stressful before the trip starts, the answer is a one-person tent.
The shelter should reduce anxiety, not become the lesson.
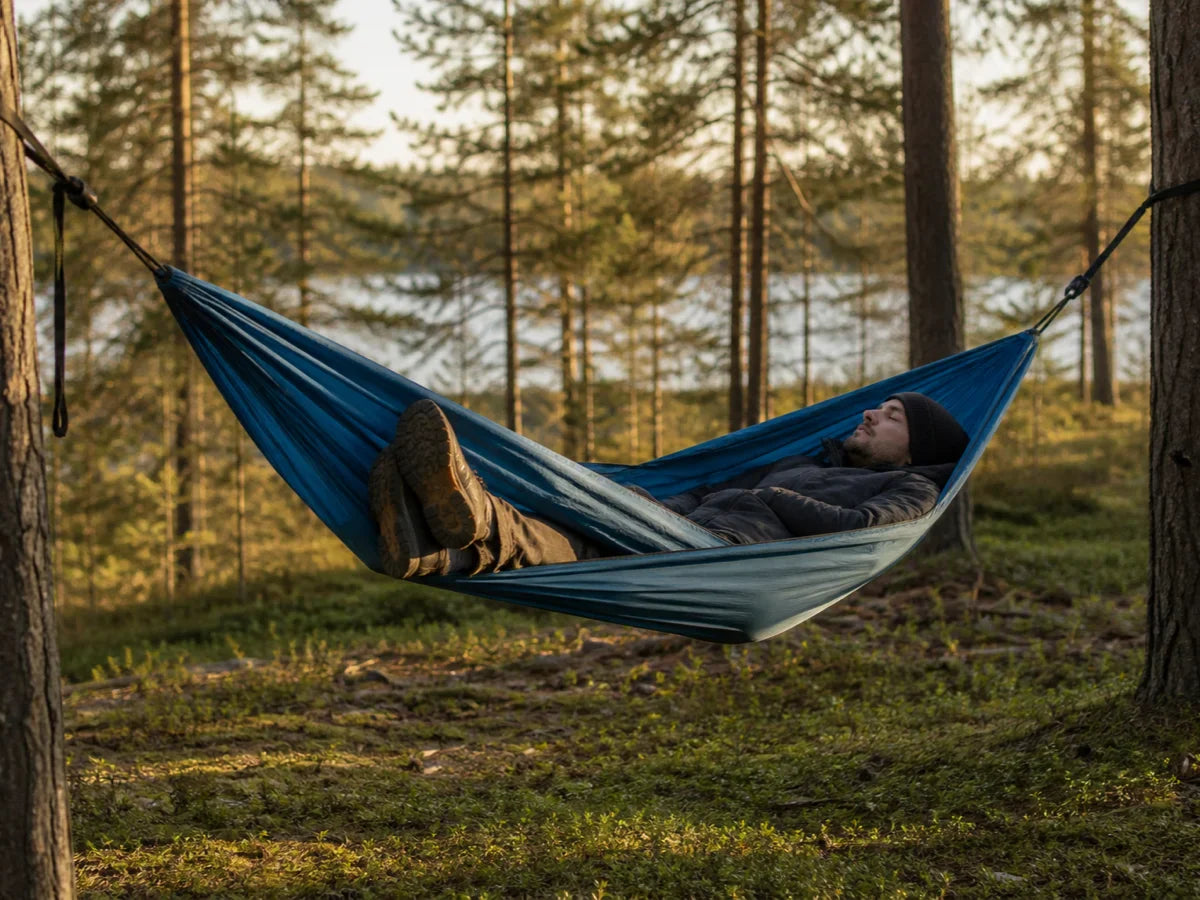
Scenario 2: Flat Bivy Sack vs Structured Bivy Sack Tent

Verdict: choose the structured option when comfort is the real blocker.
A flat bivy sack is efficient when the sleeper already accepts tight space.
It shines when the forecast is mild, the ground is durable, and the camper wants the smallest planned sleep shelter possible.
A bivy sack tent earns its extra structure when the flat sack's weaknesses matter.
Those weaknesses are usually face fabric, bug mesh position, entry shape, and quilt contact.
If those are the reasons you are hesitating, structure is not a luxury.
It is the feature you are buying.
If you are only chasing the smallest packed item, stay flat.
If you are chasing a better night, move to structure.
Scenario 3: Bikepacker With Compact Bags

Verdict: choose a bivy sack tent if your bike luggage values compact shape more than camp room.
Bikepackers often care about packed shape as much as packed weight.
A shelter that fits a handlebar roll or frame bag can be easier to live with than a bulkier tent package.
That is where a bivy sack tent can make sense.
It gives a solo rider a defined sleep shelter without demanding a large tent site.
The weak point is gear management.
Bike shoes, helmet, wet shell, and small bags still need a plan.
In dry weather, that plan can be simple.
In rain, add overhead coverage or choose a shelter with a vestibule.
The bike does not make wet gear less wet.
It only makes compact packing more valuable.
Scenario 4: Wet-Weather Camper

Verdict: add a tarp or choose a tent.
A bivy sack tent can handle some weather, but wet camp chores are bigger than sleeping.
You still need to enter without dragging water onto the quilt.
You still need to keep boots reachable.
You still need a place for the pack.
You still need enough airflow that the inside does not become clammy.
A tarp solves several of those problems at once.
It gives you a dry entry zone, a place to stage gear, and more confidence to keep vents open.
If the trip is short and the rain is light, that combination can work.
If the trip is long and wet, a tent is often the simpler shelter.
Scenario 5: One-Person Tent vs Bivy Sack Tent For 1-2 Nights

Verdict: choose the bivy sack tent for fast sleep, choose the tent for camp time.
For one or two nights, the bivy sack tent can be a smart middle choice.
The trip is short enough that compactness has real value and weather mistakes have less time to compound.
It works best when you arrive late, sleep, and move in the morning.
It works worse when you plan to sit around camp, change layers under cover, organize gear, or wait out weather.
That is the honest difference.
A tent is not always better.
It is better when you need the jobs a tent does.
A bivy sack tent is better when you do not want to carry those jobs.
Common Mistakes With Bivy Sack Tents

The pattern is simple.
Most failures come from expecting a bivy sack tent to behave like something else.
It is not a flat emergency bag.
It is not a full tent.
It is a compact structured solo shelter.
Use it that way.
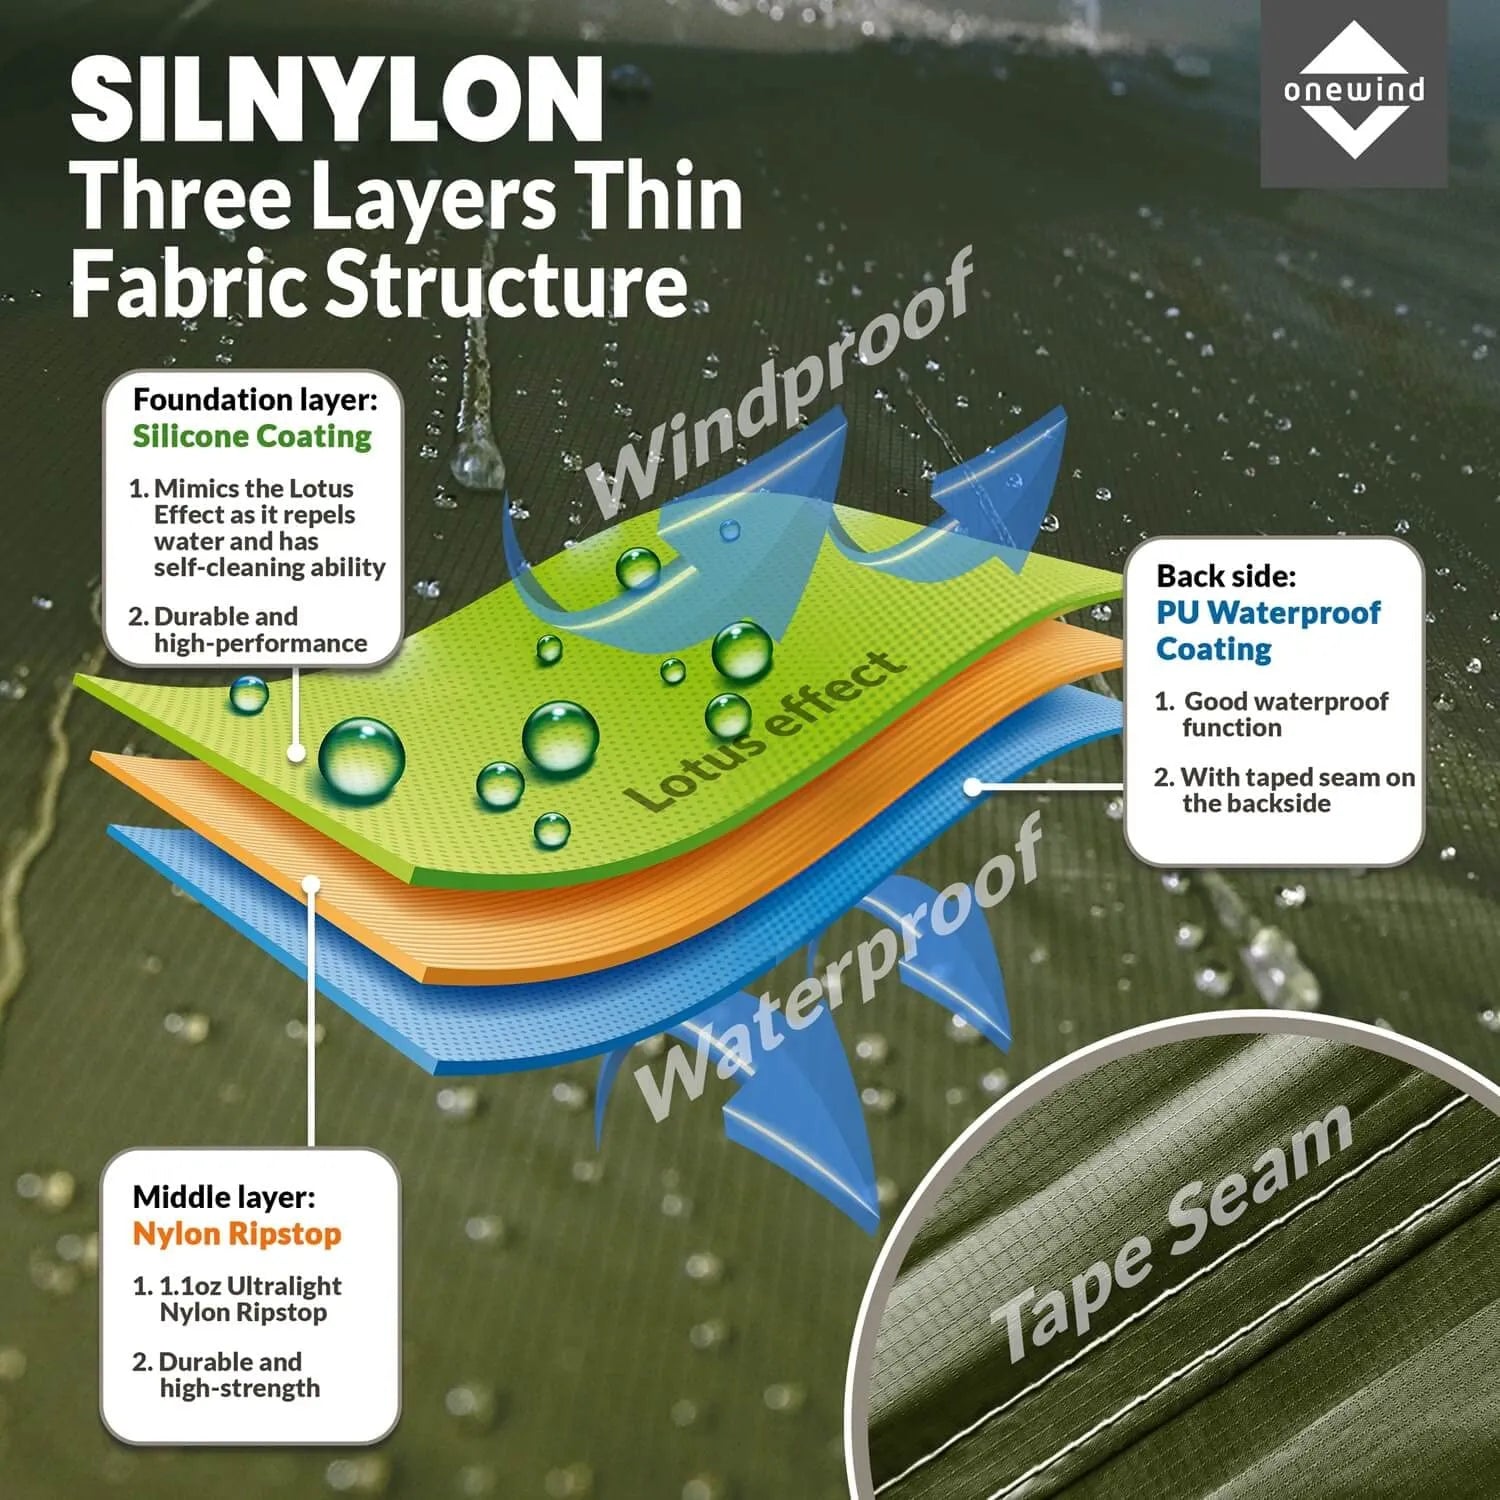
Mistake 1: Trusting Waterproof Fabric Too Much

Waterproof fabric protects only the parts it actually covers.
It does not cover every camp task.
Your pack can still get wet.
Your boots can still fill with rain.
Your quilt can still touch a damp wall if the pitch sags.
The fix is to separate weather protection from living space.
If you need a dry working area, add a tarp or choose a tent.
If you only need sleep protection on a short mild trip, the bivy sack tent can stay simple.
Mistake 2: Closing Every Vent Because It Feels Safer

Closing every vent can make the shelter feel protected for the first ten minutes.
It can make the inside damp by morning.
A low shelter needs airflow because the sleeper is creating moisture all night.
The fix is to vent before the problem starts.
Use mesh, protected openings, and tarp coverage when the forecast allows it.
If rain forces every opening shut, treat that as a shelter-selection signal.
The trip may need more overhead coverage or more interior volume.
Mistake 3: Bringing Tent Expectations Into a Bivy Shelter

A bivy sack tent can feel excellent when the job is sleeping.
It can feel frustrating when the job is living in camp.
Do not plan to sort a full pack inside.
Do not plan to change bulky layers inside.
Do not plan to wait out a long storm inside unless you already know you tolerate low shelters well.
The fix is to name your camp behavior before buying.
If you hike until dark, sleep, and leave early, the category is strong.
If you like slow camp evenings, bring a roomier shelter.
Mistake 4: Ignoring Product Fit

Do not choose a product just because it sits near the right category.
Choose it because the trip matches its design.
The Solo Skyshade Tartent is the better internal link when the reader wants a structured tarp/tent-style solo shelter.
The Ultralight SoloVent Bivy Tent is the better internal link when the reader is closer to a sleep-focused bivy tent.
Both belong in the structured solo shelter conversation.
Neither should be described as a universal tent replacement.
That honest distinction builds the right expectation before checkout.
Checklist Before You Pack One

Use this checklist before the first real trip.
Pitch the shelter once in daylight.
Put your actual pad and quilt inside.
Lie down for ten minutes.
Roll to both sides.
Reach for the headlamp and water bottle.
Get out without dragging the quilt through the entry.
Then decide where boots, pack, and rain shell go.
If the dry practice pitch feels awkward, a wet trail pitch will feel worse.
Fix that at home.
Final Verdict

A bivy sack tent is a compact solo shelter for campers who want structure without carrying a full tent room.
It solves face clearance, mesh shape, and some comfort problems from flat bivy sacks.
It does not solve vestibule storage, sit-up room, or long wet-weather living.
If you want the tarp/tent-style side of the category, start with the Solo Skyshade Tartent.
If you want the sleep-focused bivy tent side, compare it with the Ultralight SoloVent Bivy Tent.
If weather coverage is the missing piece, browse the broader Onewind shelter collection and add tarp coverage before the forecast makes the decision for you.