Todos los guías dicen "cuelga a 30 grados". Ninguno te muestra cómo.
Leí las 5 mejores guías de montaje de hamacas que ahora mismo están mejor posicionadas en Google.
Todos dicen lo mismo: «cuélgalo a 30 grados», «usa la tensión adecuada», «acuéstate en diagonal».
Buen consejo. Completamente inútil si estás de pie entre dos árboles a las 6 de la tarde tratando de averiguar cómo se ven realmente 30 grados.
Después de revisar más de 200 hilos de Reddit de r/hammockcamping y r/CampingGear, el patrón estaba claro.
El 90% de los fallos de configuración provienen de tres errores.
Ángulo de suspensión incorrecto.
Dormir recto en lugar de en diagonal.
Sin aislamiento inferior.
Todo solucionable. Todo prevenible. Pero solo si alguien te muestra cómo revisar cada uno sin herramientas especiales.
Eso es lo que hace esta guía. Siete pasos, en orden, con una prueba específica en cada paso para que sepas que lo hiciste bien antes de seguir adelante.
Lo que aprenderás en esta guía
- ✓ La secuencia exacta de configuración en 7 pasos utilizada por campistas experimentados en hamaca (con tiempos: 25 min al primer intento, 10 min para el viaje 3)
- ✓ Cómo verificar tu ángulo de suspensión de 30° usando el atajo de la longitud del brazo (sin necesidad de herramientas)
- ✓ El truco de elevar el extremo de los pies 6 pulgadas más alto que la mayoría de las guías de montaje pasan por alto por completo
- ✓ Por qué dormir recto provoca presión en los hombros y cómo la postura diagonal la corrige (desplazamiento de 30-45°)
- ✓ El árbol de decisiones de temperatura para el aislamiento: cuándo necesitas una colchoneta, un underquilt o ambos
- ✓ Una lista completa de equipo con la función específica de cada componente
Respuesta rápida
Si sigues los 7 pasos en orden → lo tendrás configurado en 25 minutos a la primera, y en 10 minutos para el tercer viaje.
Si omites pasos o sigues un orden incorrecto → ahí es donde ocurre el 90% de los fallos de los principiantes.
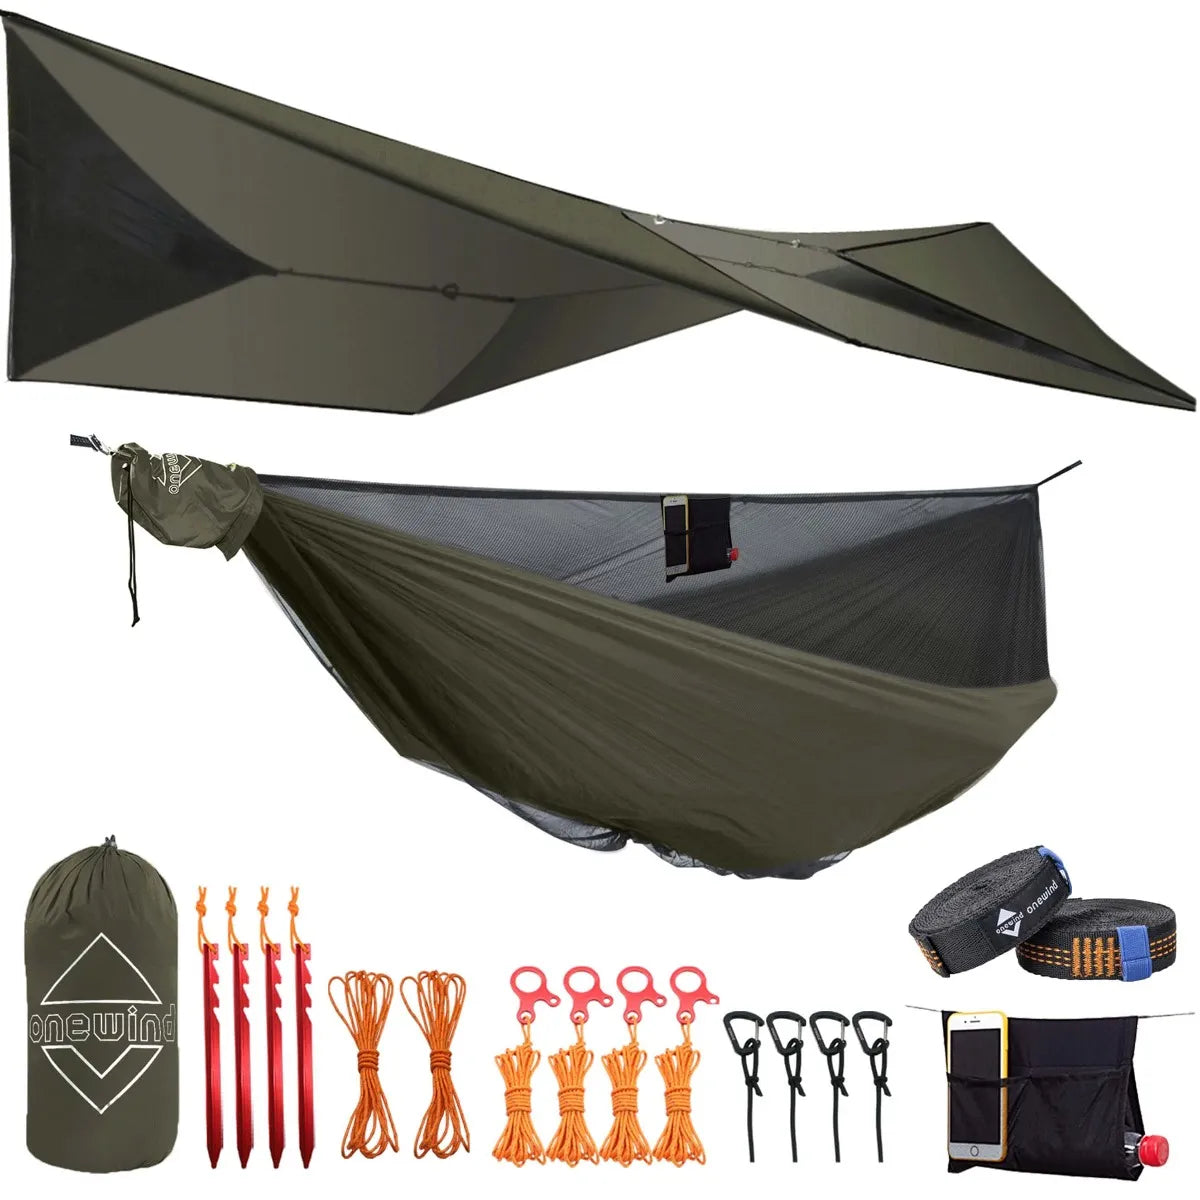
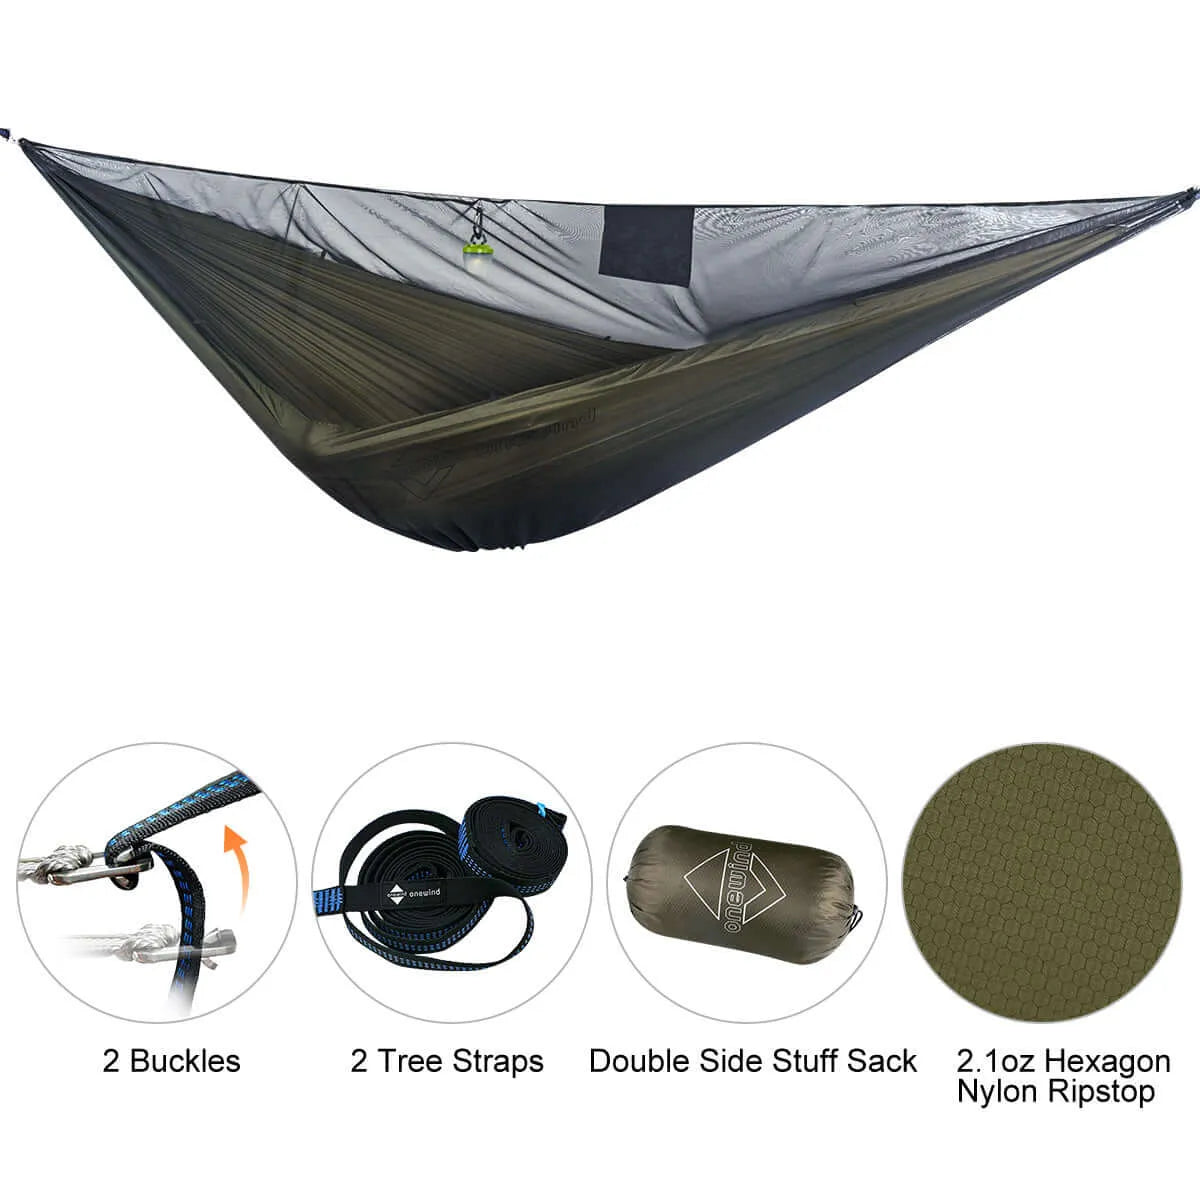
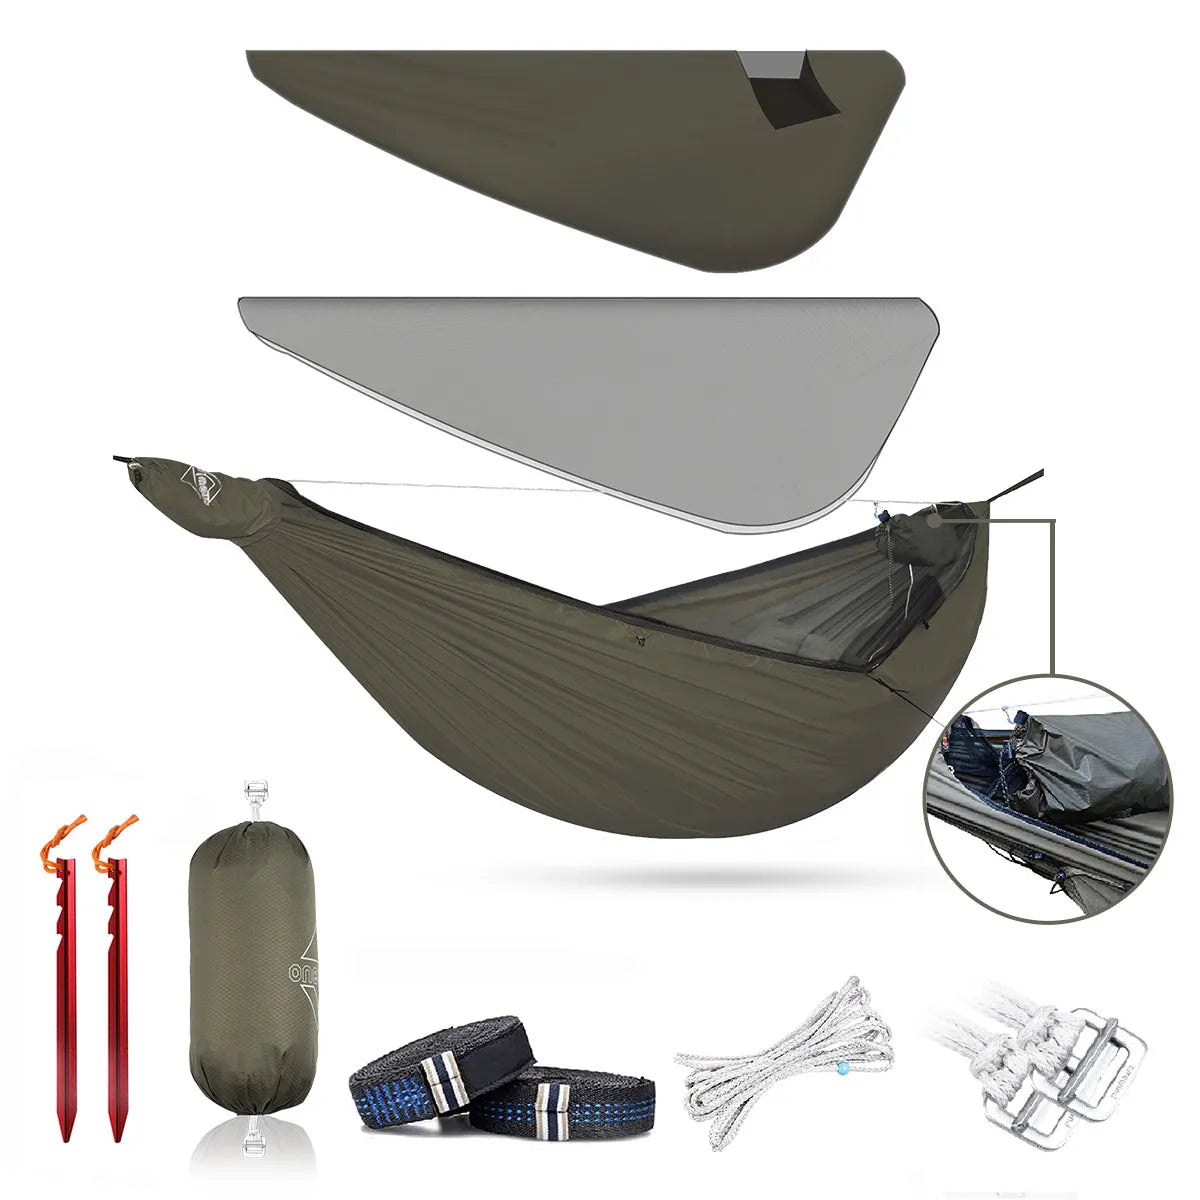
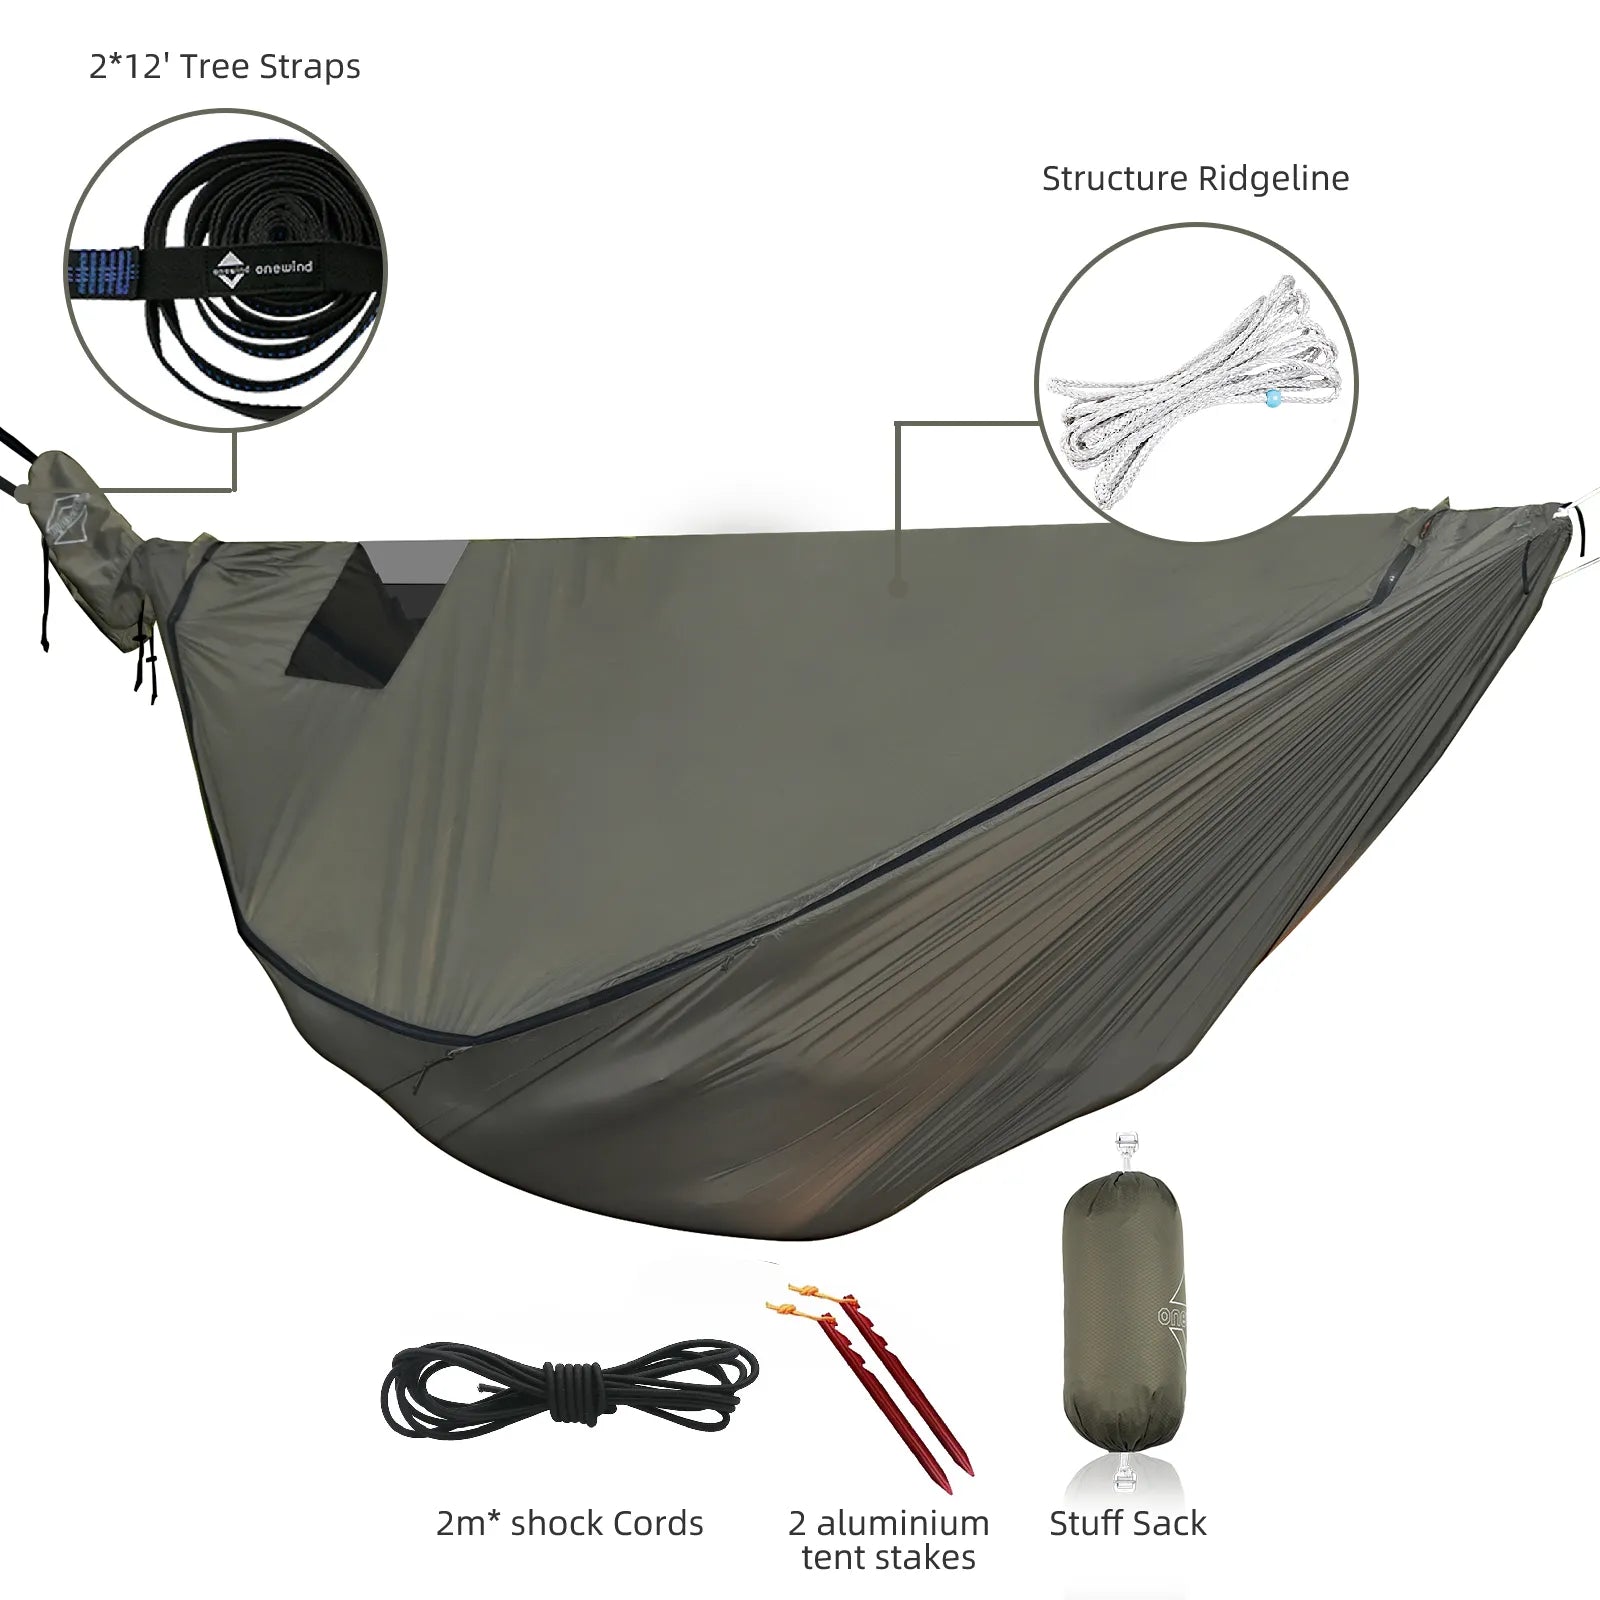
Lista completa de equipo
Antes de tu primer colgado, aquí tienes cada componente y por qué importa:
Peso total del sistema: Una configuración completa para 3 estaciones (hamaca + correas + toldo + mosquitera + colcha aislante inferior) pesa entre 57 y 80 oz, según la marca y los materiales. Como referencia, un sistema de tienda de campaña comparable pesa entre 50 y 65 oz — ver nuestra comparación completa de peso entre hamaca y tienda de campaña.
El método de configuración de 7 pasos
Paso 1: Selecciona tu sitio
Lo que estás buscando: Dos árboles sanos y vivos, separados entre 10 y 15 pies, cada uno con al menos 6 pulgadas de diámetro.
Cómo medir el diámetro de un árbol: Rodea el tronco con ambas manos. Si tus dedos no se tocan al otro lado, el árbol es lo suficientemente grueso (aproximadamente 6"+ de diámetro).
Cómo comprobar el espaciadoPárese con la espalda contra un árbol y dé 4-5 pasos normales hacia el otro. Eso equivale aproximadamente a 12-14 pies: el punto ideal.
Lista de verificación para la selección del sitio:
- Dos árboles vivos, separados entre sí 10-15 pies, con un diámetro de más de 6"
- Sin ramas secas por encima ("asesinas de viudas")
- El suelo debajo está libre de rocas y objetos afilados
- Al menos a 200 pies de fuentes de agua
- No en una senda de animales ni en un corredor de viento
- El campamento permite acampar en hamaca (algunos parques lo restringen)
Error común: Elegir los dos primeros árboles que veas. Dedicar 5 minutos a explorar ahorra 30 minutos de volver a colgar después.
Paso 2: Coloca las correas de tu árbol
Dónde colocar las correas: Envuelve cada correa alrededor del árbol aproximadamente altura de la cabeza (5-6 pies desde el suelo para la mayoría de los adultos).
El truco de elevar el extremo de los pies 6 pulgadas.: Coloca la correa del extremo de los pies unos 6 pulgadas más alta que el extremo de la cabeza. Esto concentra el peso de tu cuerpo por debajo de la caja torácica, creando una posición notablemente más plana. La mayoría de las guías de montaje omiten este detalle. Es la diferencia entre despertarte plano y despertarte curvado.
Requisitos de la correa:
- Ancho: 1 pulgada mínimo, 1,5-2 pulgadas recomendado
- Muchos campamentos requieren correas de más de 1" de ancho para proteger la corteza de los árboles
- Nunca use cuerda. Corta la corteza, se estira durante la noche y está prohibida en muchos lugares.
Prueba de verificación: Tire de cada correa con firmeza. Debe soportar su peso sin deslizarse. La correa debe quedar plana contra la corteza, sin amontonarse ni retorcerse.
Paso 3: Compruebe su ángulo de suspensión
Objetivo: Las líneas de suspensión deben colgar a una ángulo de 30° del árbol.
El atajo de la longitud del brazo (sin necesidad de transportador): Póngase junto al árbol donde está sujeta la correa. Extienda el brazo recto hacia afuera en posición horizontal. Su línea de suspensión debe inclinarse hacia abajo aproximadamente hasta el punto donde estaría su codo si doblara el brazo a la mitad. Eso es aproximadamente 30°.
Por qué importan los 30°: Demasiado ajustado (más cerca de la horizontal) junta los hombros y fuerza la estructura. Demasiado flojo (más cerca de la vertical) te deja demasiado cerca del suelo y crea un capullo incómodo.
Ajuste: Si el ángulo parece demasiado pronunciado, sube las correas en el árbol. ¿Demasiado poco pronunciado? Muévelas más abajo o aumenta la separación entre los árboles.
Paso 4: Cuelga y prueba tu hamaca
Recorta la hamaca a los mosquetones de cada correa. La parte inferior de la hamaca debe colgar aproximadamente 18 pulgadas sobre el suelo cuando está vacío.
La prueba de sentarseSiéntese en la hamaca como si estuviera sentado en una silla. Sus talones solo deben tocar el suelo. Si sus pies quedan colgando, la hamaca está demasiado alta: baje las correas. Si sus glúteos casi tocan el suelo, está demasiado baja: suba las correas o apriete.
Tensión de la línea de cumbrera: Si tu hamaca tiene una línea de cresta estructural, debería presentar una ligera curvatura cuando está vacía que se endereza cuando te sientas. Piensa tensión de cuerda para tender la ropa, no cuerda de guitarra. Lo suficientemente tenso para mantener la forma, lo suficientemente suelto para ceder cuando se carga.
Prueba de verificación: Siéntese completamente en la hamaca durante 30 segundos. Compruebe:
- La base se eleva del suelo al menos 6" con tu peso encima
- Sin crujidos de herrajes ni sonidos de deslizamiento de la correa
- Puedes entrar y salir sin hacer malabares
Paso 5: Domina la posición diagonal de descanso
Esto es la técnica individual más importante en el camping en hamaca. La mayoría de los principiantes lo omiten por completo.
Acostarse recto en una hamaca (con la cabeza y los pies alineados con la línea central) crea la «forma de banana»: columna vertebral curvada, hombros comprimidos y puntos de presión incómodos.
Por eso la gente dice: «las hamacas me duelen la espalda».
La solución es simple: mueve tu cuerpo 30-45° fuera de la línea central.
Acuéstate en diagonal para que tu cabeza quede cerca de un borde y tus pies cerca del borde opuesto.
La tela de la hamaca se extiende más ancha debajo de ti, creando una superficie para dormir casi plana.
Tu columna se endereza y tus hombros se abren.
¿Esa curva de plátano?
Se fue.
Cómo encontrar el ángulo correcto: Métete en la hamaca y acuéstate recto. Ahora mueve los pies unos 12 pulgadas hacia un lado y la cabeza unos 12 pulgadas hacia el otro. Sentirás cómo la superficie se aplana casi de inmediato. En mi experiencia, este es el momento en que la mayoría de la gente pasa de «las hamacas son raras» a «ah, ahora lo entiendo».
Comparación antes y después:
Experiencia real del usuario: Los campistas experimentados en hamaca, con más de 60 noches, afirman de forma constante que la posición diagonal es el momento en que el campamento en hamaca “encaja”. Las primeras 1-2 noches se sienten incómodas. Para la noche 4, la mayoría de los durmientes se duerme más rápido que en una tienda de campaña.
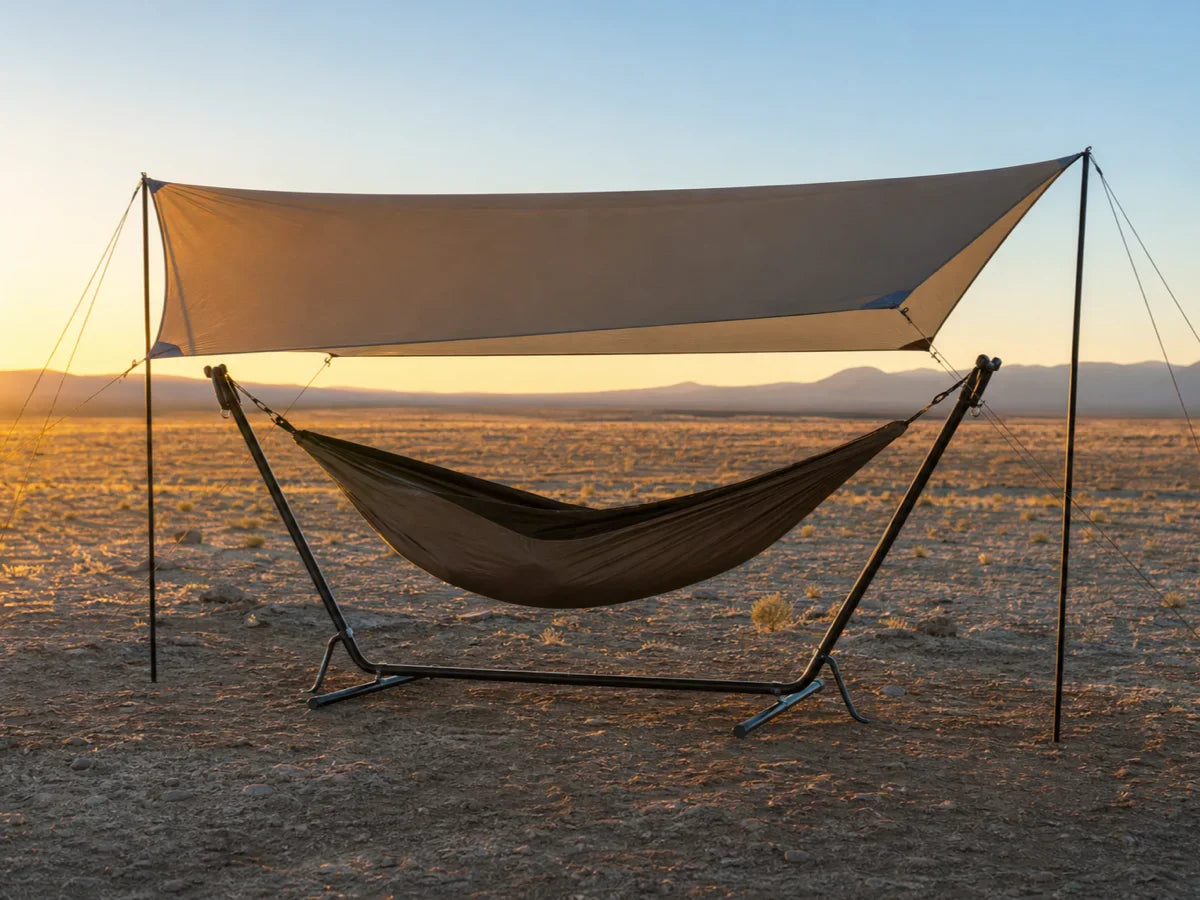
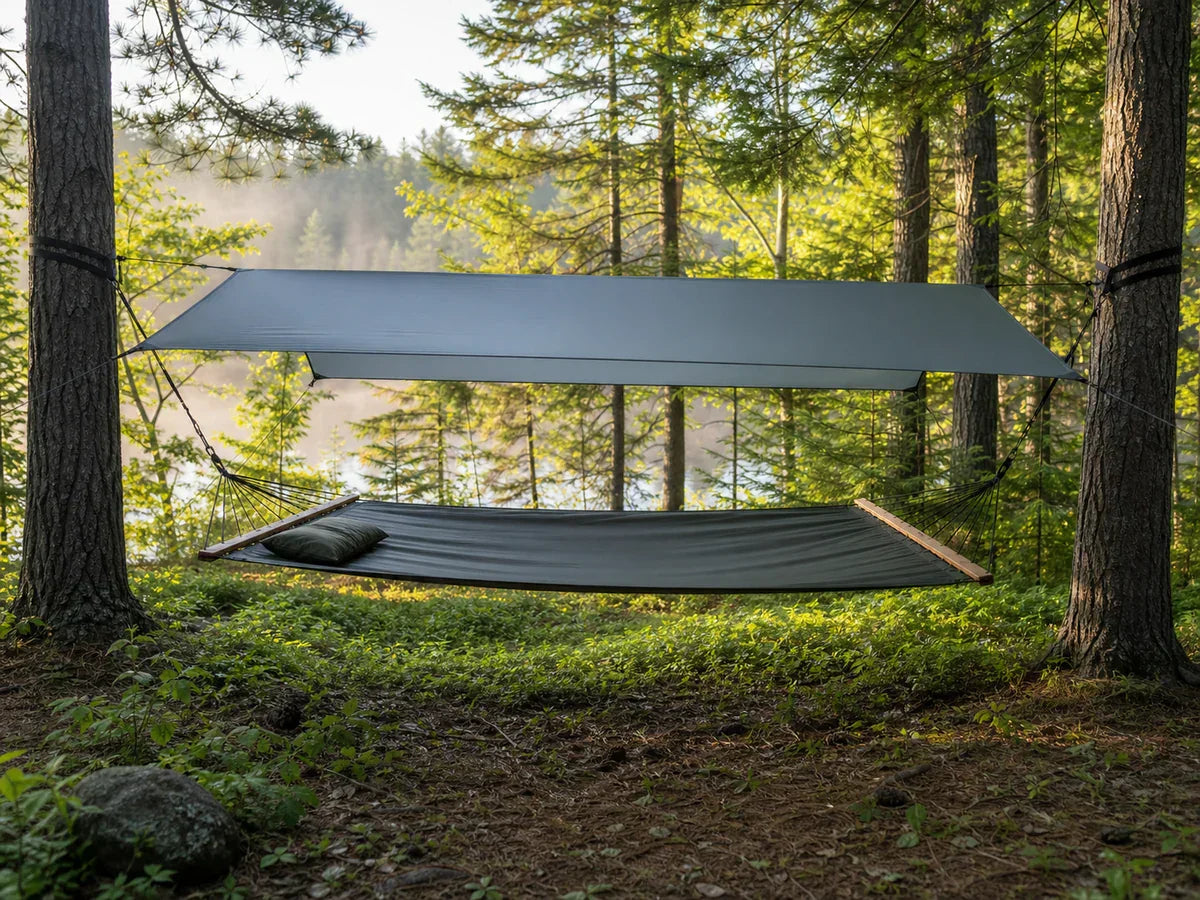
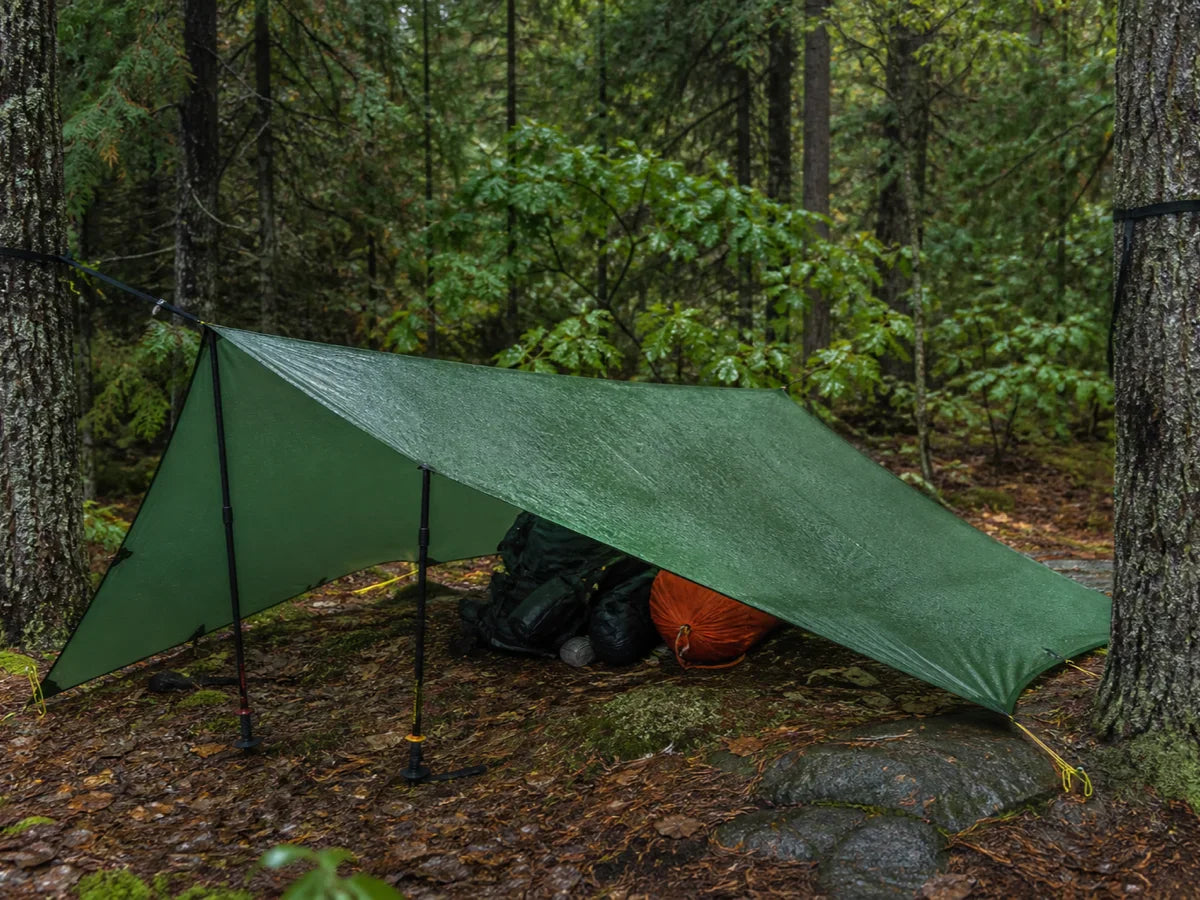
Paso 6: Despliega tu lona
Cuándo: Siempre. Incluso si el pronóstico dice que estará despejado. Pregúntale a cualquiera que haya sido sorprendido sin uno: cielo despejado a las 8 p. m., lluvia lateral a medianoche. Una lona tarda 5 minutos en montarse en seco, pero 30 minutos en colocarse a la fuerza bajo un aguacero.
Procedimiento de configuración:
- Monta la línea de cumbrera de la lona entre los mismos dos árboles, colocados por encima de la línea de suspensión de su hamaca (por encima de la cinta con bucles si utiliza una)
- Centra la lona sobre tu hamaca — a lona hexagonal o lona cuadrada debe extenderse 8-12 pulgadas más allá de cada extremo de la hamaca
- Coloca la línea de cumbrera perpendicular al viento dirección, con el borde de barlovento ligeramente más bajo para desviar las ráfagas
- Clava las esquinas usando vientos y postes para lonas si es necesario. La tensión debe ser lo suficientemente firme para evacuar la lluvia, pero no tan fuerte que rompa los puntos de sujeción
Compromiso de altura del tarp:
Prueba de verificación: Túmbate en la hamaca y extiende los brazos. Deberías poder tocar la lona, pero no debería presionarte. Echa un poco de agua sobre la lona: debería deslizarse hacia los lados, no acumularse.
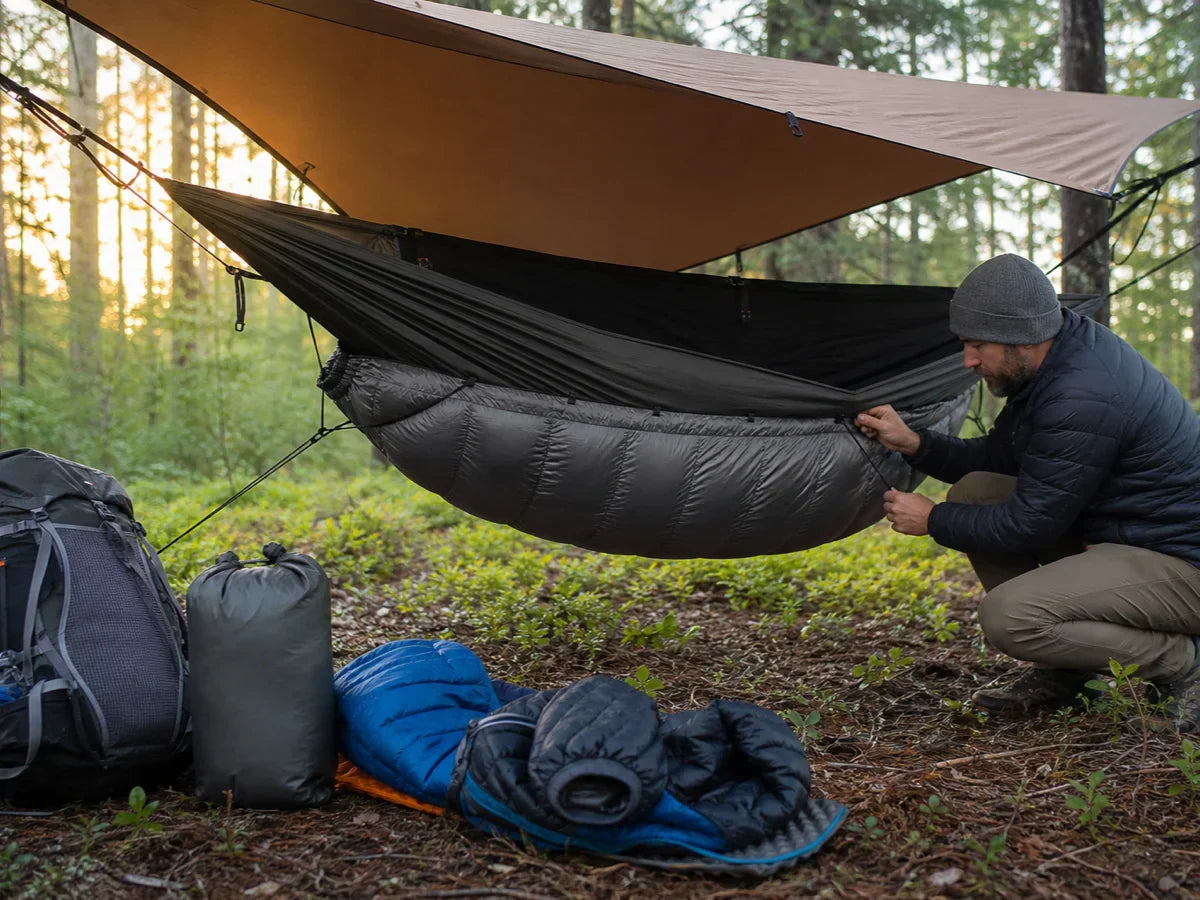
Paso 7: Añadir aislamiento (dependiente de la temperatura)
Este es el paso que más dinero les cuesta a los principiantes, no por lo que compran, sino por lo que omiten.
Trae tu saco de dormir.
¿Te mantuvo abrigado en una tienda de campaña, así que debería funcionar en una hamaca, verdad?
No.
El peso de tu cuerpo aplasta el aislamiento que tienes debajo, dejándolo plano.
¿Esas bolsas de aire que atrapan el calor?
Se fue.
Tu saco de dormir de 30°F se convierte en un saco de 50°F en la parte inferior.
Para las 2 de la madrugada, estás temblando y no sabes por qué.
El árbol de decisiones de temperatura:
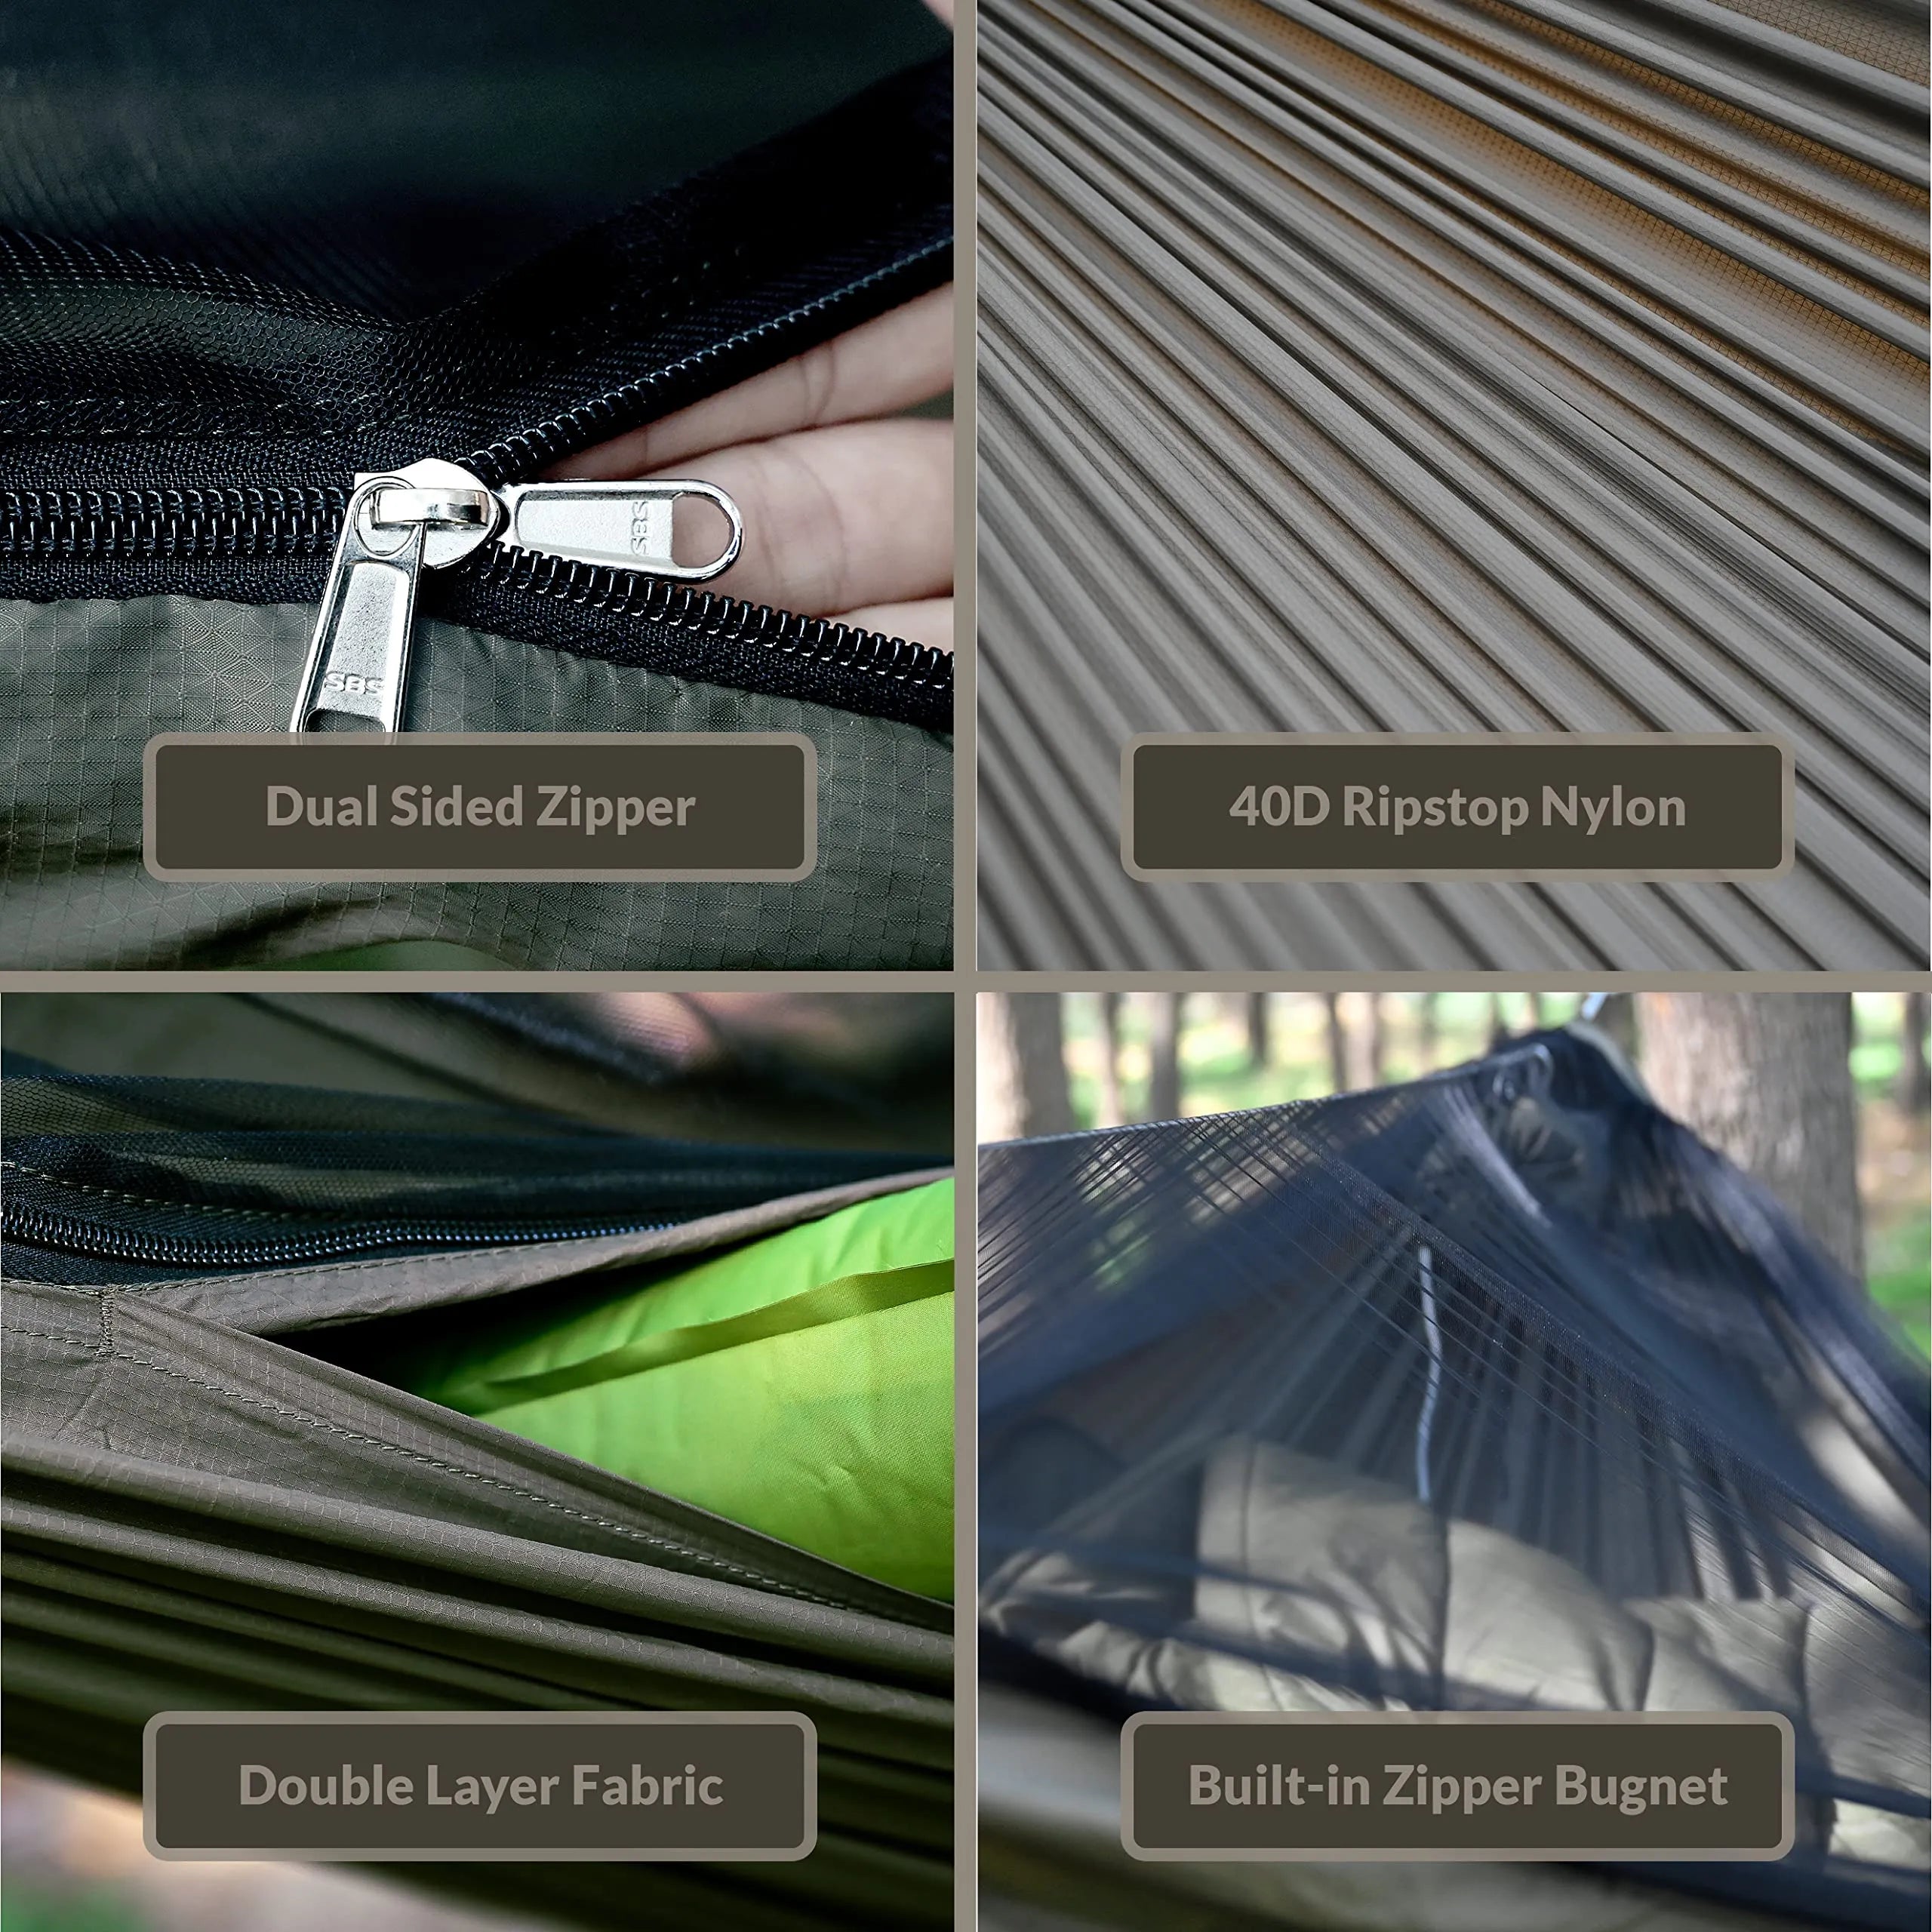
Instalación del aislante inferior: Sujeta el underquilt a la línea de suspensión de tu hamaca utilizando los mosquetones adjuntos. Debe envolver la parte inferior de la hamaca como un capullo, centrado debajo de tu torso. Sin huecos: el aire frío encuentra los huecos. En condiciones de humedad o viento, añade un protector de colcha inferior para protegerlo de la humedad.
Prueba de verificación: Túmbate en la hamaca con tu sistema de aislamiento instalado. Coloca tu mano desnuda en la parte inferior de la hamaca desde el exterior. Si puedes sentir calor, el aislante inferior está funcionando. Si la tela se siente fría, hay un hueco; ajústalo.
Para ver un desglose completo de costes que compara los sistemas de aislamiento para hamacas frente a los sistemas de descanso en tienda de campaña, consulte guía de hamaca frente a tienda de campaña.
Guías de escenarios: configuración según la situación
Escenario 1: Sesión de práctica en el patio trasero (por primera vez)
Veredicto: Empieza aquí antes de cualquier viaje real
Te queda bien si:
- ✓ Acabas de comprar tu primera hamaca
- ✓ Nunca has colgado uno antes
- ✓ Quieres aprender sin la presión de una acampada real
Por qué importa practicar en el patio trasero: Dos simulacros de acampada antes de tu primera salida real reducen la ansiedad de montaje en aproximadamente un 70 % (según informes de foros de usuarios). Puedes cometer errores en casa —ángulo incorrecto, altura incorrecta, correas enredadas— sin consecuencias.
Lista de verificación para practicar en el patio trasero:
- Completa los pasos 1-5 (sitio → correas → ángulo → colgar → recostarse en diagonal)
- Cronométrate: el primer intento tardará aproximadamente 25 minutos; el objetivo es menos de 15 minutos en el tercer intento
- Duerme una noche completa en la hamaca para probar la comodidad
- Practica entrar y salir en la oscuridad (usa una linterna frontal)
- Si las temperaturas están por debajo de 55 °F, prueba también tu configuración de aislamiento.
La mejor configuración para principiantes: Hamaca de camping Onewind de 11 pies + correas para árboles — lo suficientemente ancho para tumbarse en diagonal, correas incluidas. Si desea entrada con cremallera para un acceso más fácil, pruebe el Hamaca con cremallera de 11 pies. Para los mochileros preocupados por el peso, el Ultraligero de 11 pies ahorra onzas sin sacrificar espacio.
Escenario 2: Campamento establecido
Veredicto: Comprueba primero las reglas y luego sigue los 7 pasos
Te queda bien si:
- ✓ Acampar en un camping designado con parcelas numeradas
- ✓ Los árboles están disponibles, pero pueden estar regulados
- ✓ Hay otros campistas cerca
Preocupaciones específicas del camping:
- Muchos campamentos exigen correas de 1" o más de ancho (nunca cuerda)
- Algunos sitios restringen el uso de hamacas a árboles designados.
- Algunos parques nacionales (Arches, Joshua Tree) prohíben por completo las hamacas
- Llama con antelación o consulta el sitio web del parque antes de llegar
Modificaciones de configuración:
- El paso 1 puede estar limitado por los árboles del sitio asignados
- Utiliza correas más anchas (2") para una máxima protección del árbol
- Monta la lona incluso con buen tiempo: la etiqueta en el campamento espera dejar el mínimo rastro
Escenario 3: Configuración para clima frío (por debajo de 50 °F)
Veredicto: el aislante inferior no es negociable
Te queda bien si:
- ✓ Las temperaturas nocturnas bajan de 50 °F
- ✓ Acampar en otoño, invierno o principios de primavera
- ✓ Necesitas que tu sistema de aislamiento realmente funcione
Por qué el clima frío lo cambia todo: Por debajo de 50 °F, el flujo de aire debajo de tu hamaca se convierte en tu enemigo. Un saco de dormir por sí solo no te salvará. Se comprime por el peso de tu cuerpo, y el aislamiento comprimido no sirve de nada.
Añadidos para condiciones de frío a los 7 pasos:
- Después del paso 4 (colgar la hamaca): instale el aislante inferior antes de subirse.
- Después del paso 6 (lona): baje la posición de la lona para protegerla del viento
- El paso 7 se vuelve crítico: bajoquilt + sobrequilt + capas de ropa aislante
Añadidos de ropa y equipo para clima frío:
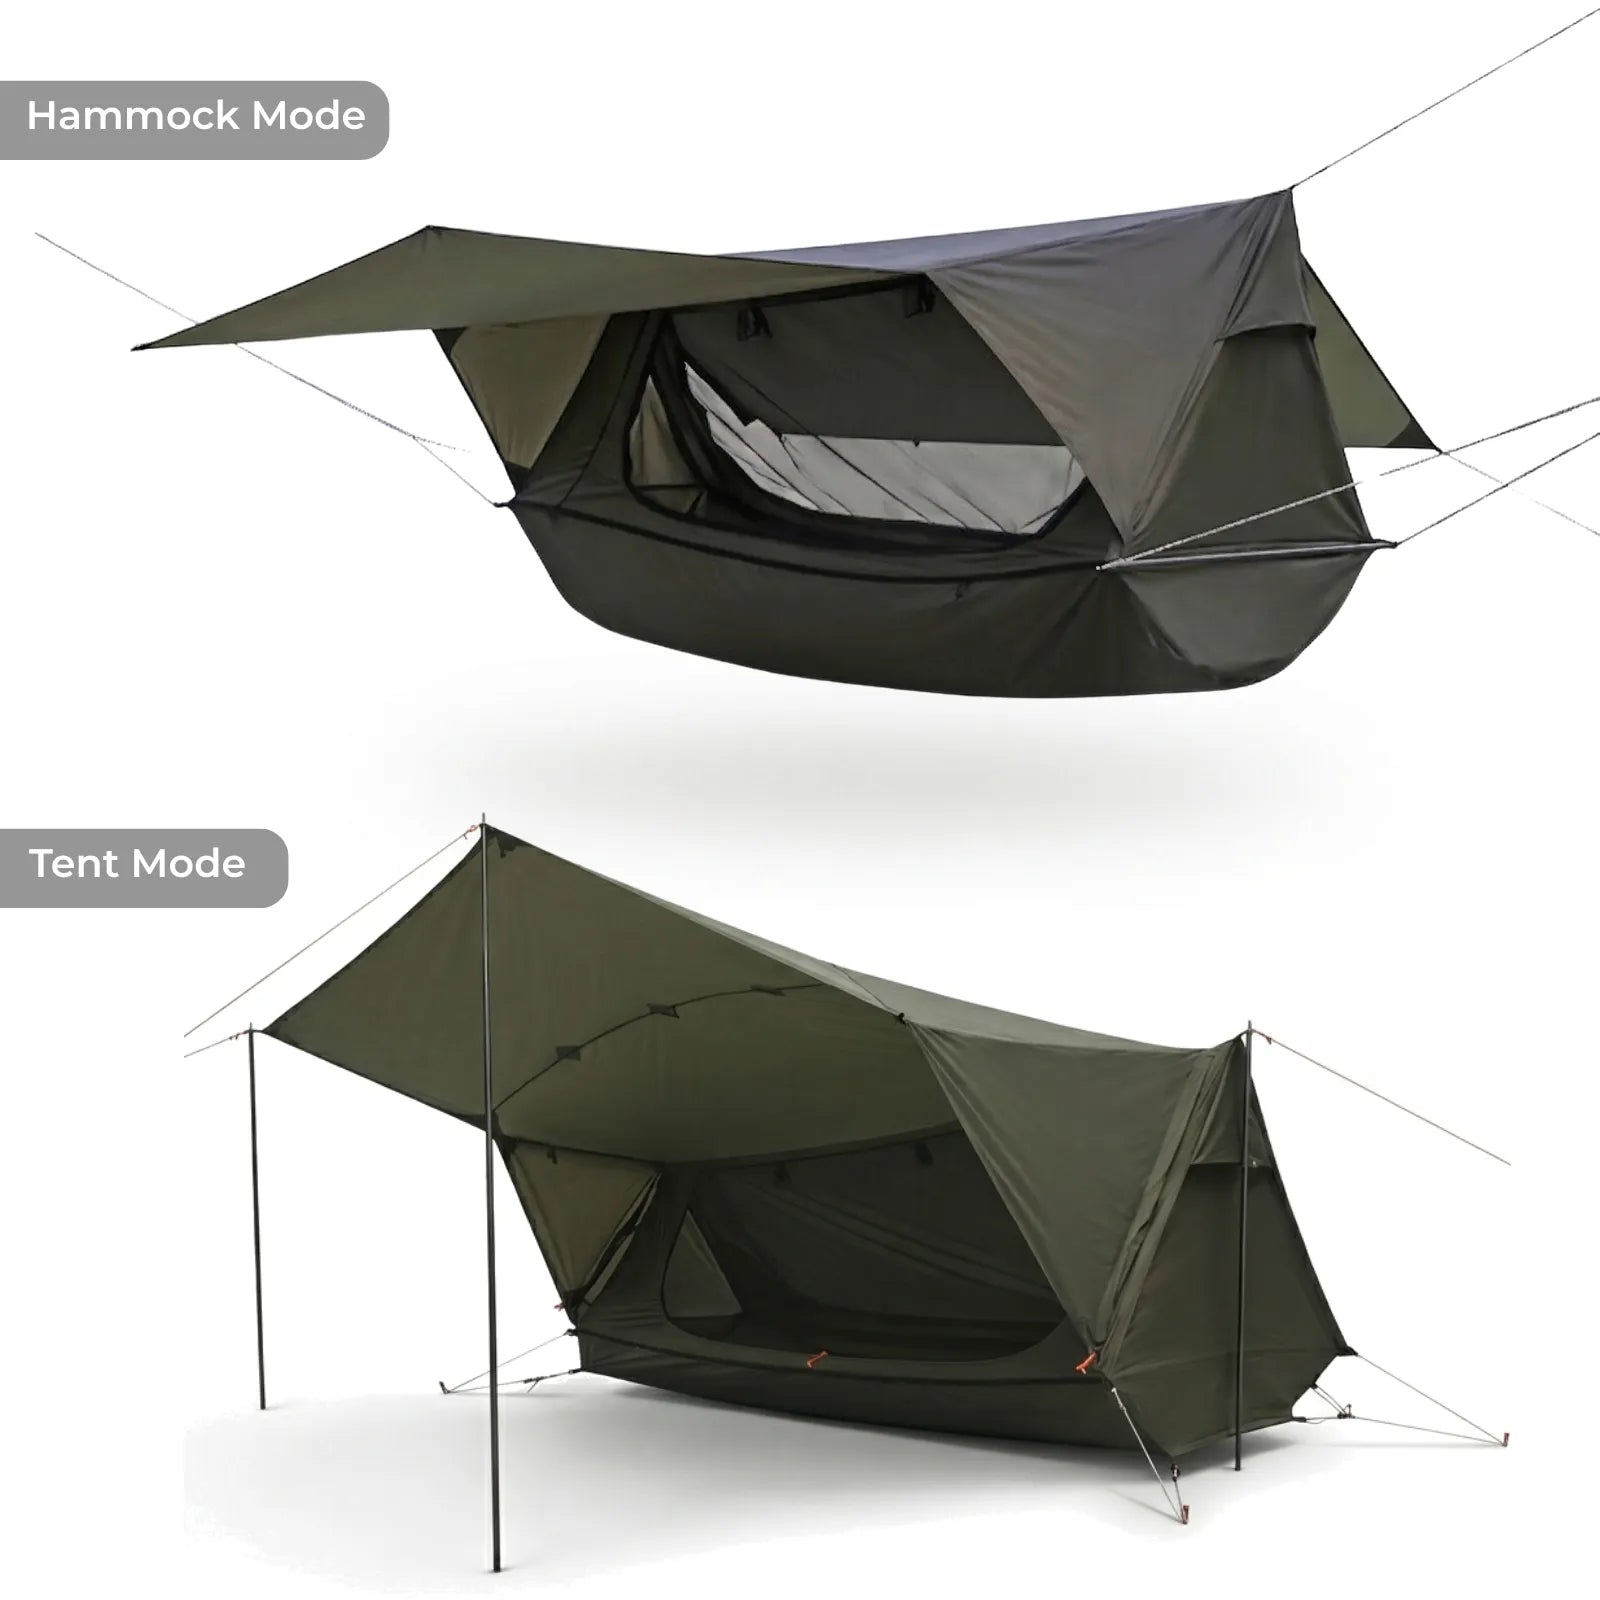
La mejor hamaca para clima frío: hamaca puente Onewind con línea de cumbrera integrada para un ajuste consistente del underquilt.
Escenario 4: Condiciones lluviosas
Veredicto: el tarp se convierte en tu prioridad número 1
Te queda bien si:
- ✓ Se pronostica lluvia (o es posible)
- ✓ Acampada prolongada en la que el clima puede cambiar
- ✓ Quieres mantenerte seco sin tener que refugiarte en un coche
Modificaciones del toldo específicas para la lluvia:
- Usa el tono bajo Coloque la lona justo por encima de la altura de la hamaca para obtener la máxima cobertura.
- Inclina el lado de barlovento más bajo para desviar la lluvia lateral
- Extiende las cuerdas tensoras más hacia afuera para crear una zona seca para el equipo debajo
- Comprueba que el agua escurra por los bordes de la lona y no se acumule en el centro.
Detalle crítico sobre la lluvia: Tu lona debe extenderse al menos 8-12 pulgadas más allá de cada extremo de la hamaca. A tarp hexagonal de 12 pies o toldo ultraligero de silnylon proporciona esta cobertura. En caso de lluvia intensa, considere una Toldo Zephyr con puertas de cobertura total.
Punta de línea de goteo: Donde tus vientos de lona se unen a la línea de cumbrera, el agua viaja por la cuerda hacia tu hamaca. Ata un corto «cordón de goteo» (15 cm de cordón) en el punto de unión: el agua lo seguirá hacia abajo en lugar de correr hacia tu hamaca.
Errores comunes de configuración (y cómo solucionarlos)
Error 1: Colgar demasiado apretado
¿Qué sucede?Tus hombros quedan apretados uno contra otro. La hamaca se siente como una camisa de fuerza. Te despiertas con los brazos entumecidos.
La solución: Añade más holgura. La suspensión debe colgar a 30°: usa el atajo de la longitud del brazo del paso 3. En caso de duda, más hundimiento siempre es más seguro que menos.
Error 2: Dormir boca arriba
¿Qué sucede?: Tu columna se curva en forma de "banana". Te duele la parte baja de la espalda. Concluyes que las hamacas son incómodas.
La solución: Tu hamaca no está rota, tu posición sí. Túmbate en diagonal a 30-45° (Paso 5). La diferencia es inmediata.
Error 3: Sin aislamiento inferior por debajo de 50 °F
Imagínate esto: son las 2 de la madrugada, estás tiritando y tu saco de dormir se siente como una hoja de papel debajo de ti.
Eso se debe a que el peso de tu cuerpo aplastó por completo el aislamiento.
¿Valor R en la parte inferior?
Básicamente, cero.
La respuesta es un aislante inferior.
No es una colchoneta (aunque las colchonetas funcionan por encima de 50 °F).
Un verdadero underquilt que cuelga debajo de la hamaca, se mantiene esponjoso y realmente atrapa el calor.
Error 4: Usar cuerda en lugar de correas
¿Qué sucede?: La cuerda se clava en la corteza del árbol (dañándolo), se estira de forma impredecible durante la noche (quedando más bajo) y está prohibida en muchos campamentos.
La solución: Correas para árboles, ancho mínimo de 1". Las correas más anchas distribuyen mejor la presión y cumplen con las normativas del camping.
Error 5: Omitir la práctica previa
Lo he visto repetirse docenas de veces en foros de camping.
Alguien compra el equipo, conduce tres horas hasta el campamento y trata de entender por primera vez las correas y los mosquetones a las 9 de la noche con una linterna frontal.
Cuarenta y cinco minutos después, están frustrados, sus parejas están esperando y, de todos modos, la instalación es incorrecta.
Una sesión en el patio trasero soluciona esto por completo. Cronométrate. Memoriza los 7 pasos hasta que queden grabados en la memoria muscular. Tu primera salida de verdad debería tomar 10-15 minutos, no 45.
Ponlo todo junto
El montaje de la hamaca es no es intuitivo.
Pero es completamente aprendible en una tarde en el patio trasero si sigues los 7 pasos en orden.
Ángulo de suspensión incorrecto, durmiendo recto, sin usar el cubrecolchón inferior.
Esos son los tres errores fatales de los principiantes, y cada uno tiene una solución específica en esta guía.
Resumen de tu secuencia de configuración
- Sitio: Dos árboles, separados entre sí 10-15 pies, de diámetro de más de 6"
- Correas: La altura de la cabecera, el extremo de los pies 6" más alto, 1"+ más ancho
- Ángulo: 30° — usa el atajo de la longitud del brazo
- Colgar: 18" de altura libre al suelo, supera la prueba de sentarse
- Diagonal: desplazamiento de 30-45°: la innovación en comodidad
- Toldo: 8-12" más allá de los extremos de la hamaca, línea de tensión perpendicular al viento
- Aislamiento: Coincidir con el árbol de decisión de temperatura
Tu próximo movimiento
Si recién estás empezando:
→ Hamaca de camping Onewind de 11 pies — el tamaño adecuado para descansar en diagonal
→ Correas para árboles — 1.5" de ancho, conforme a las normas del camping
→ Mosquitera individual — protección para primavera/verano
→ Tarp hexagonal de 12 pies — cobertura contra la lluvia con voladizo de 8-12"
→ Haz una prueba de práctica en el patio trasero este fin de semana
Si quieres ultraligero:
→ Hamaca ultraligera de 11 pies — tejido más ligero, mismo espacio
→ Toldo ultraligero de silnylon — protección ultraligera contra la lluvia
→ Underquilt de una sola capa — aislamiento para la temporada cálida
Si necesita capacidad para clima frío:
→ Colcha inferior 600 g — adapta la clasificación a tu temperatura mínima nocturna esperada
→ Edredón de plumón de 800 g — combinado con un aislante inferior para temperaturas bajo cero
→ Hamaca de puente — línea de cresta integrada para un ajuste uniforme del cubrecolchón
→ Protector de aislante inferior — protege el aislamiento del viento y la humedad
Si todavía estás decidiendo entre una hamaca y una tienda de campaña:
→ Lea nuestro comparación completa entre hamaca y tienda de campaña para principiantes primero

The perfect starter kit mentioned in this guide — hammock + tarp in one bundle.
Shop Now →